PERFECT BLANKET CHEST
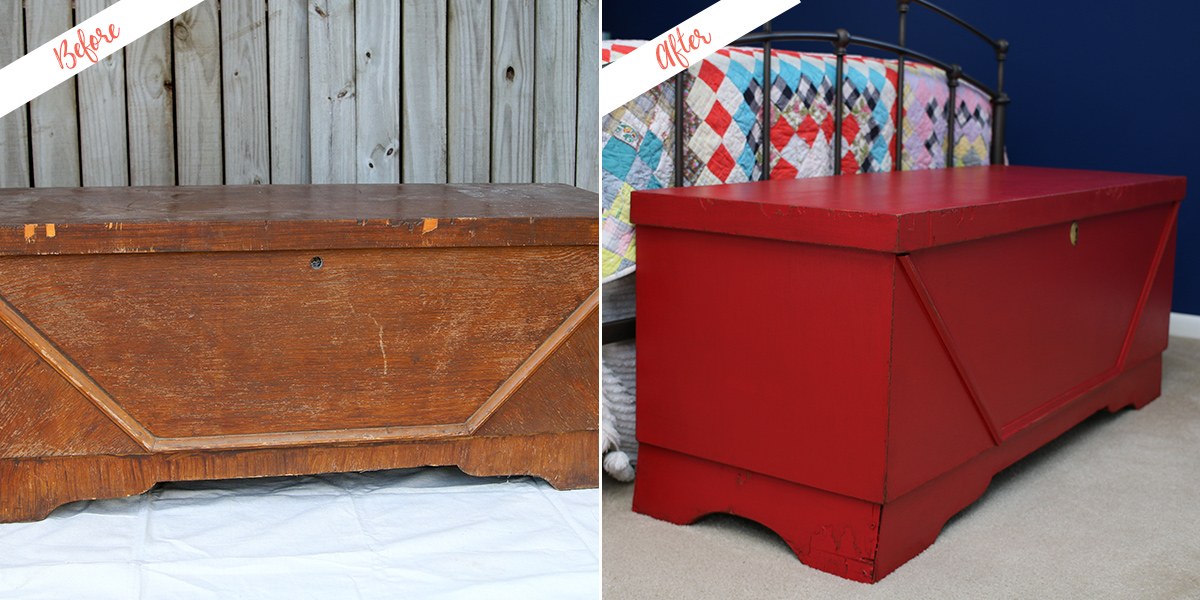
I bought a vintage Lane cedar chest at my favorite junk shop for $35. The cedar chest was in pretty rough condition. The veneer was pulled off in places and the lock was missing. I decided to paint the chest and distress the areas where the veneer was chipped or missing.
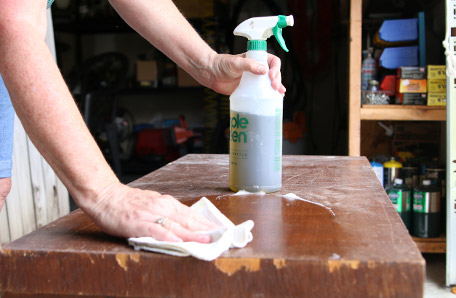 The first step in any paint project is prepping the furniture. I cleaned the cedar chest with a soft rag and some all-purpose cleaner. Now is the time to make repairs if needed. The lid hinges on the chest were missing and the key lock was gone too. I found replacements for both but decided to wait and replace them after the painting was completed. Just wait till you see the finished project!
I SELECTED A BEAUTIFUL RED CALLED “NO MORE DRAMA”
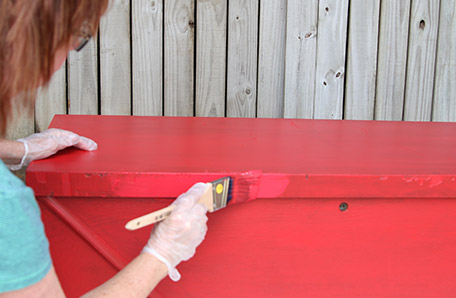
I decorate with pops of red anytime I get the chance. I get the love of red from my Mom. The nice paint specialist at Home Depot mixed a quart of BEHR PREMIUM PLUS ULTRA® Interior Eggshell Enamel for me.
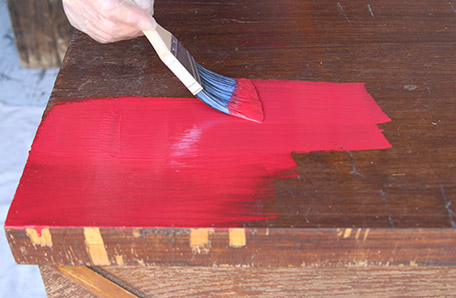
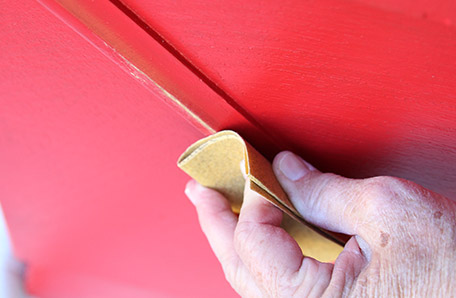
After the prep is done, painting is the easy part. I brushed on one coat of paint and it covered so well I really thought about not applying another coat. The first coat of paint dried in under an hour and I applied a second coat. I let the paint dry overnight then started distressing the chest. I used 120 grit sandpaper and distressed by hand. I find that folding the sandpaper several times makes it easier to work with.
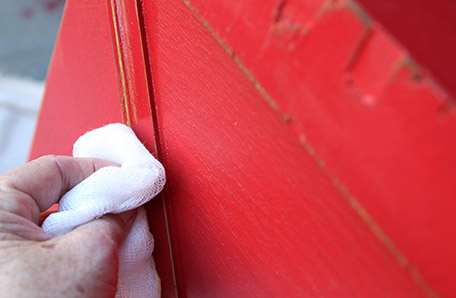
All the missing veneer and rough areas made this project perfect for distressing. Areas that can’t be fixed should be showcased in some way. I personally think distressing paint adds depth and texture. To darken and protect the distressed wood, I apply wax. Any neutral colored wax would work. I used a lint free rag/gauze to apply the wax.
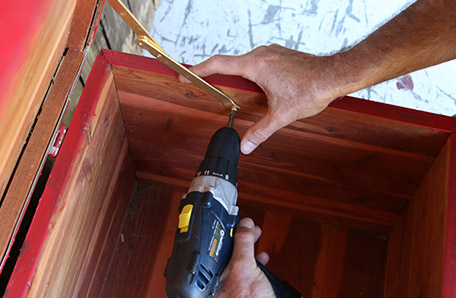
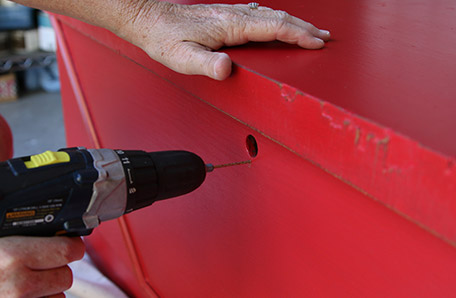
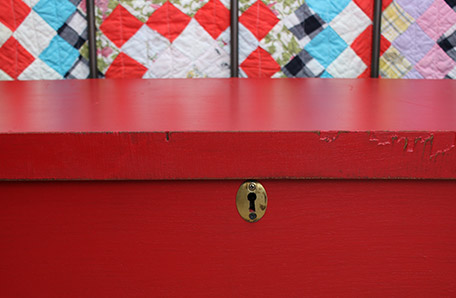
The blanket chest is looking great with that coat of “No More Drama” and the bit of distressing for added character. But it still has that big old hole where the lock is missing. I collect vintage hardware and I found the perfect piece to cover the hole. I know everyone doesn’t have a collection of junk/treasures but Home Depot is a good place to look for a bit of fun hardware. I first drilled holes for the screws then used a screwdriver to add the vintage hardware. It isn’t a functioning lock but doesn’t the chest look so much better with that added detail!
All the missing veneer and rough areas made this project perfect for distressing. Areas that can’t be fixed should be showcased in some way. I personally think distressing paint adds depth and texture. To darken and protect the distressed wood, I apply wax. Any neutral colored wax would work. I used a lint free rag/gauze to apply the wax.
The blanket chest is looking great with that coat of “No More Drama” and the bit of distressing for added character. But it still has that big old hole where the lock is missing. I collect vintage hardware and I found the perfect piece to cover the hole. I know everyone doesn’t have a collection of junk/treasures, but Home Depot is a good place to look for a bit of fun hardware. I first drilled holes for the screws then used a screwdriver to add the vintage hardware. It isn’t a functioning lock, but the chest looks so much better with that added detail!
I brushed on one coat of the paint and it covered so well I really thought about not applying another coat.
TIME TO ADD SOME PIZZAZZ
The hinges to hold the chest lid up were also missing. I found replacement hinges at Home Depot...left and right...glad I noticed that and didn’t grab two rights or two lefts. I used the same screw holes as the original hinges for the replacement hinges. At this point the hubby wanted to get involved. You know how guys are about power tools.
If the first coat is streaky. Do not fret!
The magic happens when you apply the second coat. The texture of this paint is exactly what you’d think... chalky and extremely matte.
THE BIG REVEAL

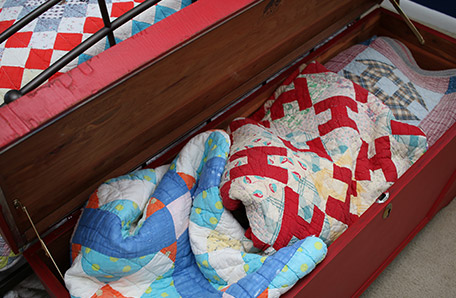
How pretty is that little junk shop blanket chest now. The “No More Drama” red is the perfect color for our guest bedroom. The distressed paint and the added hardware detail adds depth and character. The quilts have a nice new home and are easy to grab out of the chest. I’m so happy with my better-than-new blanket chest. I smile every time I glance in the bedroom and see the chest.
READY TO DIY?
Find your color, pick your paint, and be inspired.
When you're ready, buy your paint online.
- Explore colors on your own or browse through our curated collections.
- Click on "Buy" then customize your options.
- Checkout at homedepot.com