I was in search of something to help keep my bedroom organized. A small bedside table wasn’t going to do the trick. I needed more storage than that. I also needed something tall and narrow to fit the space. As I started searching for ideas, I came across an option using wooden crates. Not a bad idea! With a little creativity and some stain, I could make just what I needed!
Behr’s Featured Colors
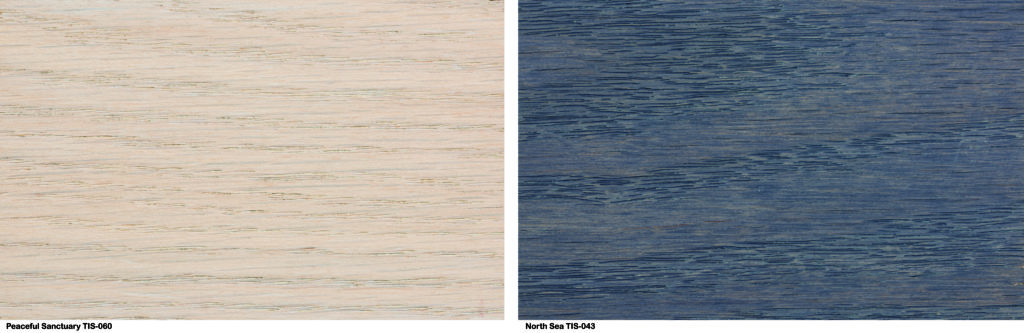
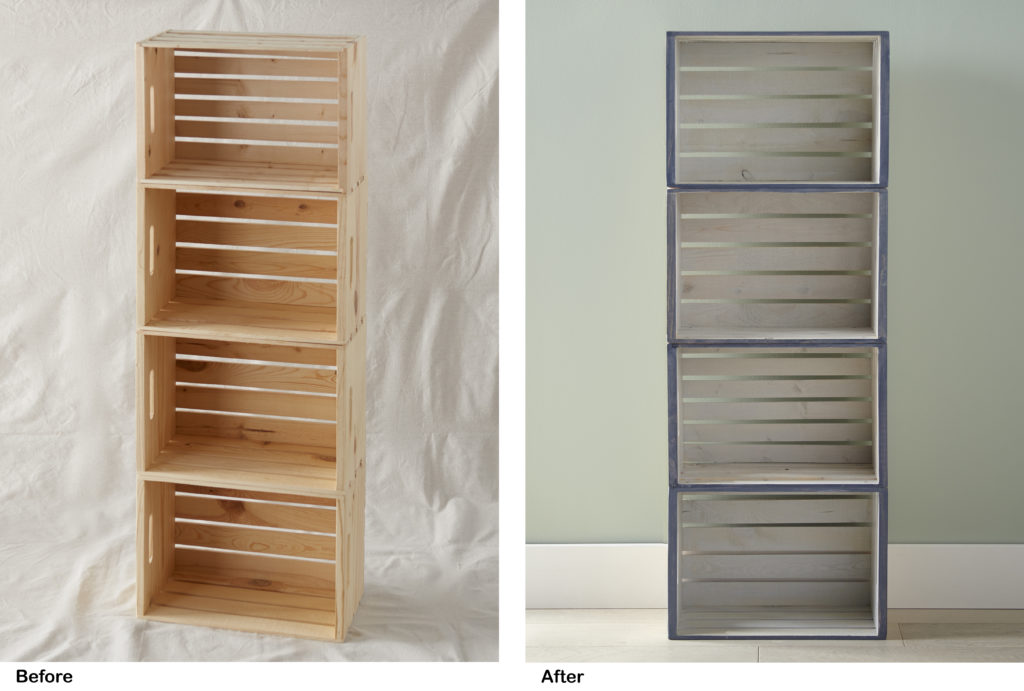
Stain Colors – Overall: Peaceful Sanctuary TIS-060,Trim: North Sea TIS-043
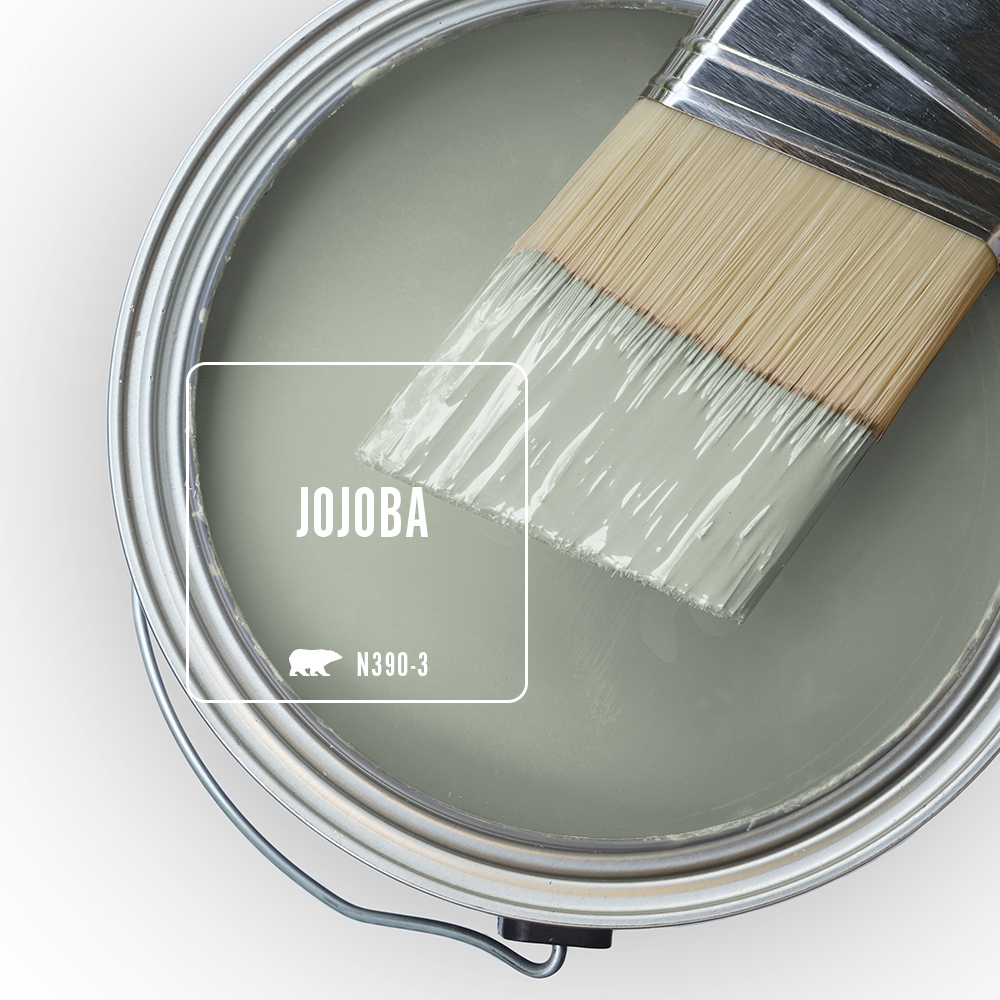
Paint Color – Wall: Jojoba N390-3
Materials:
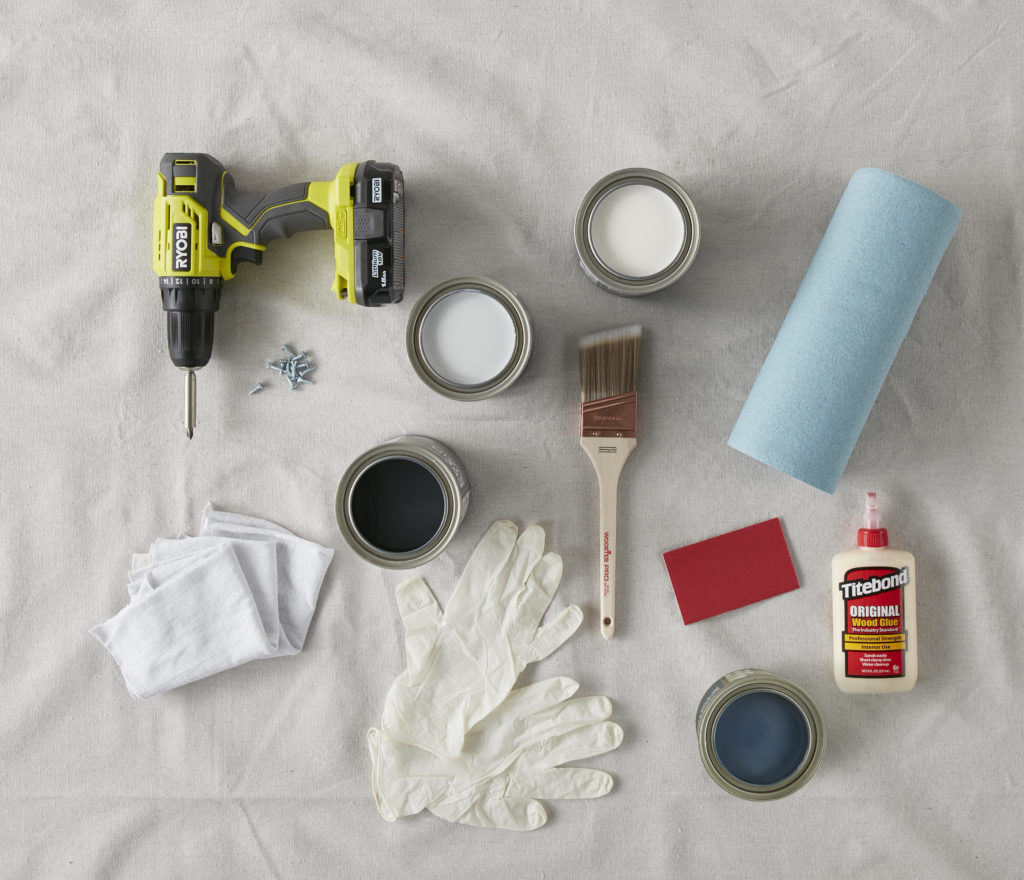
- Pre-Stain: BEHR® Water-Based Pre Stain Wood Conditioner
- Stain: BEHR® Fast-Drying Water-Based Wood Stain
- Crate: Peaceful Sanctuary TIS-060
- Front Edge: North Sea TIS-043
- Top Coat Poly: BEHR® Fast-Drying Water-Based Polyurethane
- Wooden Crates, 4 for this project
- Paint Brush, suggest nylon 2” brush
- Sand Paper, use a fine grit so that you don’t scratch the wood
- Gloves
- Cotton Rags
- Shop Towels
- Drop Cloth
- Optional: Wood Glue, Hardware/Tools for assembling to keep the crates secured when stacked.
Tip: When staining, make sure you are in a well-ventilated space. Outside is always best, but if you are in your garage, be sure to work closely by an open door. Make sure to stir thoroughly before using each product (do not shake).
Step 1
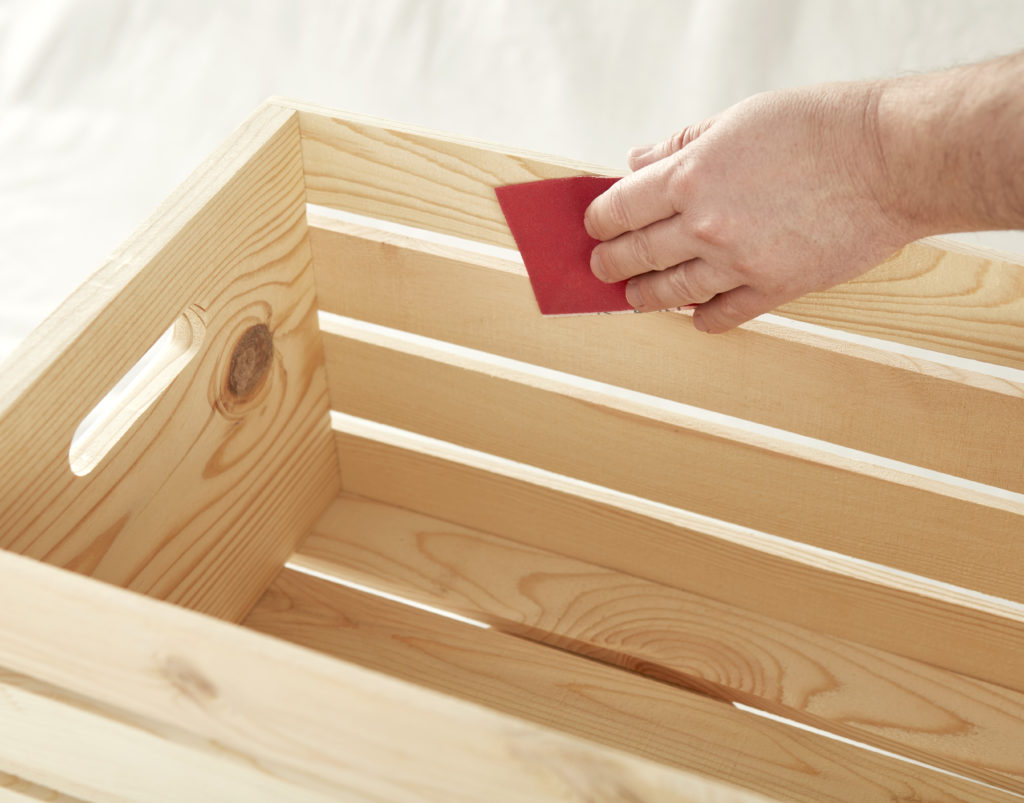
Scuff Sand
If using new wooden crates, you will want to lightly sand. For older crates, you will need to remove nails and fill in holes with wood filler. Sand out any rough areas so that you have an even surface to start with. Wipe away sand dust with a cloth or rag.
Step 2

Apply Pre-Stain Wood Conditioner
Use a nylon brush and apply wood conditioner liberally on the entire piece. Let sit for 5-10 minutes then wipe off any noticeable excess with a clean cloth. Let dry for at least 20 minutes.
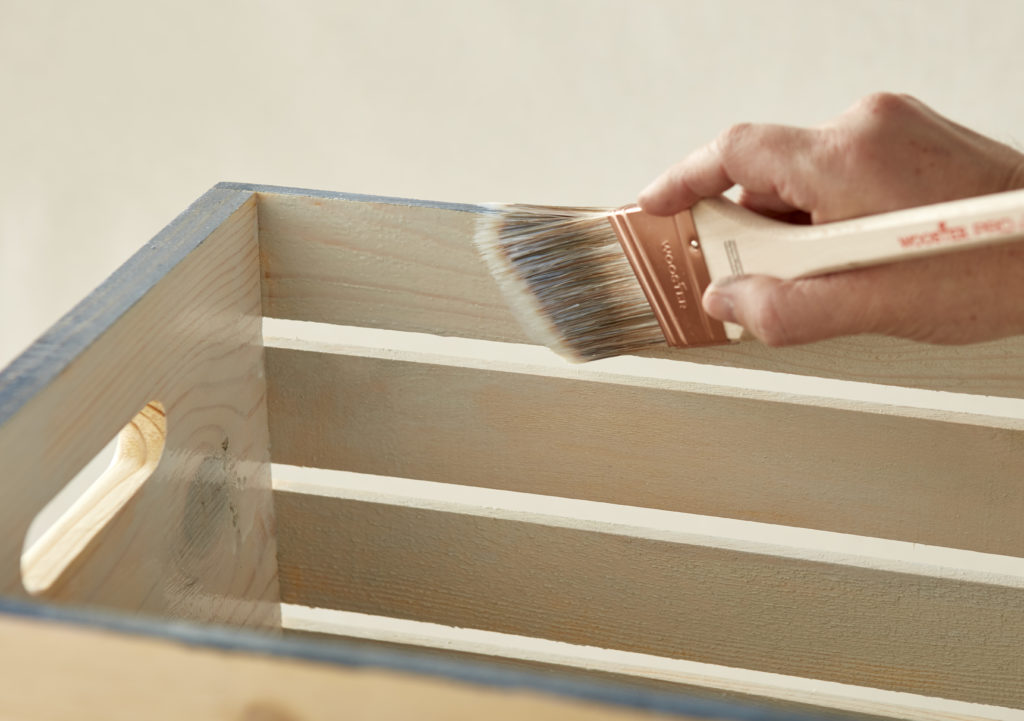
Step 3

Apply Wood Stain
Once the pre-stain wood conditioner has dried, using a nylon brush, going in the direction of the grain, apply the wood stain. Allow stain to penetrate into the wood for 5-10 minutes. Then, with a dry cloth, remove any stain that has not absorbed. When wiping, be sure to go with the grain. You will want to blend light and dark areas to achieve a uniform color. If you want the stain darker, repeat the step until you achieve the color you want. Allow to dry.
Step 4
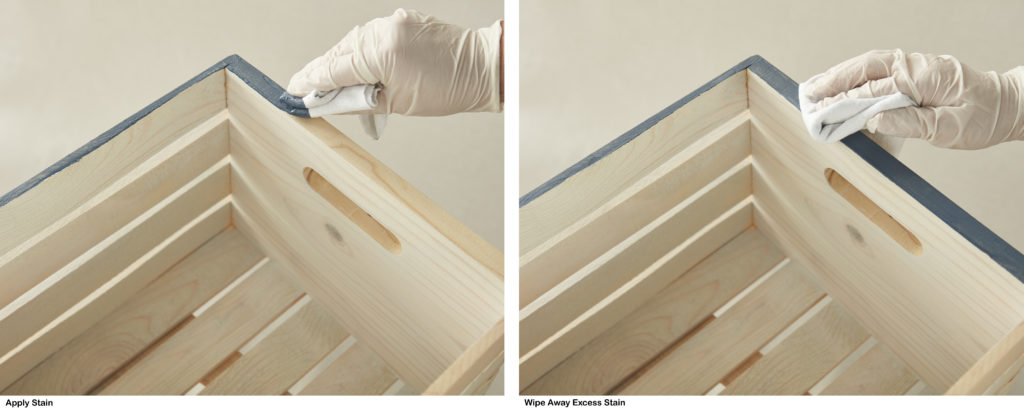
Stain Front Edge
Use a cloth rag or very thin brush to apply stain to the edges. Be sure to drag in the direction of the wood grain. Allow stain to penetrate into the wood for 5-10 minutes. Then, with a clean dry cloth, remove any stain that has not absorbed. When wiping, be sure to go with the grain. You will want to blend light and dark areas to achieve a uniform color. If you want the stain darker, repeat the step until you achieve the color you want. Allow to dry.
Step 5
Apply Protective Top Coat
Use a nylon brush and apply a thin even coat of polyurethane. Be sure to maintain a wet edge to avoid lap marks. Always move brush in the direction of the wood grain. Allow to dry overnight.
Assemble Crates and Decorate
You can stack them tall, place side by side forming a row, make a square… any form you prefer. To secure crates, use wood glue and nails to keep from moving.
We stacked them tall, decorated with books, plants and knickknacks. For the final touch, we paired with the paint color Jojoba on the walls to give the room a complete updated feel.
Here are some helpful tips to keep in mind before starting your stain project:
- If you can’t stain outside, make sure to work in a well-ventilated area.
- Stir product before and during. DO NOT SHAKE.
- Apply product with the wood grain.
- After applying product, wait 5-10 minutes, then go back and remove any excess product that has not penetrated into the wood.
- Make sure to let your stain dry completely between steps.
- Let everything dry overnight before assembling.
Behr® Interior Wood Stain Products are currently only available in select stores. Find out if it’s available in a Home Depot Store near you. Find a Store. Not available at your local store, order online at TheHomeDepot.com.
For more inspiration on Interior Stain Projects, visit Behr.com.
Colorfully Yours,
Larayne