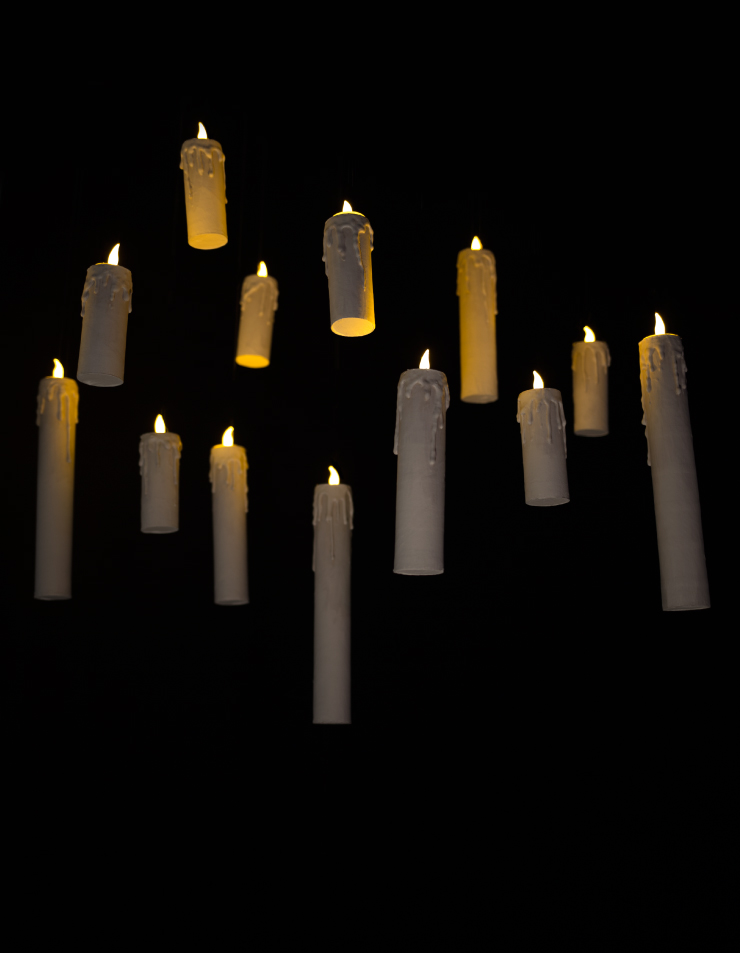
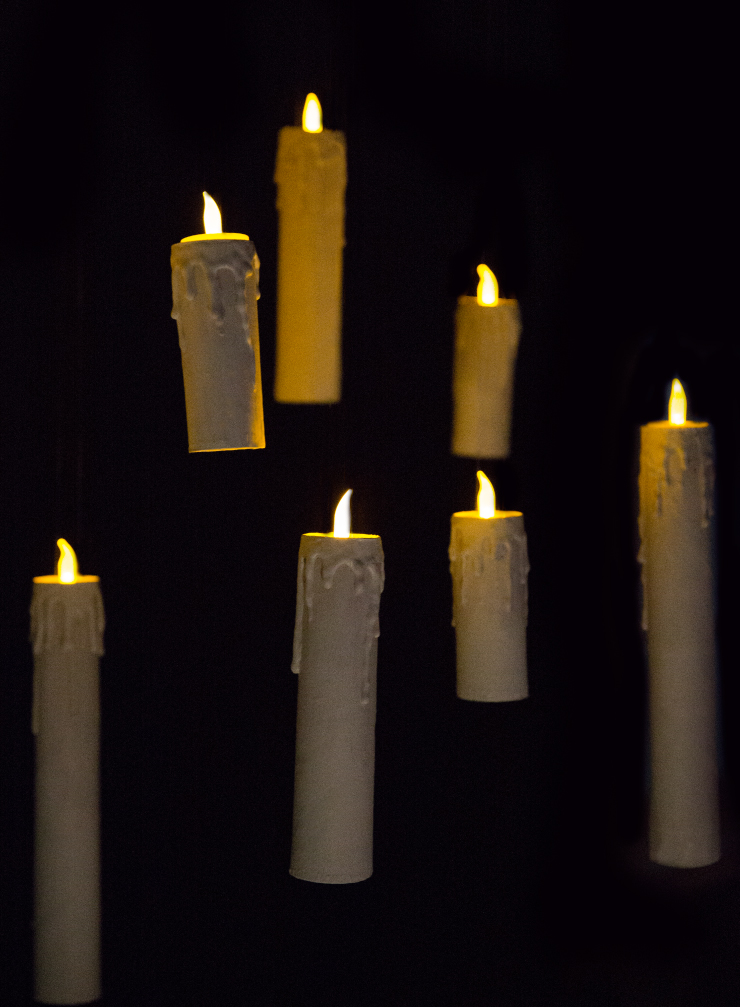
Add a little magic to your holiday this year with these easy to make floating flameless candles.
To complete this project you will need the following tools and materials:
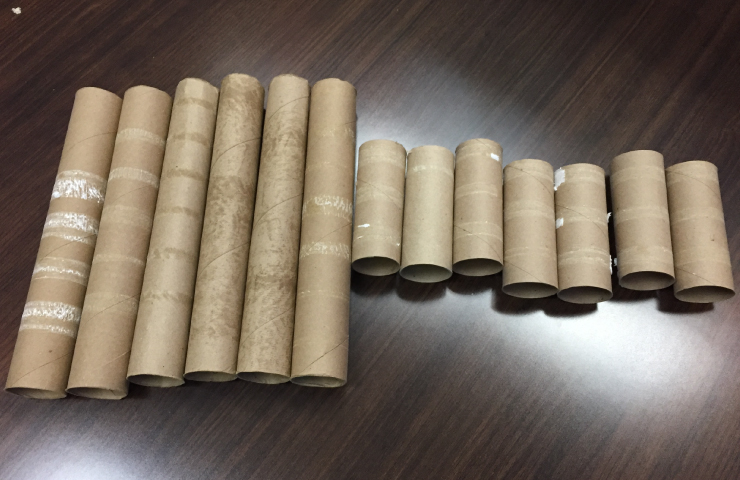
Paper towel and/or toilet paper rolls.
Paint, I used (ULTRA PURE WHITE and Arrowhead N320-6)
Craft glue
2 small/detail paint brushes
Tissue paper
Water
Glue gun
Glue sticks
Scissors
Fishing line or transparent thread
Needle
Flameless candles (1 per roll)
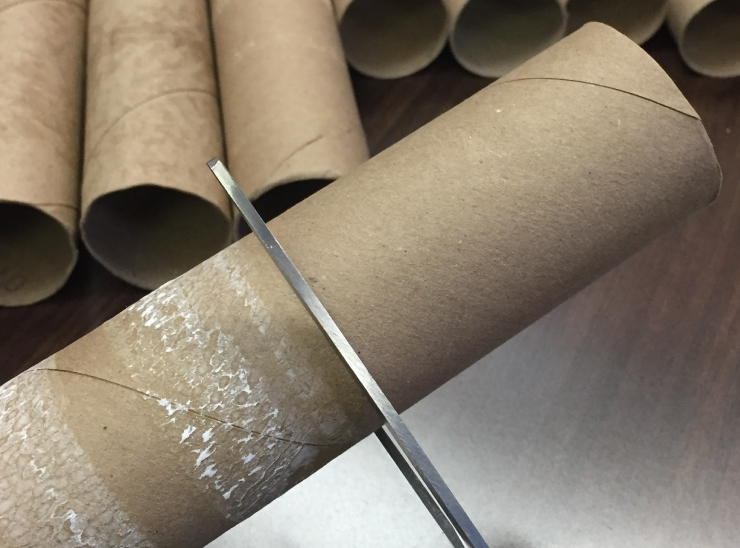
Step 1: Cut your rolls to size (optional)
If you want to make a variety of candle sizes, you can cut your rolls to different lengths.
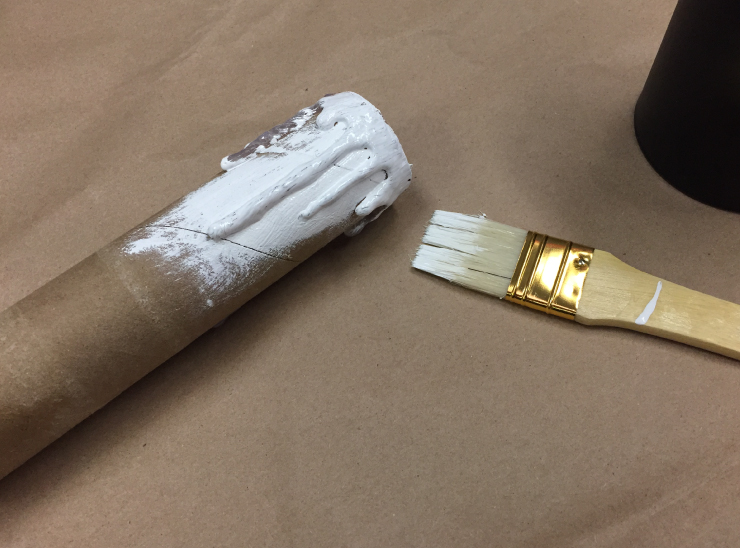
Step 2: Create dripping wax look
Working in a well ventilated area, flip your glue gun to high and start dripping the hot glue down the roll. Be sure to add some creative variation to the drips. If your glue is hot enough it will drip down the side naturally. Please be careful not to burn your self as you do so. Place your rolls upright and allow the glue to cool completely before moving on to the next step.

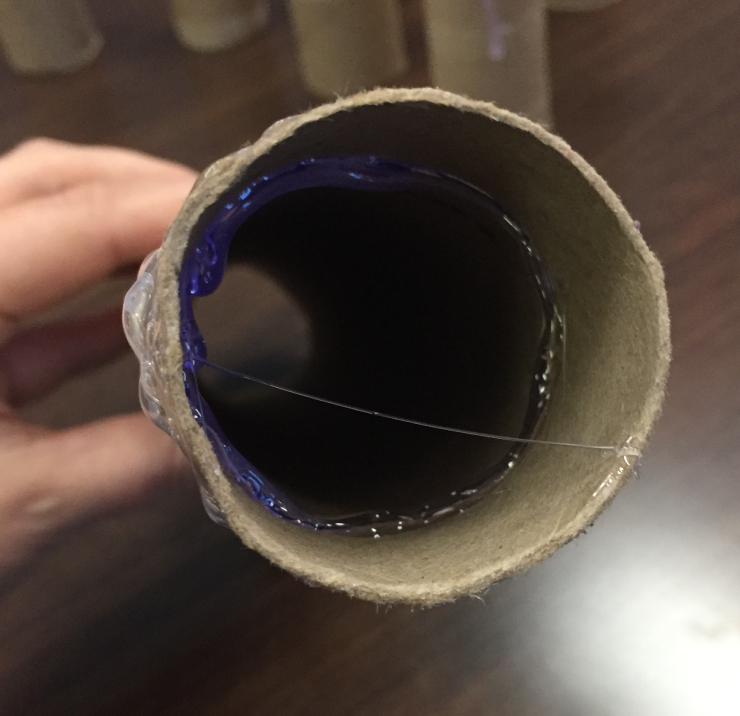
Step 3: Create a ledge for your light
Switch your glue gun back to low. When the glue drips have cooled, create a ledge for your light to rest on within the roll. Most lights are about 1/2″ in height, so I made a ring of glue about about 3/4″ down the roll’s interior.
Step 4: Add bottom to candles (optional)
If you like, you can add bottoms to your candles. If you prefer not to, skip to step 5.
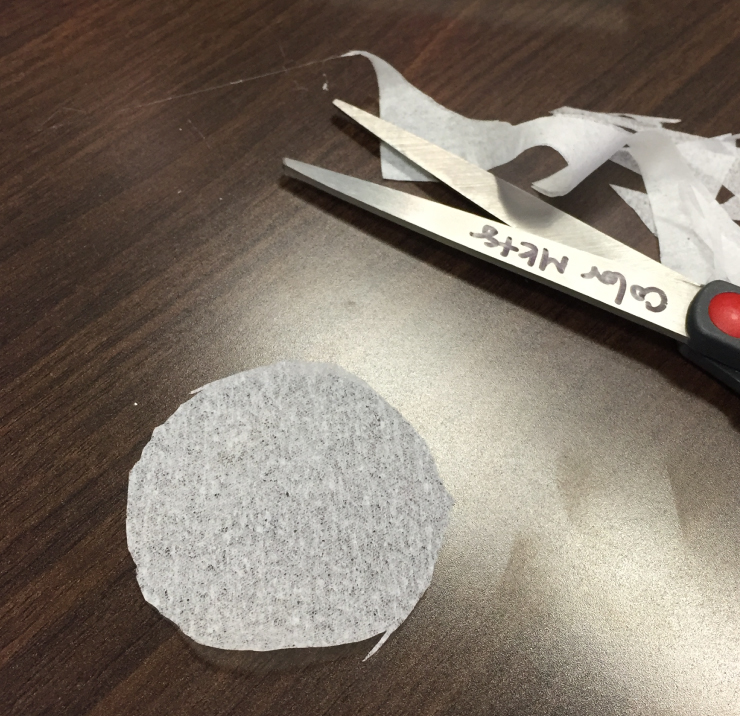
With your scissors cut a piece of tissue paper large enough to cover the bottom of the candle.
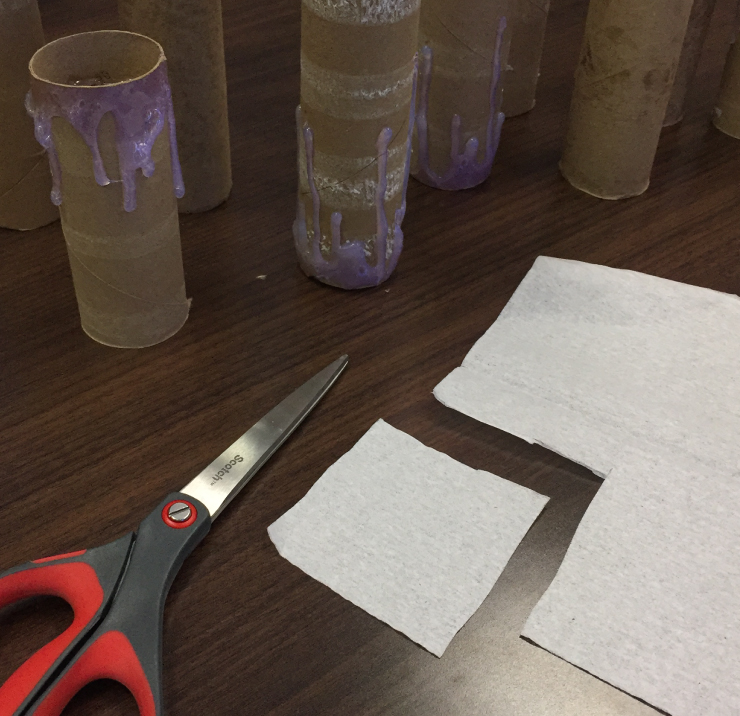
Cut the piece into a circle that will just cover the bottom opening of the rolls.
Brush some craft glue on the bottom of the roll and place the tissue over the opening.
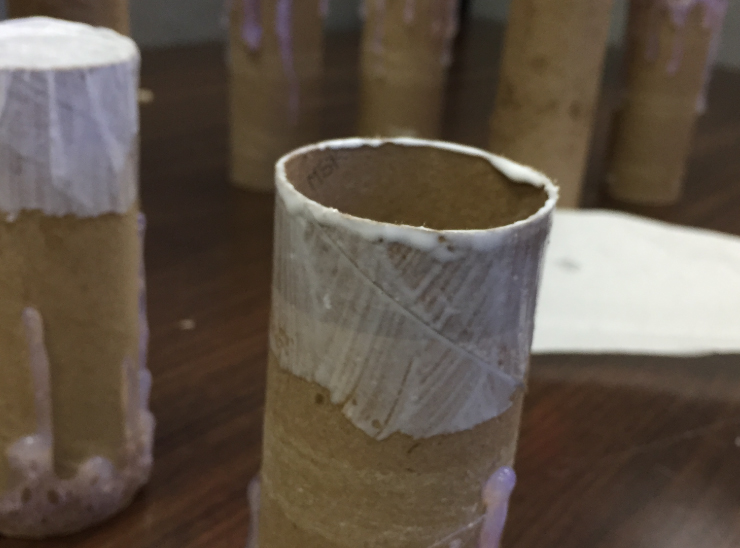
Gently brush the tissue down the sides to adhere. Cover the tissue with a thin layer of craft glue to seal it. Allow the glue to dry completely before moving on to the next step.
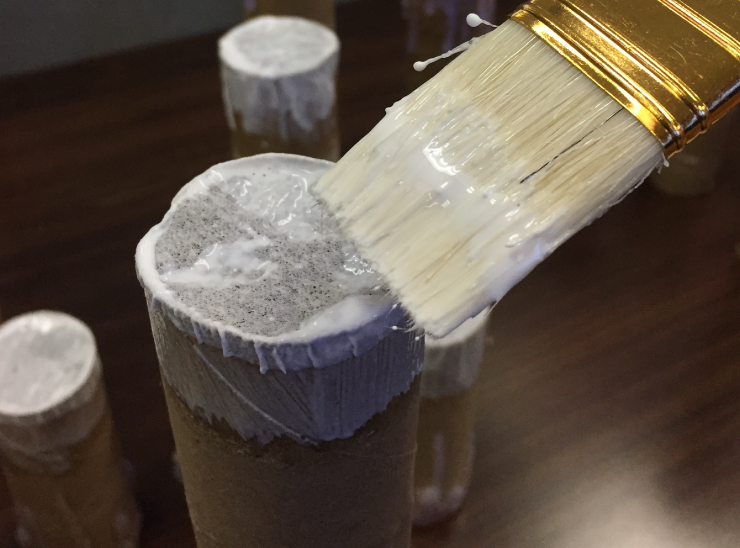
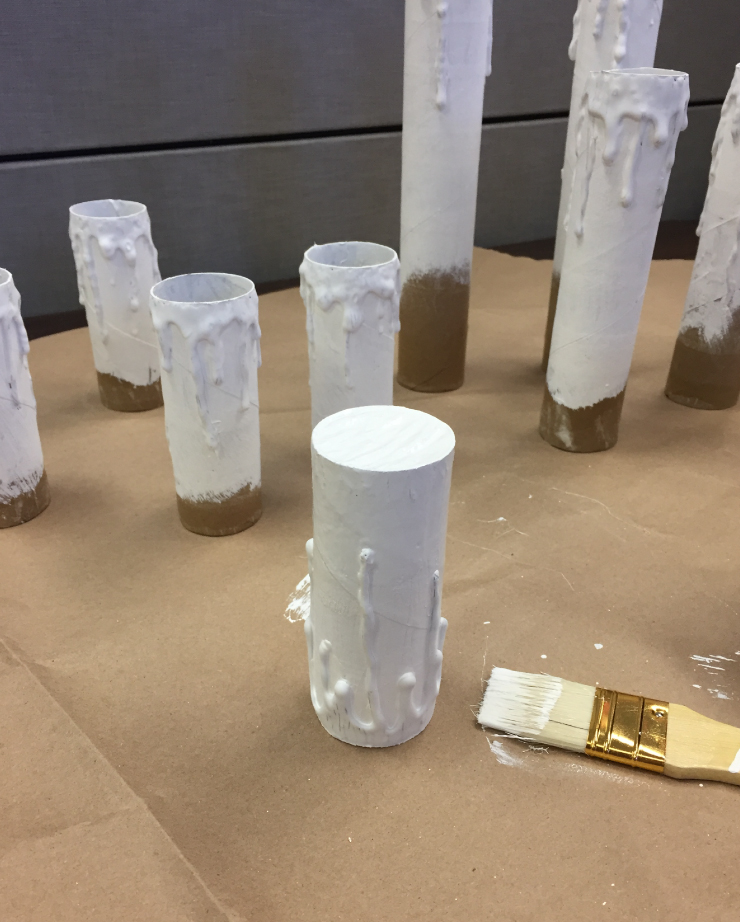
Step 5: Paint your candles
I selected white, but you could paint them any color you wish. I painted the tops first, and let them dry before painting the bottoms. Apply a second coat of paint if desired.

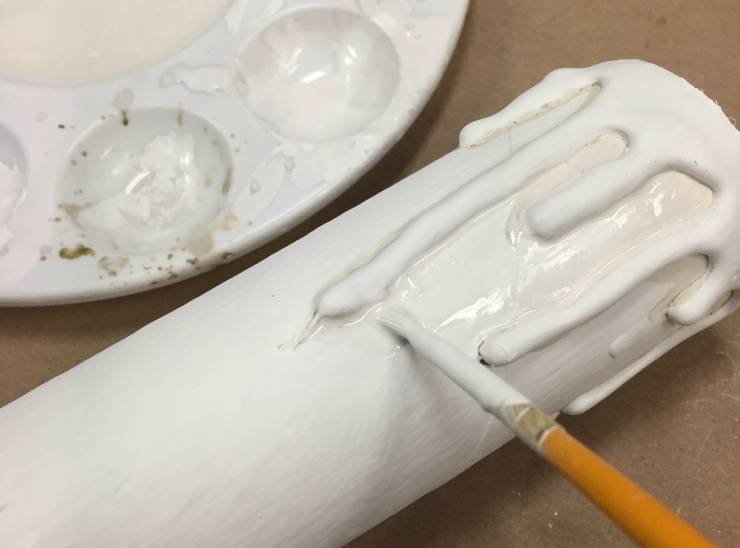
Step 6: Add some detail (optional)
If you’d like to add a bit of dimension to your candles you can do so with a darker color. Take a drop of a gray or brown color and water it down. Trace around the edges of your drips with your detail brush.

Don’t worry if you make a mistake. Simply water down a bit of your candle color and paint over it. Allow candles to dry completely before moving onto the next step.
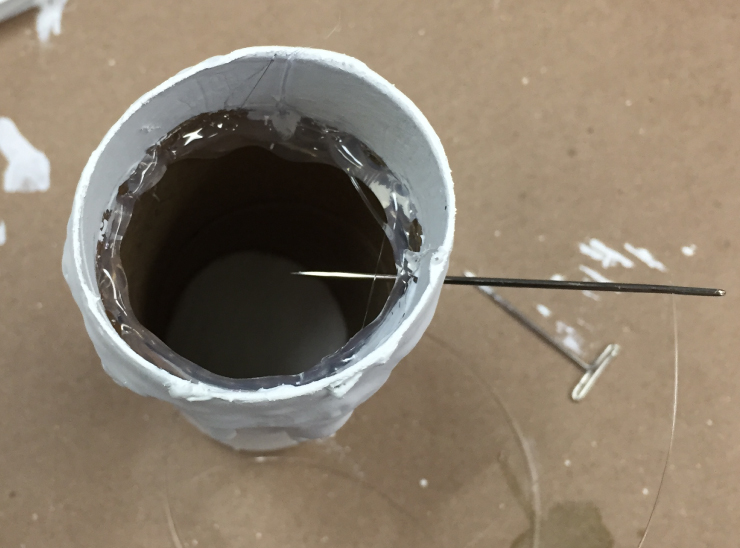
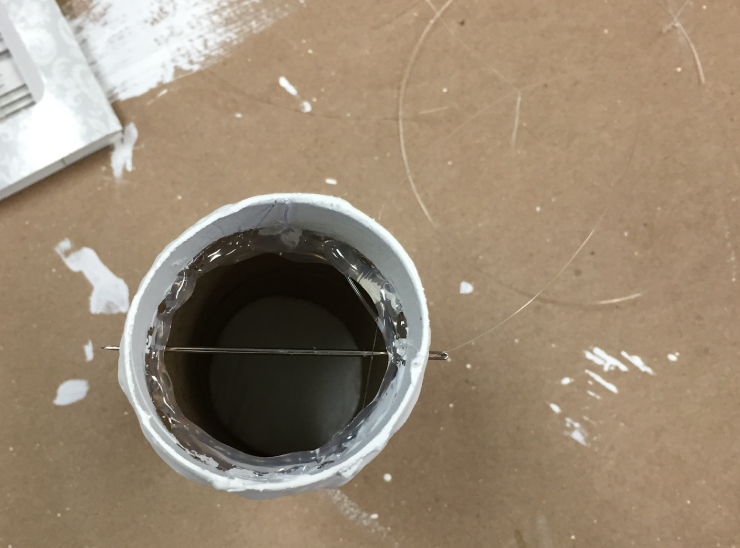
Step 7: Thread candles
Measure and cut your desired lenghts of transparent thread. Thread a needle with one length, keeping the ends untied. Poke a hole into one side of your candle and push the needle through to the other side. Try to keep the needle level as you do. Pull the needle and one end of the thread through.
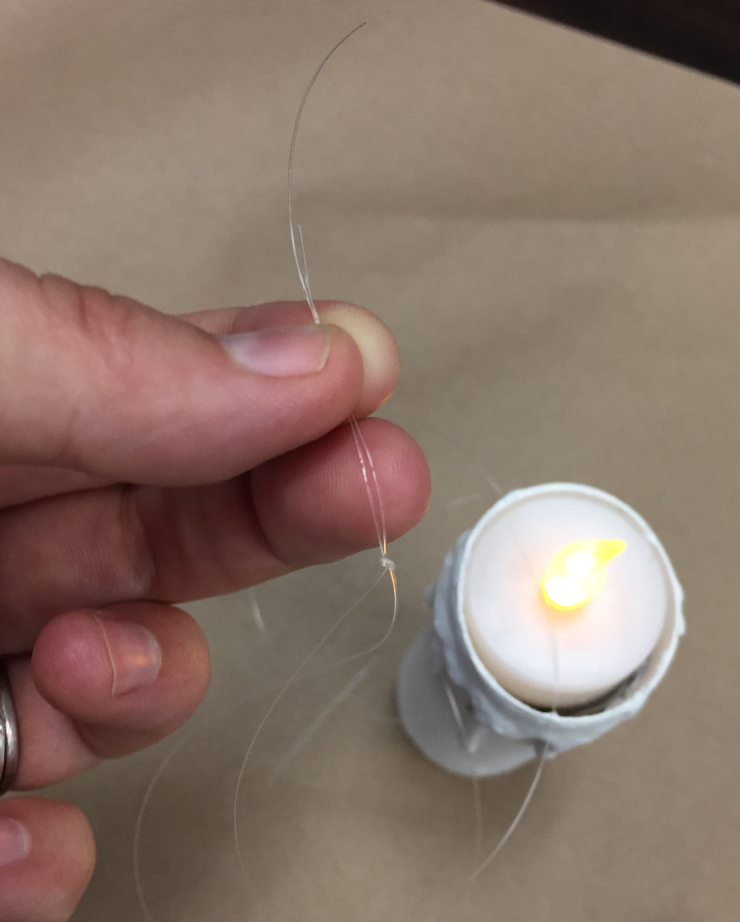
Step 8: Hang candles
Tie an overhand knot at the end of your thread. Pop in your lights and hang where desired. Low light areas will hide the transparent thread making them appear as if floating!
For more holiday project ideas, check out our Holiday Collection.
Colorfully yours,
Quinn
DIY Projects
Halloween How-To: Floating Flameless Candles
TIME
BUDGET
COMPLEXITY