BATHROOM SHELF
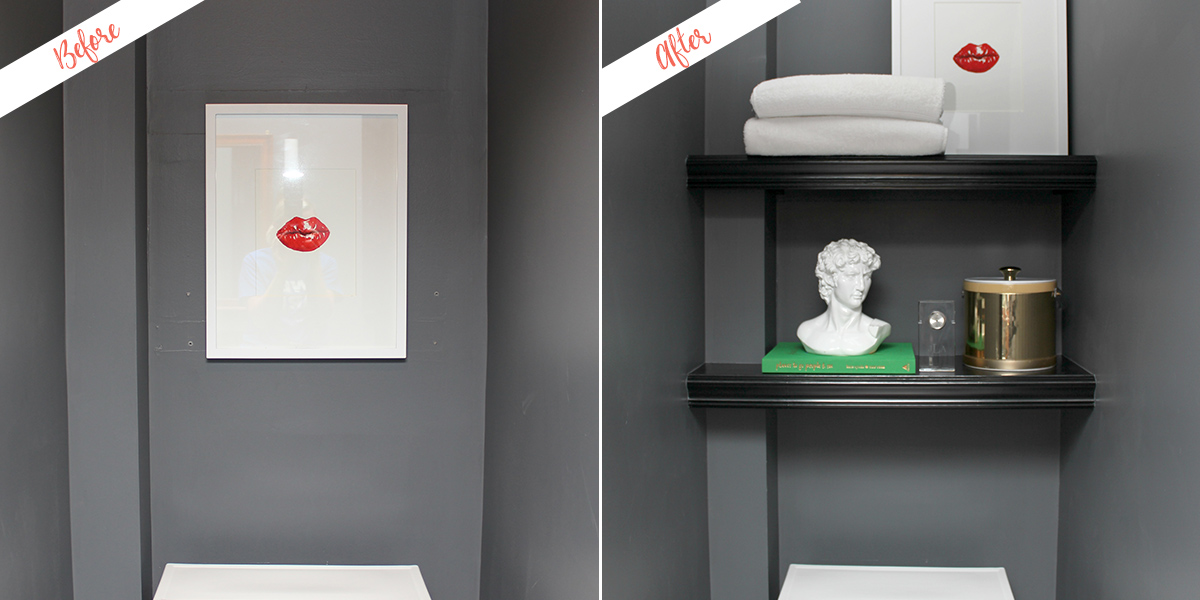
Need extra storage in your bathroom? Make these built-in shelves in a weekend for around $50
While looking around my master bathroom and wondering where I could gain more storage, I noticed the empty space above the toilet. I decided this little area would be the perfect candidate for some built-in shelving just above the toilet.
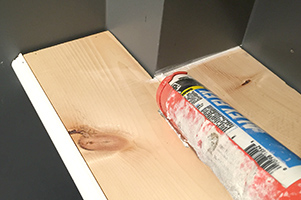
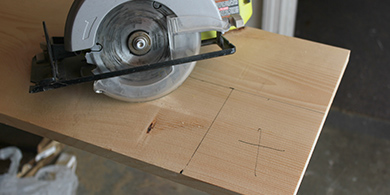 Step 1: To start with, you will want to cut the 1" x 12" common boards down to the desired length for your shelves. Measure from wall to wall above your toilet to find this measurement. You can cut the boards yourself with a miter or circular saw or have your local home improvement store cut the boards when you purchase them.
Step 2: Next, cut four 1" x 2" pieces down to the depth of your shelves. This should be about 11 ¼" (1" x 12" common boards are actually just under 12" in depth, thus the 11 ¼".) Once more, you can do this yourself or you can have your local home improvement store do this for you when you purchase them.
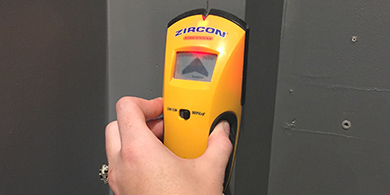 Step 3: Using a stud finder, locate the studs along the walls on either side of the toilet and mark them. You’ll only need to come out the 11 ¼” from the corner of the walls as that is only how deep the shelves will be. Mark where the studs are on the wall with a pencil.
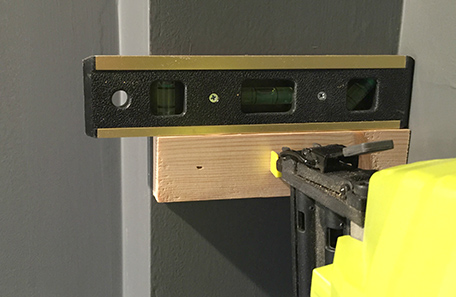
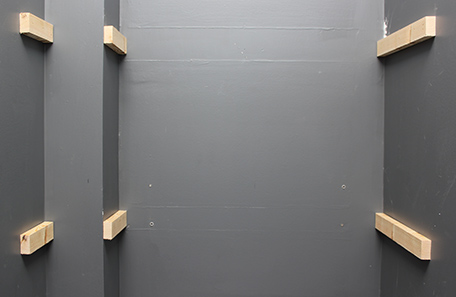
Step 4: Attach the 1” x 2” wood strips that are cut to the depth of your shelves on each wall beside the toilet to the studs. Use a small level on top of the wood strip while attaching it to the wall to ensure levelness. I attached the strips for my bottom shelf at 47” up from the floor and the strips for my top shelf at 64” up from the floor. You can change these measurements to your desired height. Ensure you are attaching the strips the same distance up on each wall so your shelf is level. If you have the bump-out like I do on one wall, simply cut two of your 1” x 2” strips down to the depth of the bump-out as shown above. The remaining portion of the 1” x 2” strips you cut should go on the other side of the bump-out as shown above.
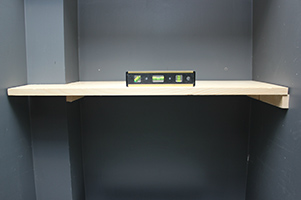
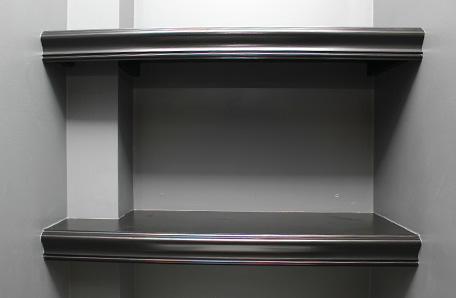
Step 5: Lay each of your shelves on top of the 1” x 2” strips and check for levelness. If the shelves are level, attach the shelves from the top using a nail gun or a hammer and finish nails into the 1” x 2” strips below. If your shelves are not level, you will need to remove the 1” x 2” strips and make them level before nailing down the shelves.
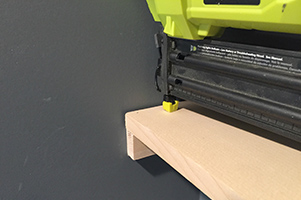
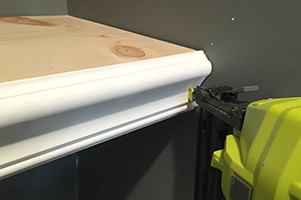
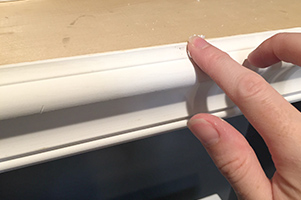
Step 6: Using a nail gun or hammer and finish nails, attach the chair rail trim pieces you cut to the width of your shelves to the front of the 1” x 12” shelves and 1” x 2” strips on the sides.
Step 7: Caulk any gaps you have between the walls and shelves. Use your finger to smooth the caulk. Fill any nail holes on the front molding with wood putty or spackling. Rub the spackling into the hole and rub your finger over it until the area is smooth. Touch up any wall paint as needed.
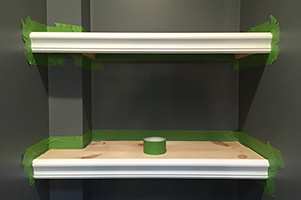
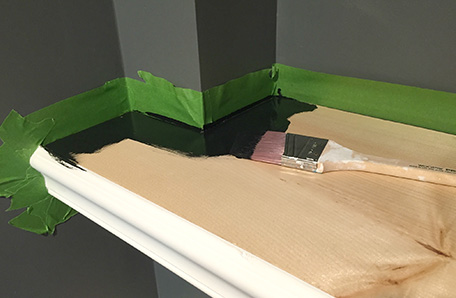 Step 8: Wait at least one day, then tape-off the walls around the shelves. Gather your painting materials and begin painting the shelves your desired color. Cut in along the edges with your paint first and brush it on the front molding. Then, roll the paint onto the rest of the shelves. Remove the tape immediately after you have painted your last coat of paint.
THE BIG REVEAL
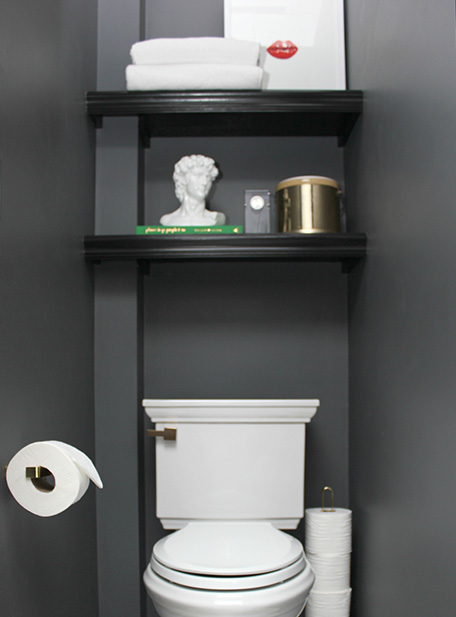
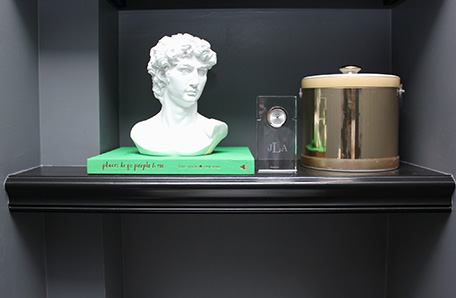
Painting the shelves black gave them a more modern feel, which is what we were going for in this space.
With these shelves, you can easily change the overall style of them just with the color. Painting them white, beige or a light gray would give them a more cottage or farmhouse feel. Paint them in a bright color like coral, yellow or turquoise for a more fun feel. Painting them black gave them a more modern feel, which is what we were going for in this space.
READY TO DIY?
Find your color, pick your paint, and be inspired.
When you're ready, buy your paint online.
- Explore colors on your own or browse through our curated collections.
- Click on "Buy" then customize your options.
- Checkout at homedepot.com