Gray Shiplap Style Accent Wall
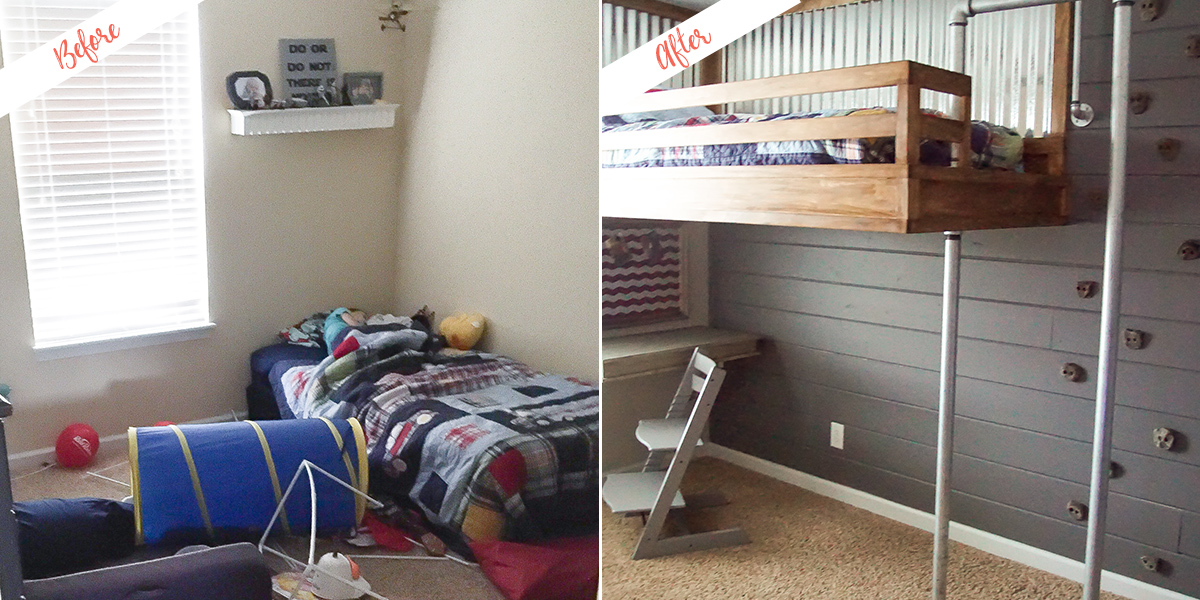
After living in our home for 6 years, we are finally getting around to designing and decorating our kids’ bedrooms. Our son’s room needed some extra help.
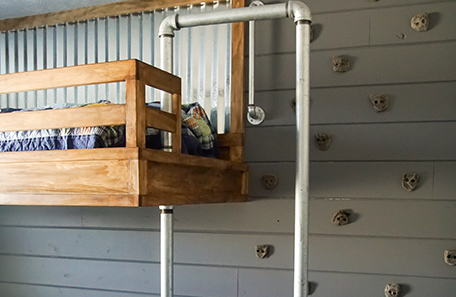
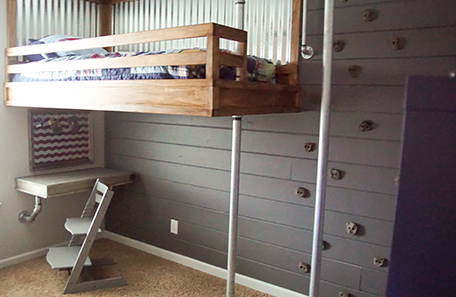
We installed the shiplap style accent wall at the same time that we built our son’s industrial loft bed. You can read more about building the actual bed here. This bed was so fun to design and build and we especially love the fireman’s pole to get off of the bed and the rock wall to climb up his bed! We knew we wanted a rock wall for our son to climb in order to get into his bed, but we knew we couldn’t just install rock climbing grabs into the drywall. After a bit of brainstorming, we decided to install a shiplap style wall for the rock climbing grabs to be installed on. This would create a beautiful accent wall and a stable and sturdy place to install a rock climbing wall.
Color can completely transform the look of a room and adding an accent wall can create a focal point of interest in any space.
After the base of our son’s new loft bed was built, we began installing the shiplap style wall. Every hardware store has different options for wood wall siding and any type will work. The type of joint used to secure the boards together determines the name for the wood siding. (i.e. shiplap joints are different then car siding joints) At our local store we can usually find a good selection of car siding, also called tongue and groove board, so we bought enough to cover the entire wall. We removed the molding along the bottom of the wall. Then we used our nail gun to attach the car siding to the walls. We added long screws to attach the boards into studs in order to support a rock climbing wall. We staggered the vertical joints of the boards as they were hung beginning at the ceiling and working our way down the wall to the floor. We used a compound miter saw to cut the boards to the needed lengths. Then we trimmed and reattached the molding over the car siding.
We used a putty knife and wood putty to fill in the holes created by the screws. We let that dry and then sanded the wood to create a smooth finish then we used a lint free cloth to wipe the saw dust off of the wood. If you like, you can use caulk around the baseboards and anywhere else you feel it is needed.
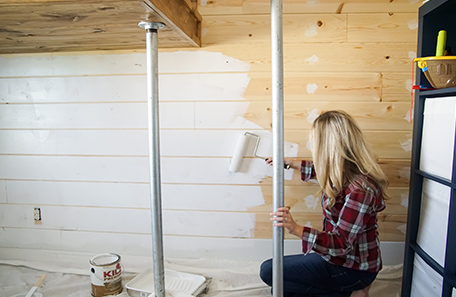

In a few hours our shiplap style wood wall was up and ready to be painted! We prepared our space by placing a drop cloth on our floors and taping around the shiplap style wall. We got both our primer and paint out and ready with stir sticks, brushes and rollers.
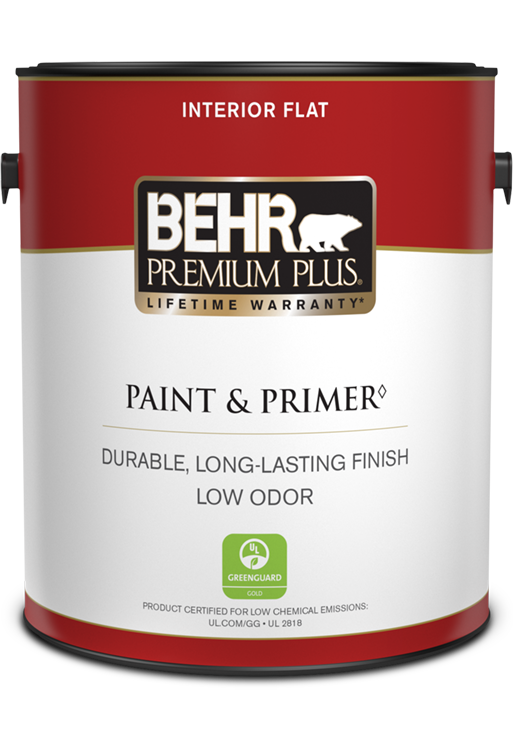
We used KILZ® Premium to prime our shiplap style wall. Priming is an important step in achieving professional results when painting anything. In this particular case, priming the wood helps prepare the wood to receive paint and helps ensure that stains don’t bleed through the paint.
I chose BEHR PREMIUM PLUS ULTRA® in Iron Mountain for our accent wall. We had already painted the other walls in his room a lighter gray color and while I knew I wanted this wall to be a bit of an accent wall, I wanted it to still feel neutral yet masculine.
Adding this pop of neutral color to our son’s room gave the room a sophisticated yet masculine feel.
Iron Mountain is a beautiful gray that doesn’t lean purple or green, plus it’s the perfect name for a rock climbing wall. It was meant to be. (Note that all paint looks different in different homes, lighting and location, so while this color is a very neutral gray in my home, it might look different in your home.) We began by using a brush to edge around the wall and in the grooves.
Tips and Tricks
- Tip 1: Two coats of paint or stain give you a much nicer look then one coat, so take your time and always add a second coat to your projects.
- Tip 2: Allow your paint and stain to dry completely according to the manufacturer's instructions in order to get the most durable finish.
Our son’s bedroom has made a huge transformation and I love how the colors of paint we chose play a huge role in the final look of the room. Color can completely transform the look of a room and adding an accent wall can create a focal point of interest in any space.
I am absolutely in love with how this gray shiplap style accent wall turned out! It has truly inspired me to finish his room and turn it into a more functional, organized and fun space for him! We have a few more projects up our sleeves for his room including better storage in his closet and an industrial cantilever desk under his bed! I can’t wait to put the finishing touches on his room.
Ready to DIY?
Find your color, pick your paint, and be inspired.
When you're ready, buy your paint online.
- Explore colors on your own or browse through our curated collections.
- Click on "Buy" then customize your options.
- Checkout at homedepot.com