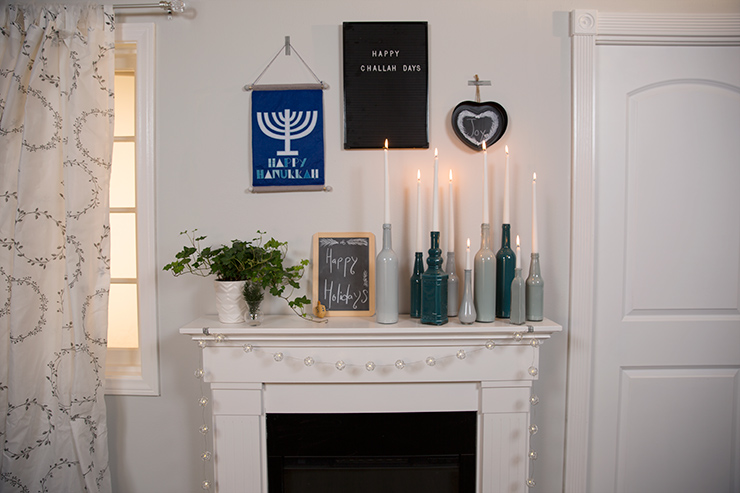
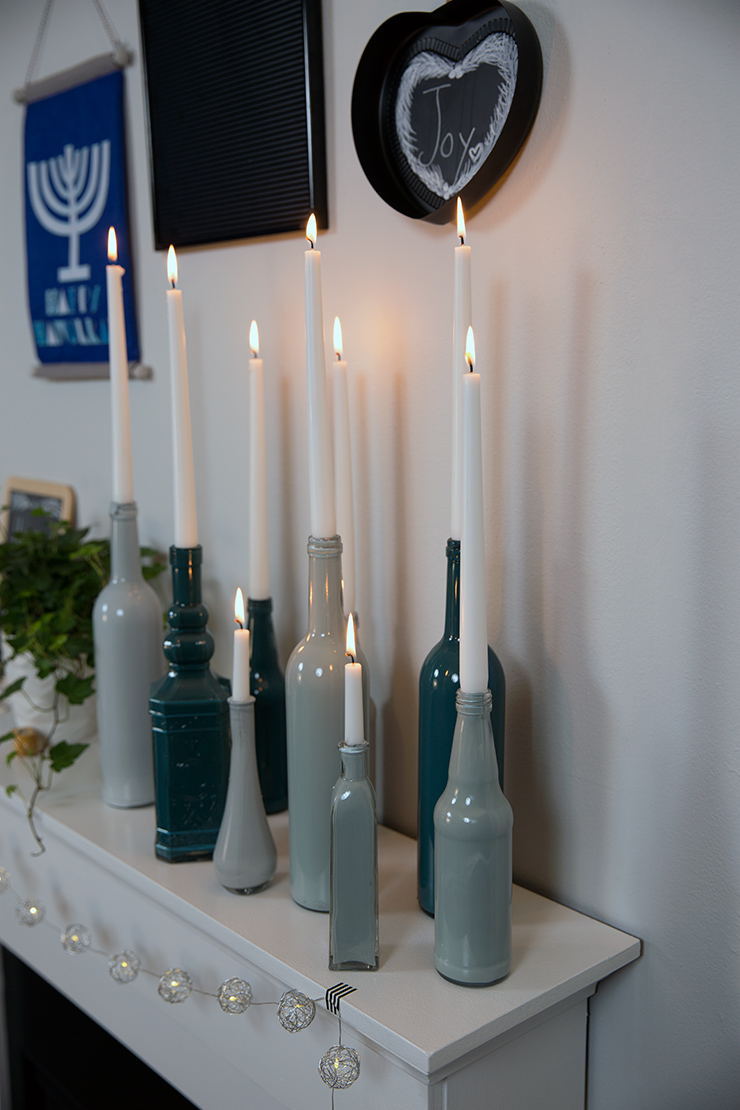
As the cold front encroaches, and you patiently await your latkes to be ready, consider undertaking a fun and easy holiday project with a DIY menorah. Simple and enjoyable enough for a child to do, it’s an excellent project to use those last bits of paint you may have sitting around.
Materials:
Paint -we used Tealish S440-6, Garden Vista N430-3, and Nature’s Reflection N430-2
Clear Bottles -we used a variety of shapes and sizes
Funnel -we made ours from a piece of cardboard box
Tape (to tape your funnel)
Candles
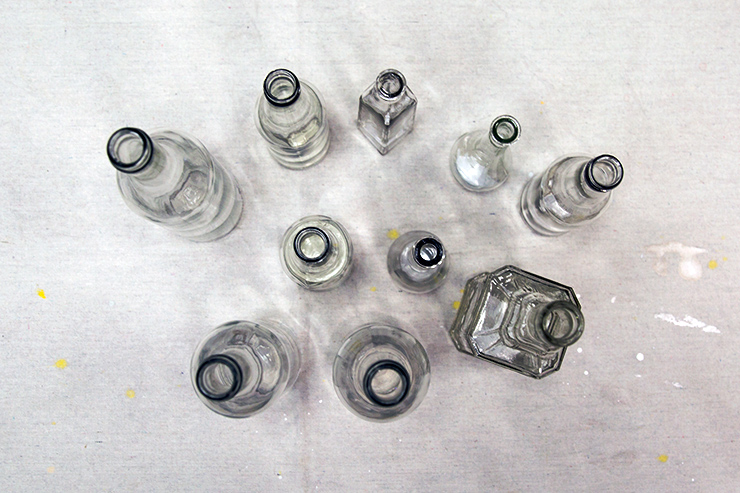
Step 1: Gather and prep bottles
The first thing you will need is clear glass, or plastic bottles (different shapes are always fun) to create your menorah. These need to be washed and labels removed.

Step 2: Select paint colors
The next step is choosing your paint colors. I wanted to stick to the traditional, cool tone, Hanukkah color scheme, but with a modern rendition in warmer, muted blues. Although, any colors would be great depending on your home and style.
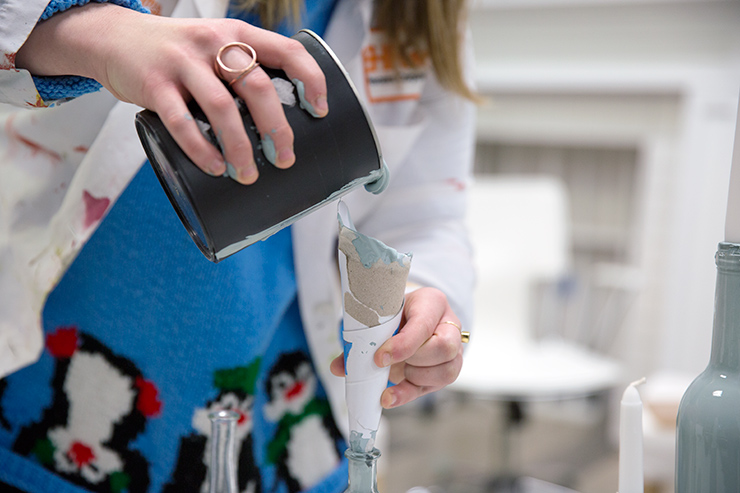
Step 3: Construct funnel
One thing I would highly recommend is a funnel, or several. As you can see, you can create a DIY funnel with a bit of scrap cardboard (especially if you are going with a *fresh out of college and need a funnel on the fly theme*). Just kidding, you are going to need a funnel.

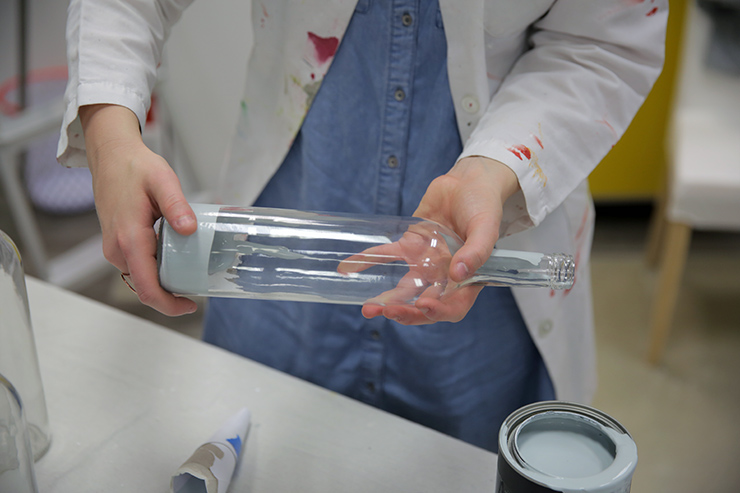
Step 4: Pour paint into bottles
Insert your funnel into the bottle and pour in a small amount of paint. Remove the funnel and move the bottle around so the paint completely coats the interior.

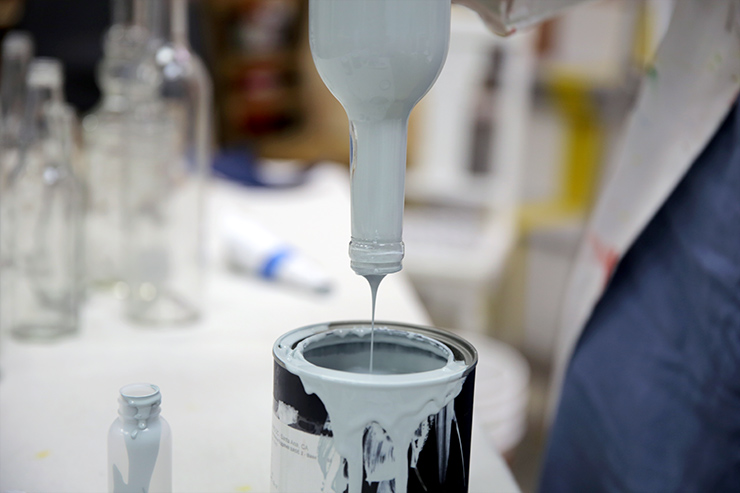
Step 5: Empty excess paint
When the interior has been coated evenly, hold the bottle upside down over your paint can to allow the excess to drain. This will catch any extra paint that is not needed, while spreading the paint around inside of the bottle to create a uniform look.
Repeat steps 4 and 5 in different colors for the remaining bottles.
Step 6: Set up, display and enjoy
The paint may take a few hours (depending on how much is poured into them) to dry. After they have completely dried, fit with candles that work best for the bottles and your home.
However you celebrate this winter season, we wish you a wonderful and colorful holiday.
Colorfully yours,
Nicole
DIY Projects
DIY Hanukkah Menorah
TIME
BUDGET
COMPLEXITY