Many of us thrive on change and have an insatiable desire to continually modify our environment. Because of this need, we are compelled to redesign our homes by adding or subtracting something every day. One way to employ change, while keeping your budget in check, is to paint the wall in a new color! Like your wall color? How about painting a fun, fresh pattern?
Material needed:
Two colors paint (we used Shades on T17-10 and Gold Hearted T17-02)
Mini roller or paint brush
Paint Tray
Painter’s Tape (1″ and 2″)
Ruler
Pen or pencil
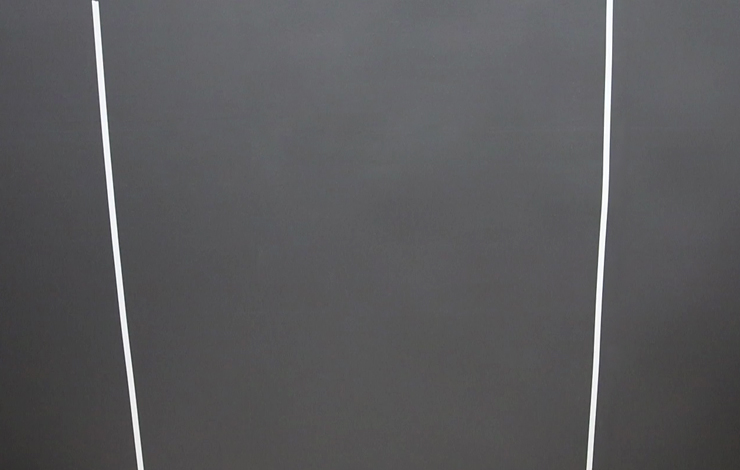
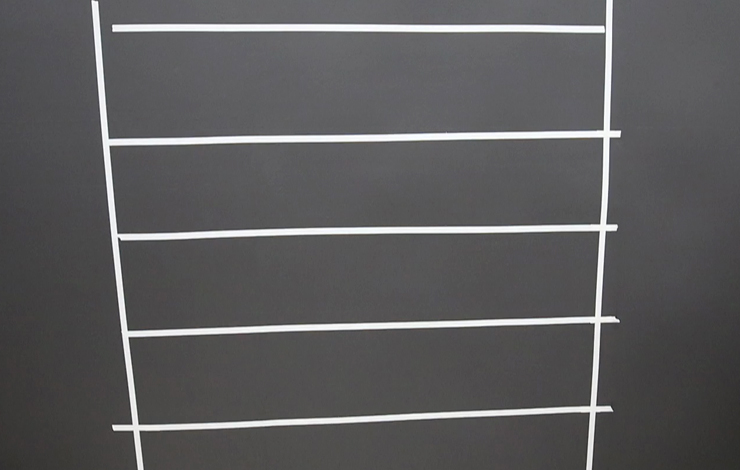
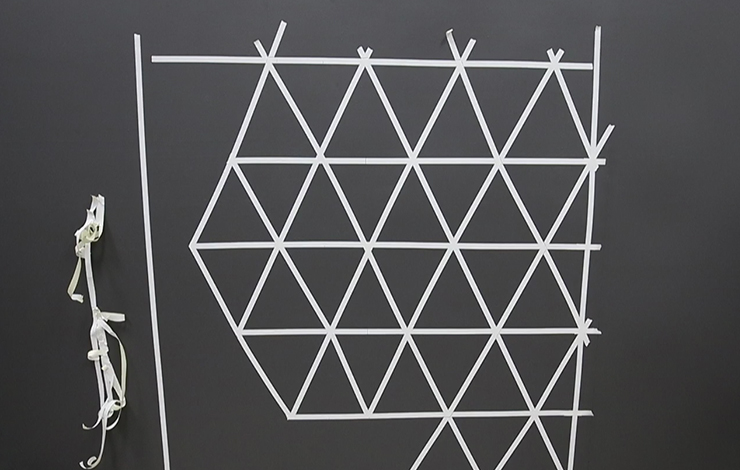
Step 1: Tape two vertical lines
First, designate the place on the wall where you would like to paint the geometric pattern. Make a frame for it by taping two vertical lines with your 1″ painters tape.
Step 2: Measure and tape horizontal lines
Tape five horizontal lines, of equal distance, across your horizontal lines.
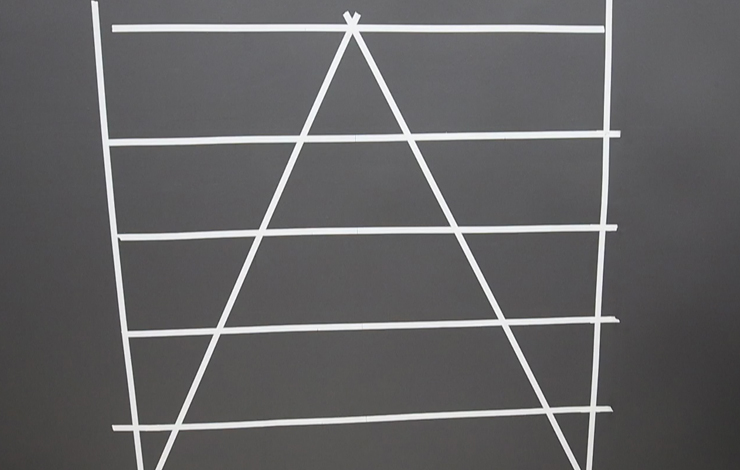
Step 3: Find the center of horizontal lines
With a ruler, find the center of the horizontal lines and mark with your pencil.

Step 4: Tape two diagonal lines
Starting from the center of the top horizontal line, tape two diagonal lines to the bottom of each of your vertical pieces.
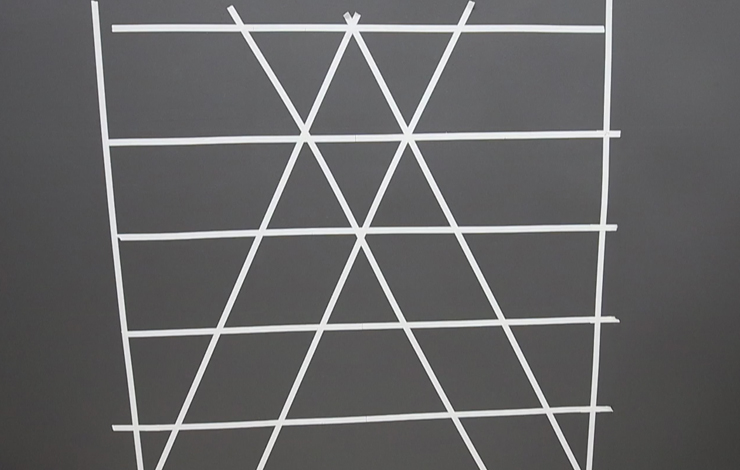
Step 5: Tape additional diagonal lines
Repeat Step 4 on the center of the third and fifth horizontal lines. Continue until all of the triangles are formed between the taped areas.
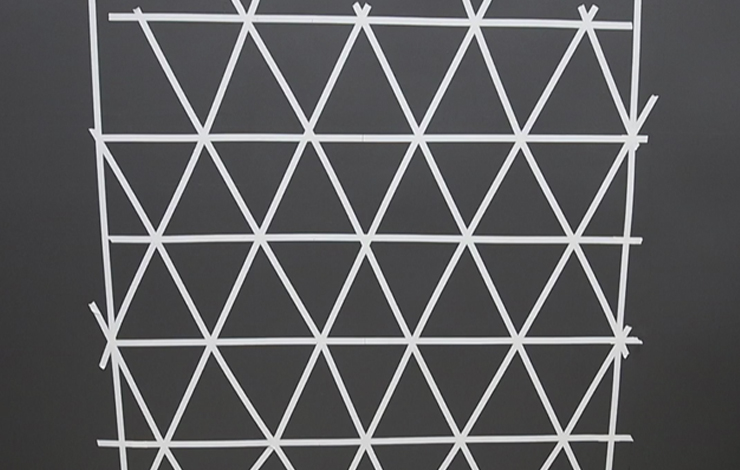
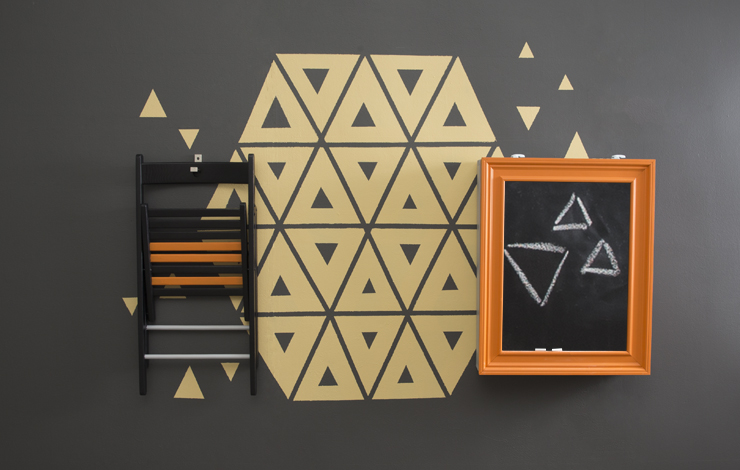
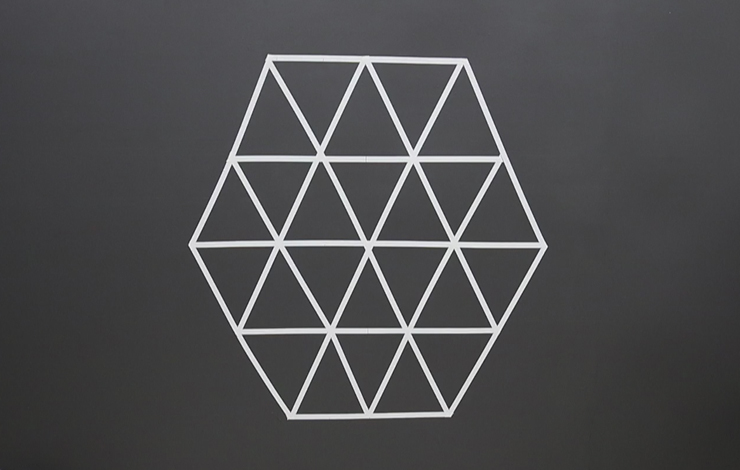
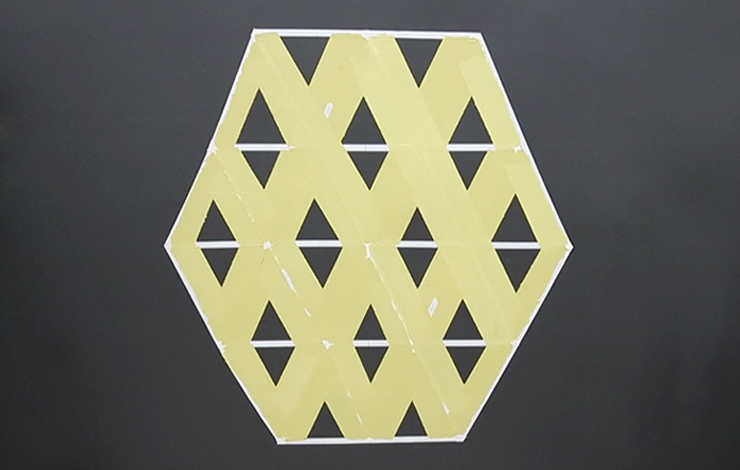
Step 6: Determine shape
Once you’ve completed your frame of triangles, you can decide what kind of geometric shape you’d like to make. We decided to cut out the extras on the sides in order to create a hexagon shape.
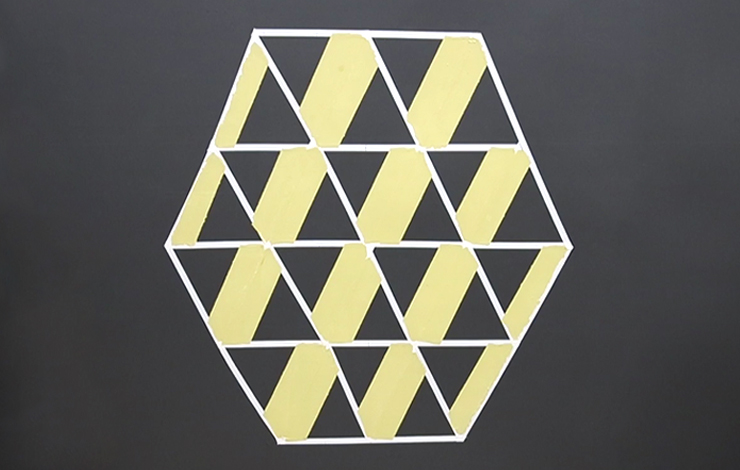
Step 7: Subdivide diagonal sections
Measure the left diagonal section and tape subdivisions across the pattern with your 2″ painters tape. Repeat for each diagonal section you have. Once all of the sections have been taped you are ready to begin painting.

Paint the trapezoid shapes only. Allow to dry and apply a second coat if necessary.
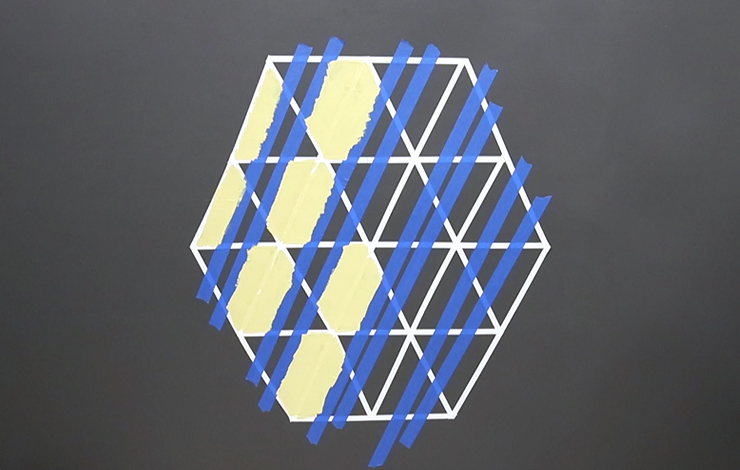
Once the paint has dried, remove the tape.
Step 8: Diagonal subdivision part 2.
Repeat Step 7 for all the diagonal sections in the opposite direction.

Paint the trapezoid shapes and allow to dry.
Once dry, remove the tape.
Step 9: Tape horizontal lines
Repeat Step 7. subdividing the horizontal sections.
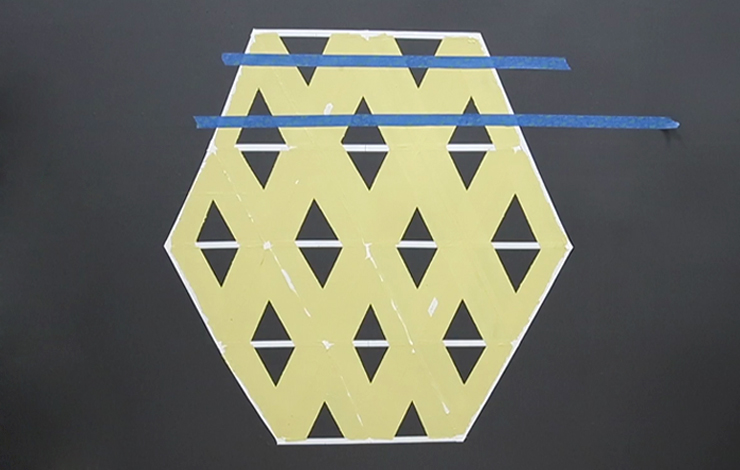
Paint sections when taping is complete. Allow to dry.

Step 10: Remove all tape
Remove all of the tape outlines from the wall.
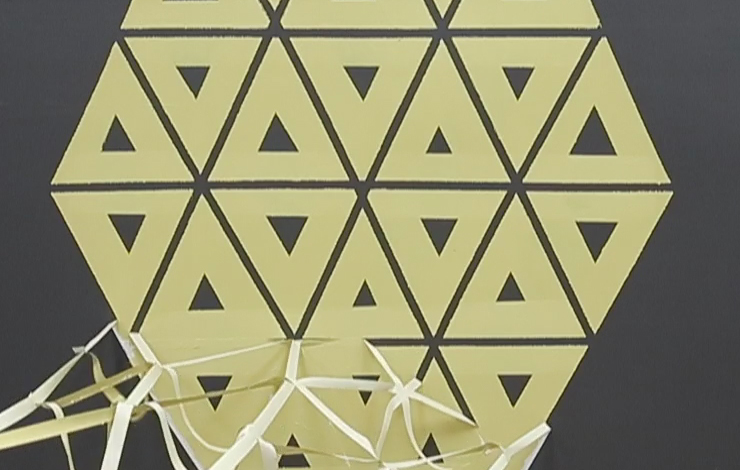
Step 11: Add extra embellishments to wall (optional)
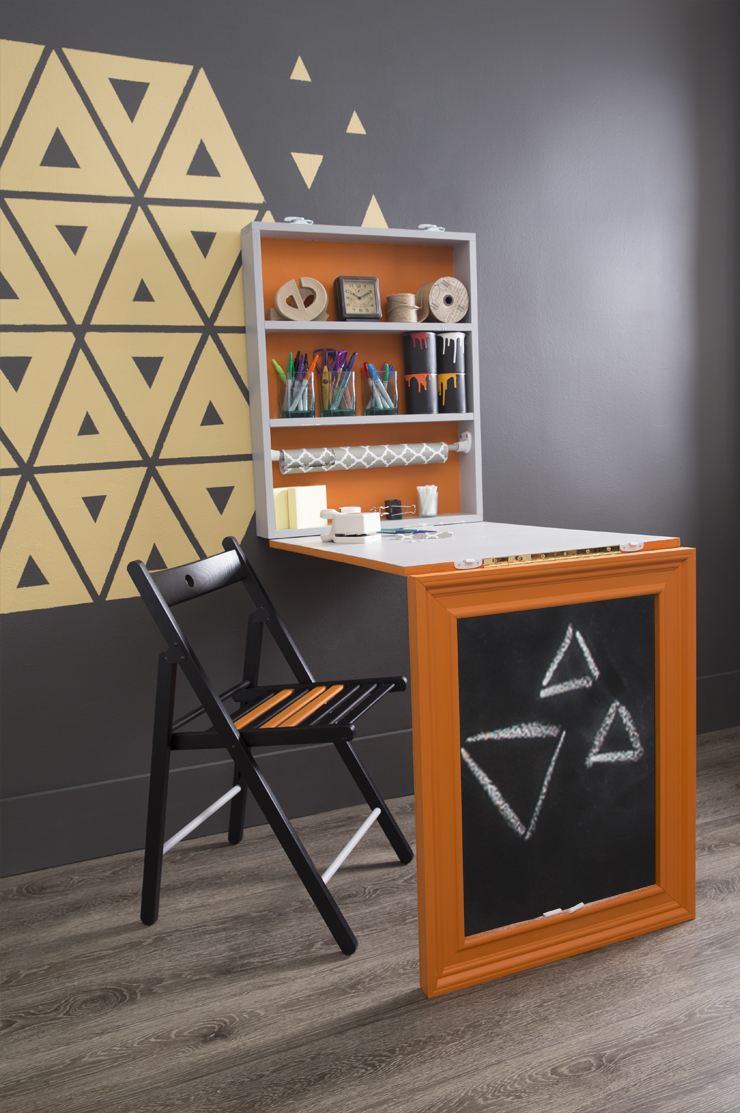
Wall:Shades On T17-10, Pattern:Gold Hearted T17-02, Frame: Japanese Koi P210-7
Want to see the whole process start to finish? Watch our project video:
Colorfully Yours,
Sha Khezri