
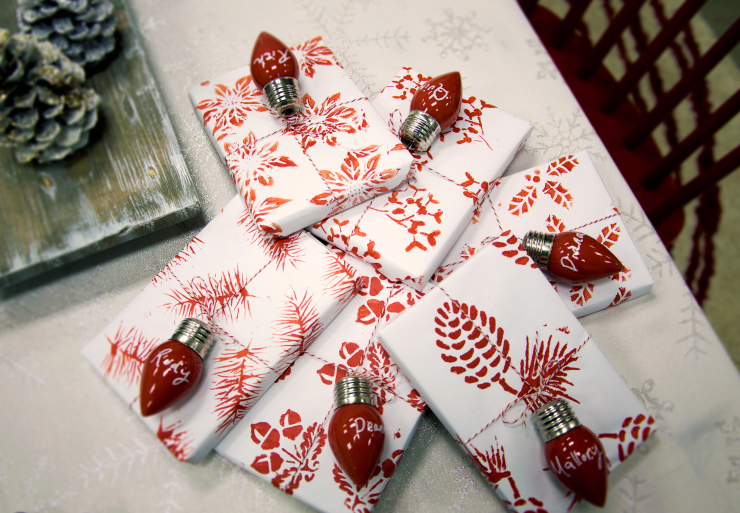
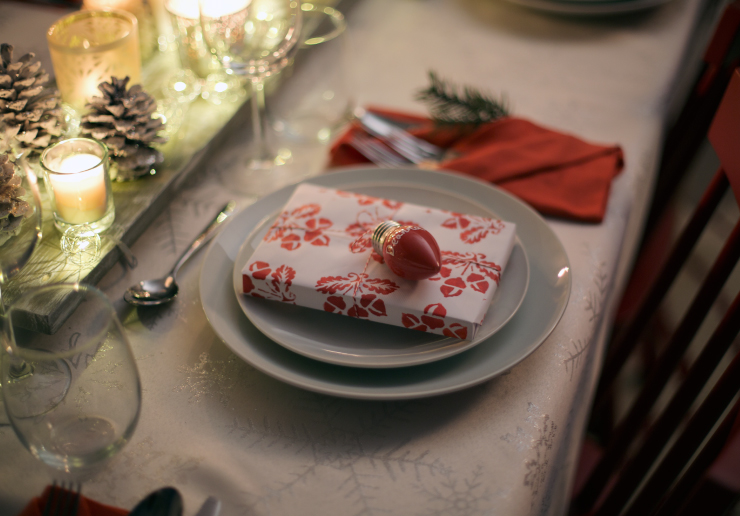
Personalization doesn’t have to stop at purchase! This easy, DIY, paint project allows you to show, just how much, you care by giving every gift its own unique wrapping.
Materials:
Holiday stencils
Solid color, unpatterned wrapping paper
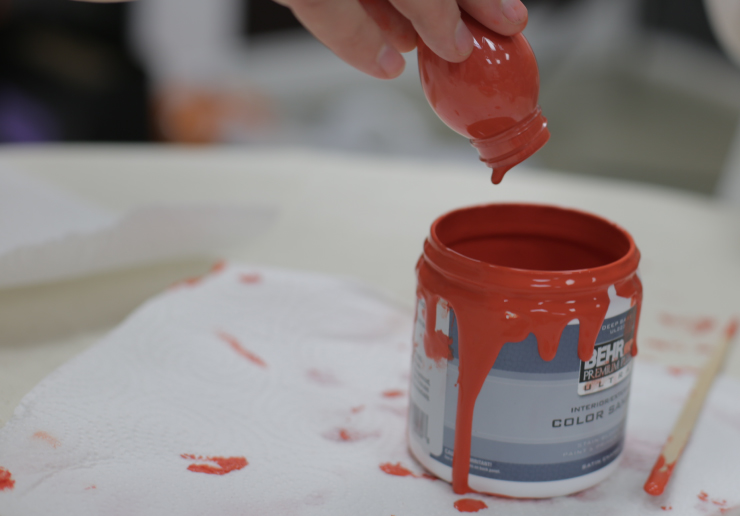
Paint -we used Hot and Spicy T17-18
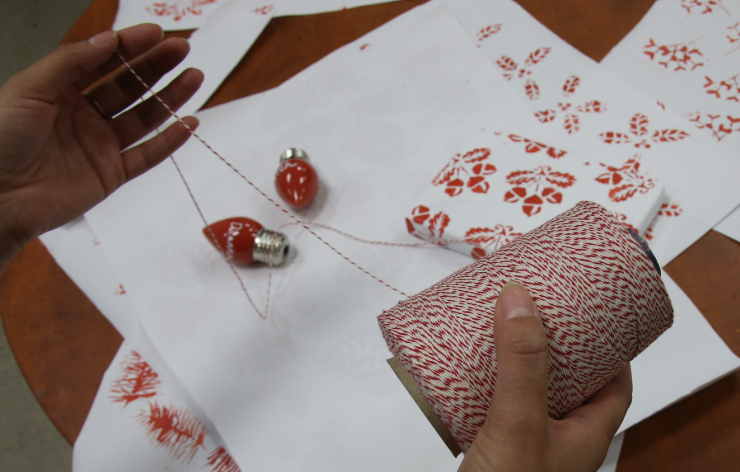
String/ribbon
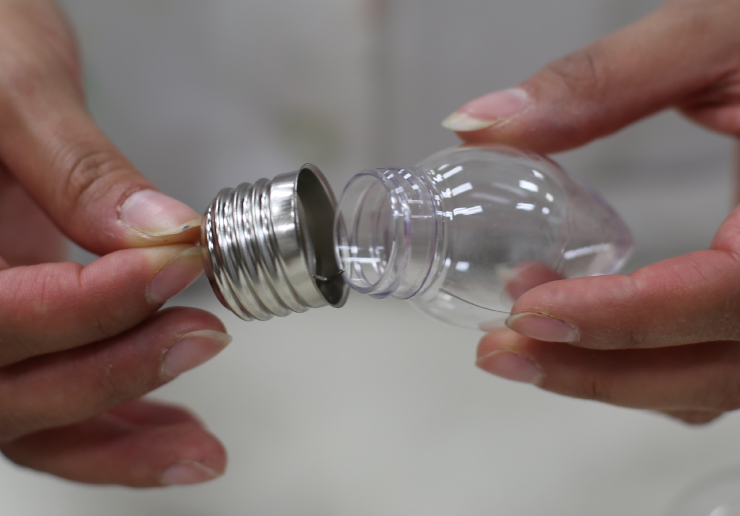
Clear glass or plastic ornaments
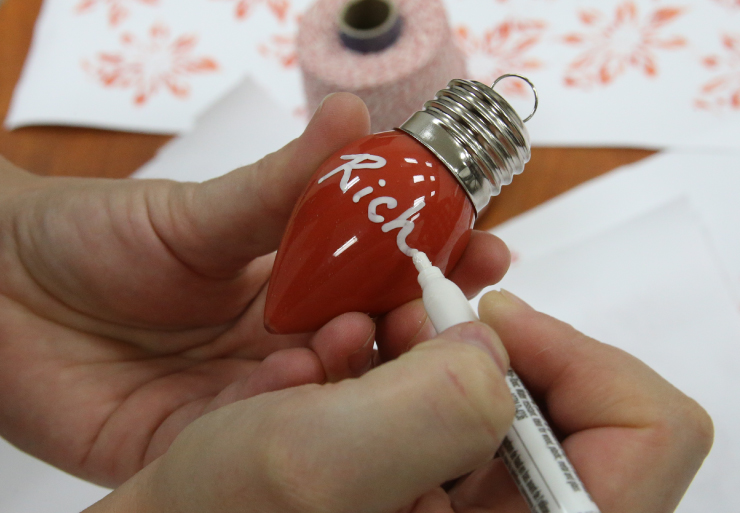
Paint pen
Tape
Tools:
Sponge brush
Scissors
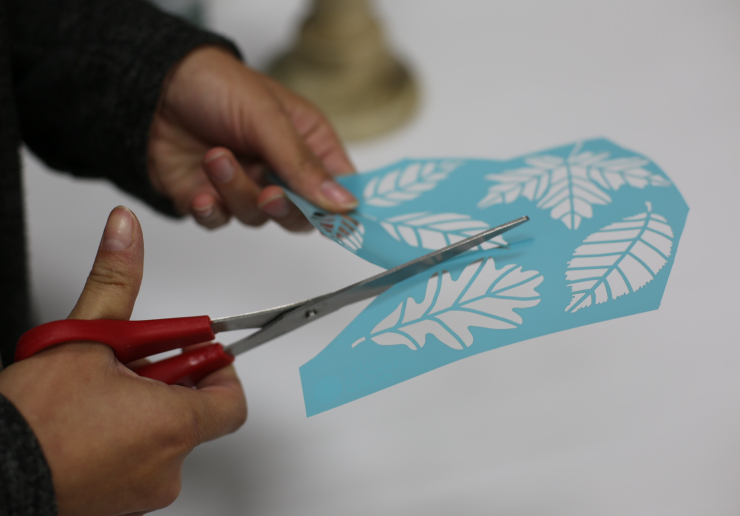
Step 1: Select holiday theme stencil
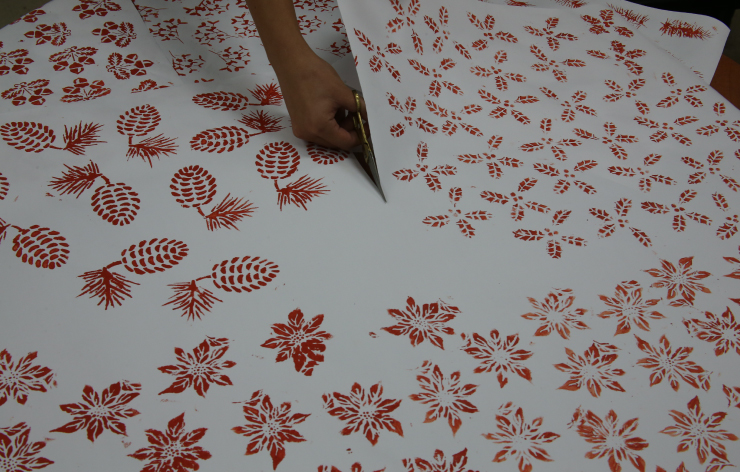
Find and select a stencil to decorate your wrapping paper. If the stencil is grouped with others, you can cut the stencil out. Roll the paper out across your workspace when ready to begin painting.
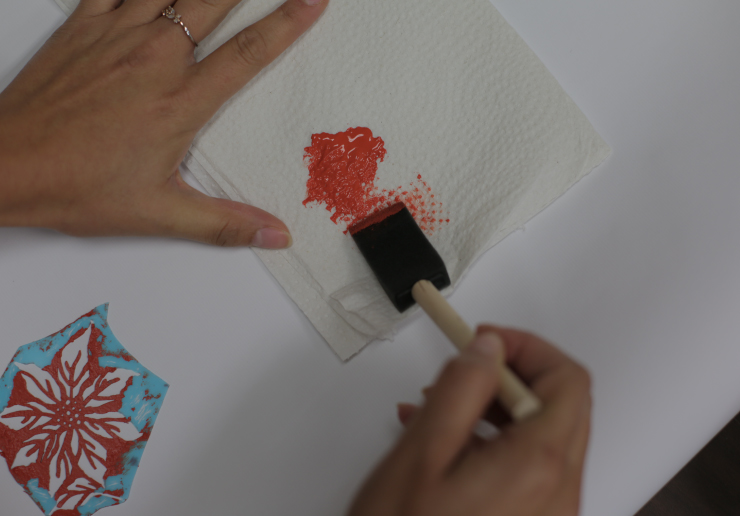
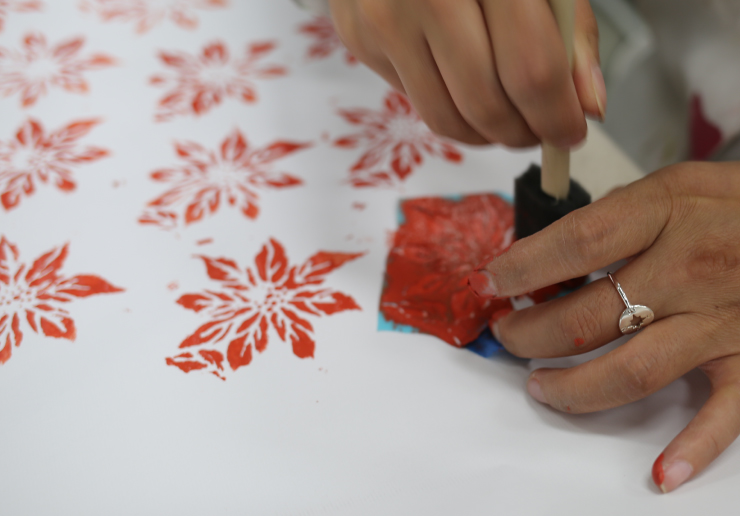
Step 2: Blot paint
Dip your sponge brush into your paint color. Blot off excess paint on a paper towel before applying to the stencil. Doing so will keep the paint from bleeding through the stencil edges.
Step 3: Paint stencil
Place your stencil onto your wrapping paper where you’d like the pattern to begin. Tap over the stencil lightly with your sponge brush to fill in the pattern with color. When the pattern has been filled in, carefully lift the stencil up and move to a new position.

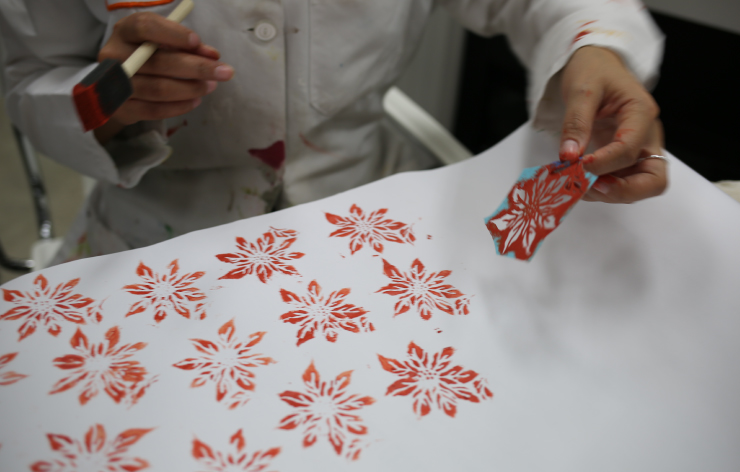
Repeat steps 2 and 3 until you are happy with the look of your wrapping paper pattern. Allow your paper to dry before wrapping presents.
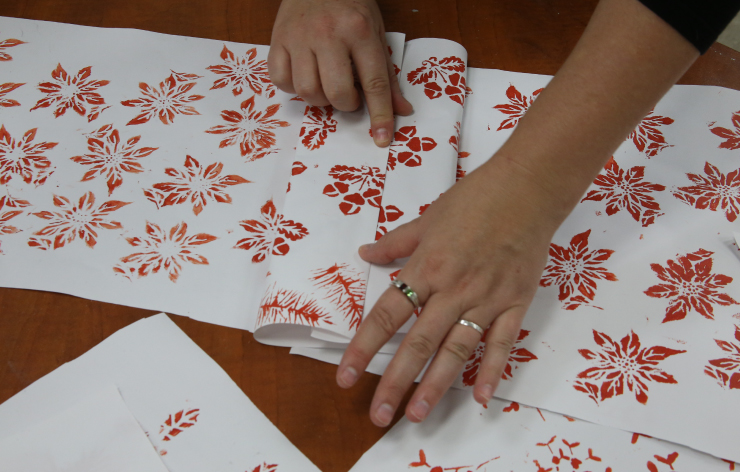
Step 4: Cut paper
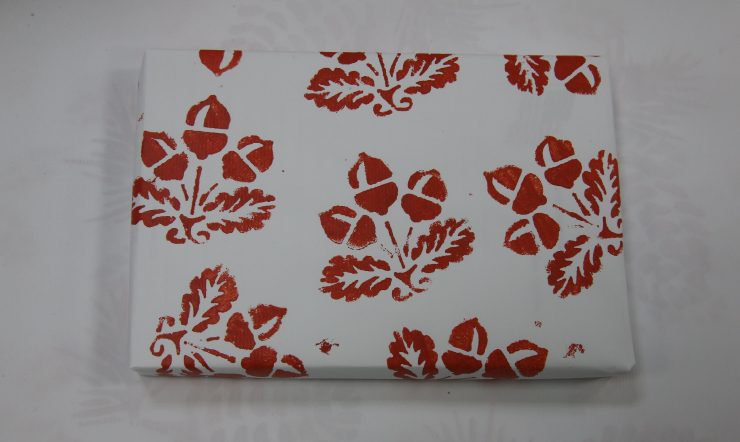
If you used multiple stencils, cut out your pattern pieces to begin wrapping.
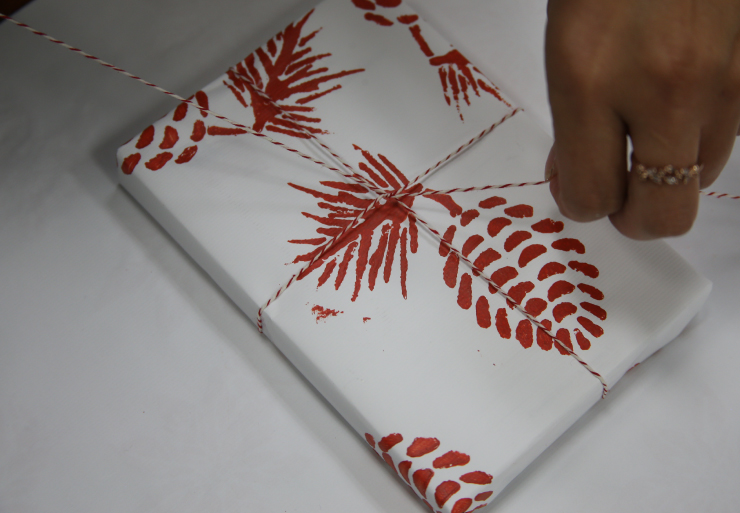
Step 5: Wrap presents
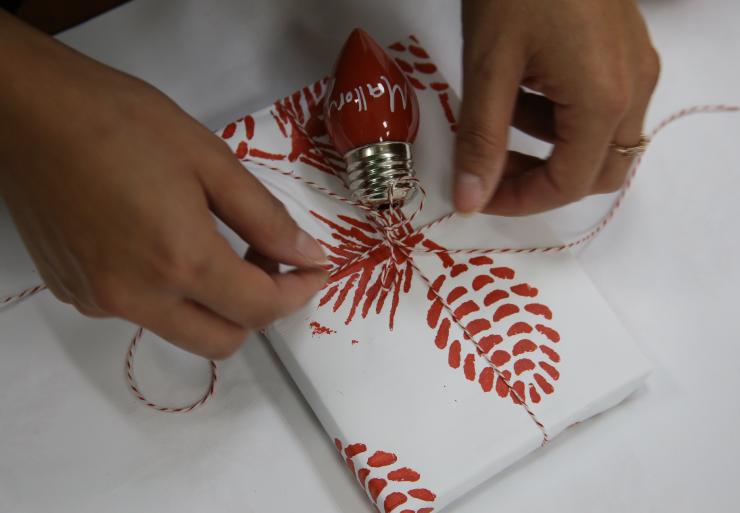
Step 6: Create name tag (optional)
We wanted to use these gifts as a seating placement guide at our holiday diner. To do so we created custom name ornament place cards. For detailed how-to steps click here.
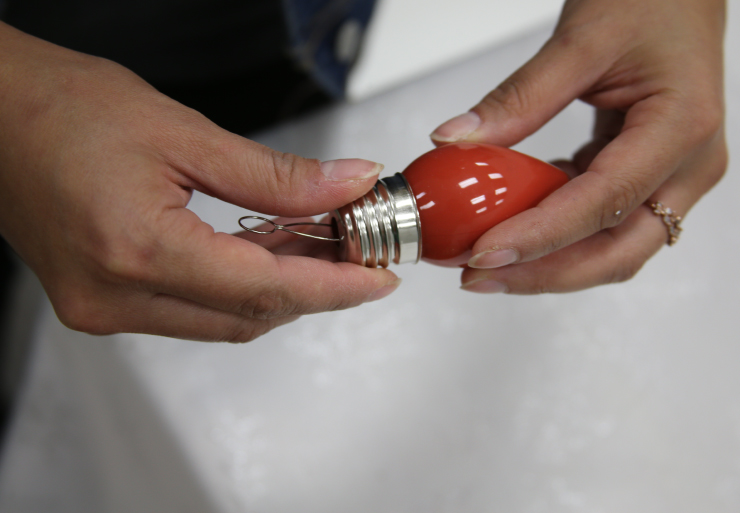
When colored and together as one piece, write the name of your event attendees on the ornaments with your paint pen.
Step 7: Tie to present
Repeat for all attending.
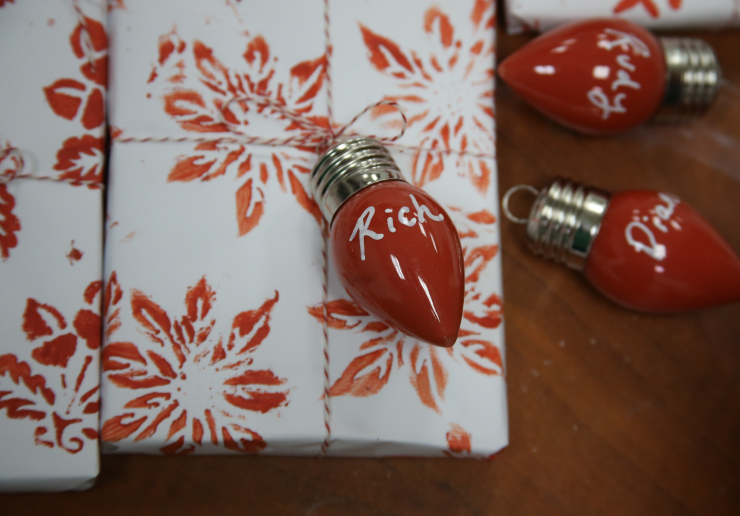
Step 8: Place on a plate to direct and delight.
Colorfully yours,
Quinn
DIY Projects
Wrapped with Love
TIME
BUDGET
COMPLEXITY
How cute! What a pretty idea.