
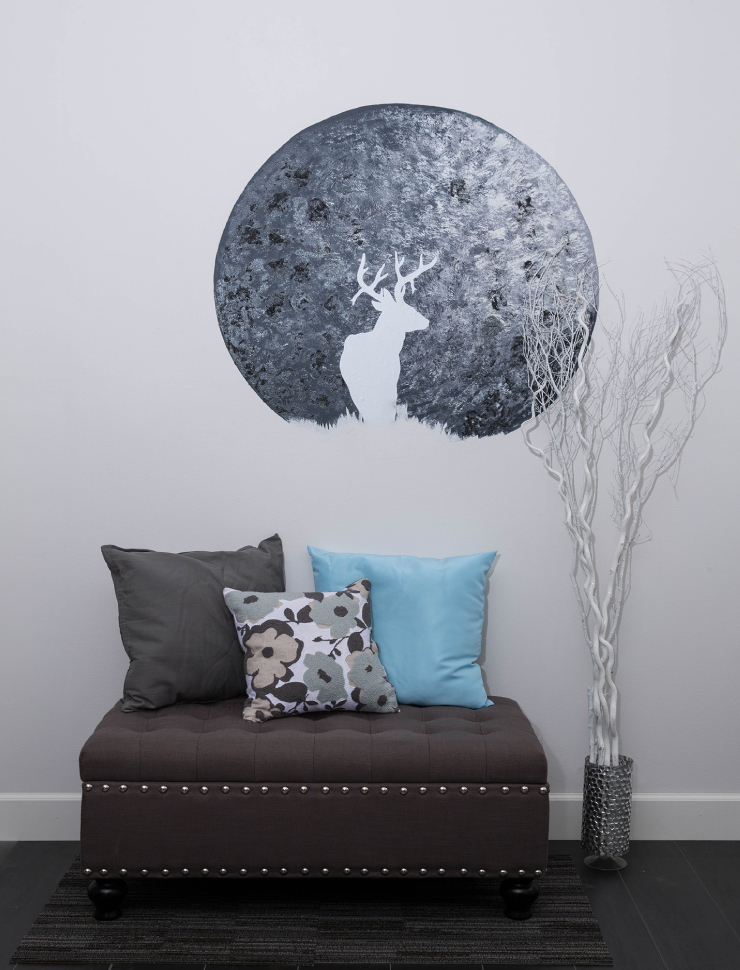
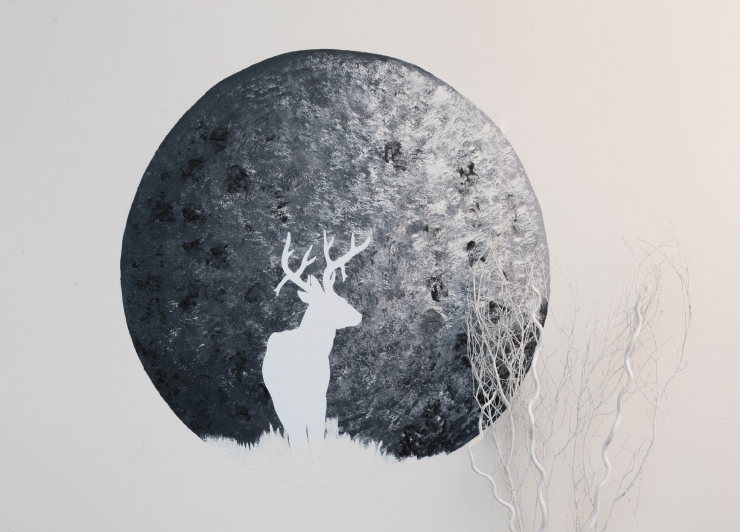
July was the month of the Full Buck Moon, named so because bucks begin to grow new antlers at this time. Inspired by this seasonal event we set out to create this stunning and artistic moon wall mural. With the launch of our new collection of beautiful gray colors, finding the perfect selection of hues was both easy and fun.
Materials and Tools:
Paint- we used Smokey Lilac PPU26-20 for our light tone, Summer Storm PPU26-22 for our mid-tone, and Chimney PPU25-22 for the deep. Painter’s White PPU18-8 was used on the wall as our base color.
Vinyl decal
Paint tray
Paintbrushes
Pencil, String, Thumbtack
Sponge brush
Black Glitter
Mod Podge
Ruler/measuring tape
Continue reading for the how-to steps or watch the video below:
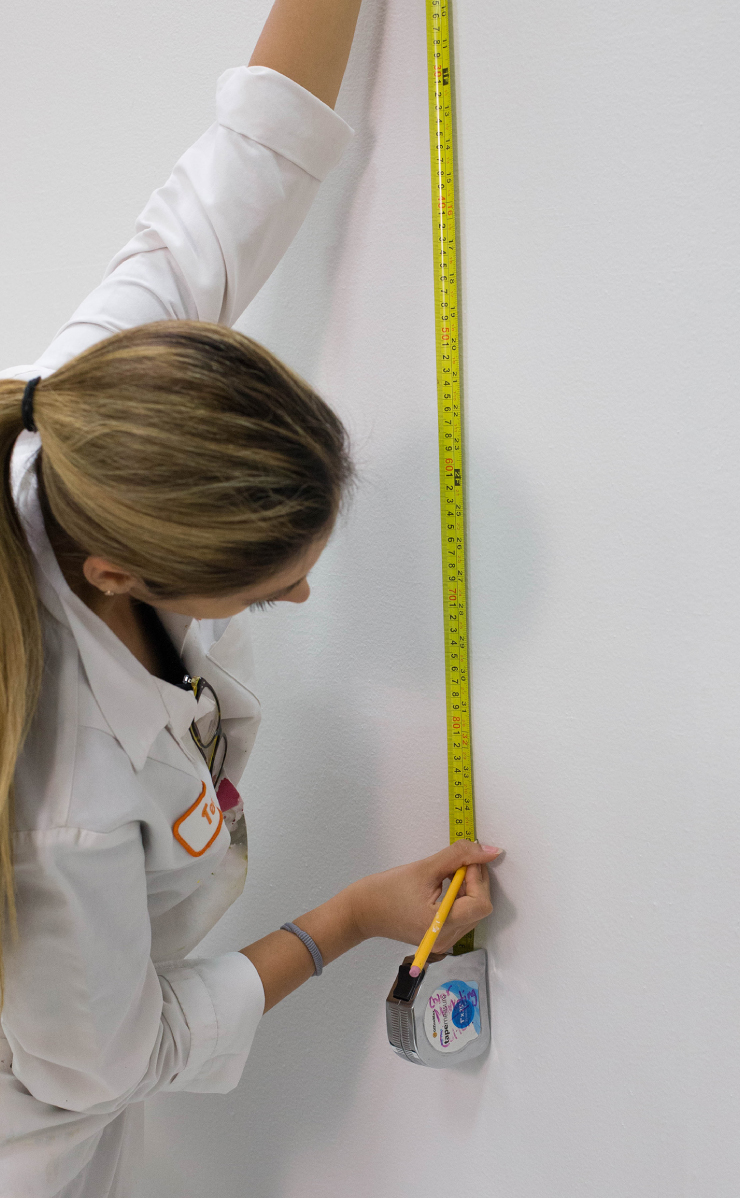
Step 1: Position your circle on the wall
Measure your wall and find out where you want to paint your moon, and how wide you’d like it to be. Make a small mark in pencil for each measurement.

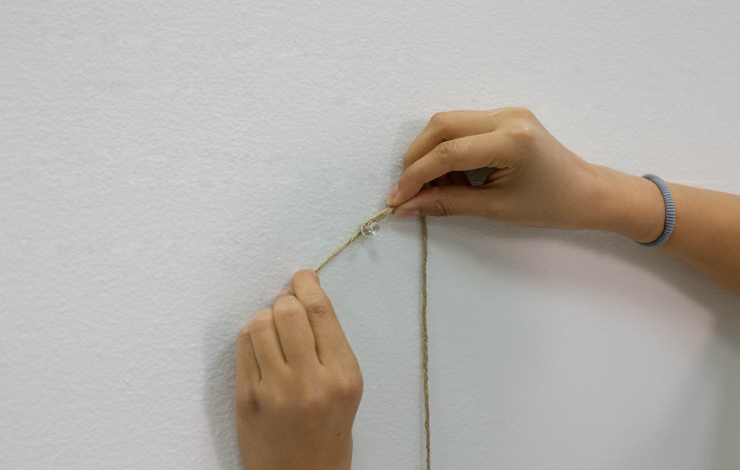
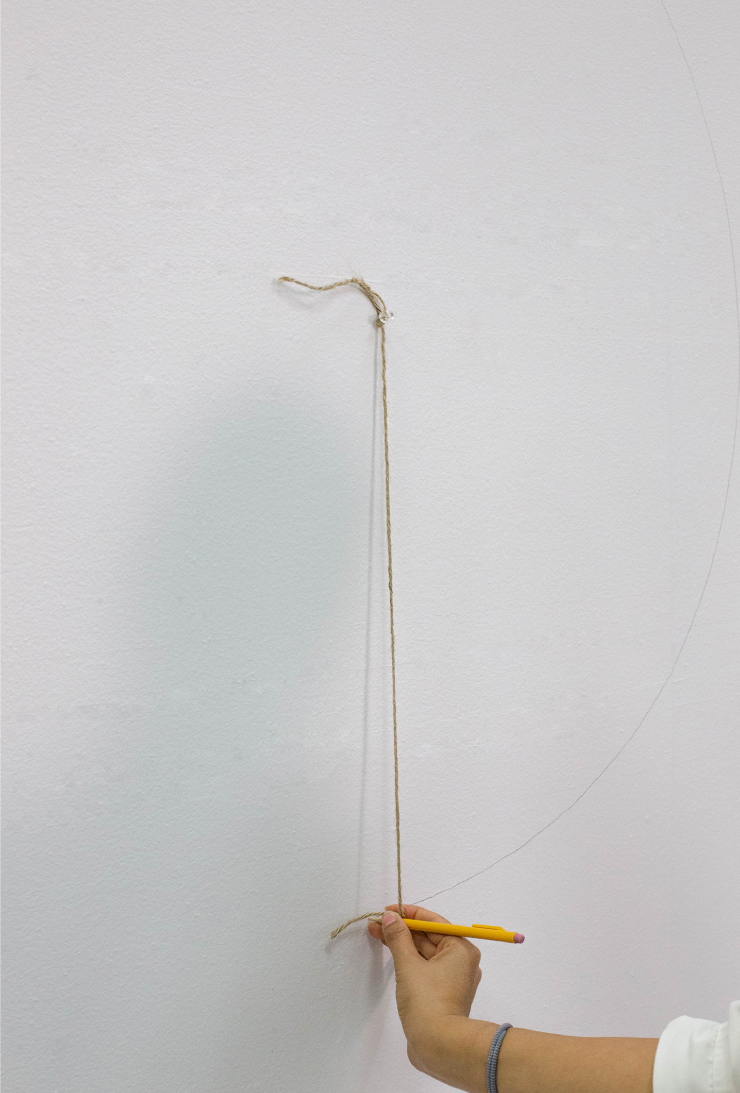
Step 2: Find your center
Press your thumbtack into the wall in the center of your measurements.
Step 3: Decide the size of the circle
Measure a length of the string from the center point to the edge of your width mark. Tie one side of the string to the pencil and tie the other side to the thumbtack.
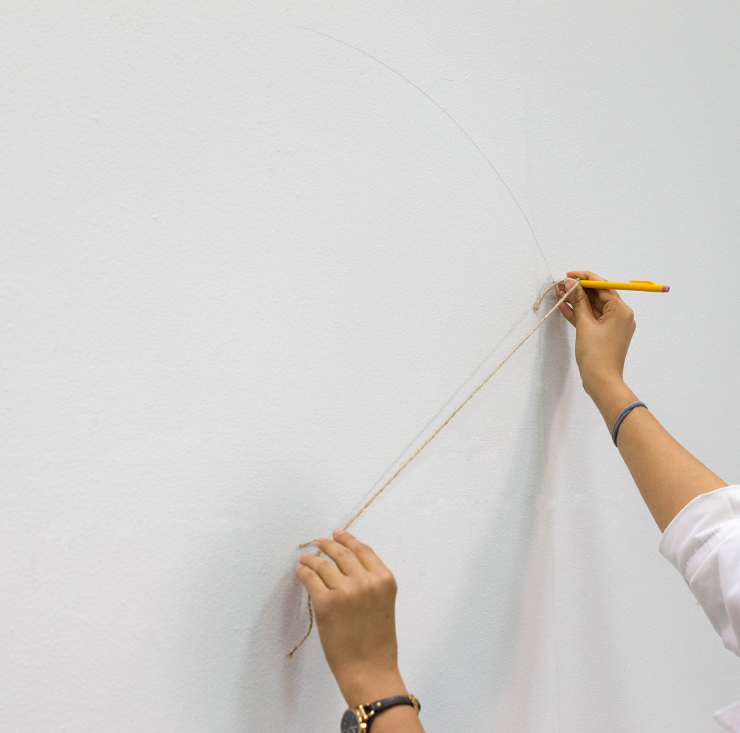
Step 4: Draw the circle
Pull the string straight to outline the circle.
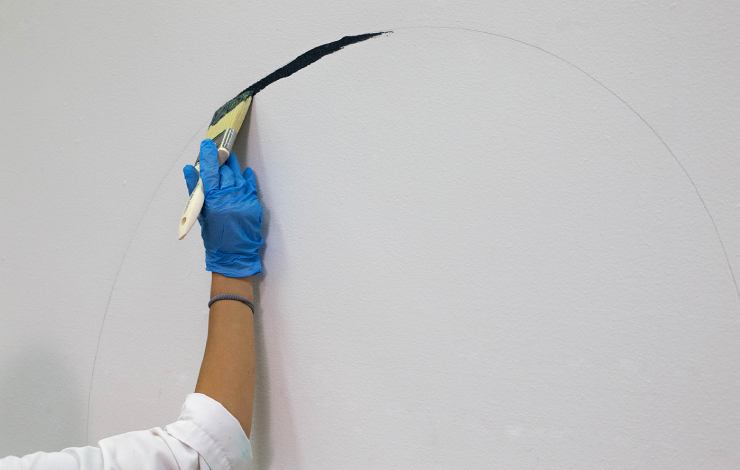
Step 5: Paint the moon
Once you have your circle outlined, begin painting the dark side border of the moon with Chimney PPU25-22, and the light side with Smokey Lilac PPU26-20. Use your brush and fill out the center of the circle with summer storm PPU26-22.
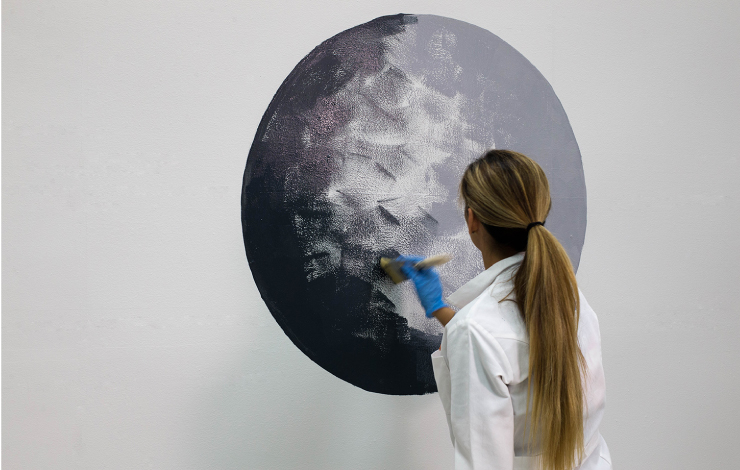
Step 6: Paint moon texture
The most important part of this project is the surface texture. Dip your sponge into your paint, dabbing off any excess onto your tray. Then, starting with the dark side, lightly dab color in a random pattern blending the two sides together. This will create a gradation from shadow to light. Bring a little of your background color into the moon in order to create depth.
Step 7: Make your moon shiny (optional)
You can buy black glitter from your local art and crafts store. Using a clean sponge brush, mix the glitter with Mod Podge and add it to the mural. Doing so will add texture and depth to your work.

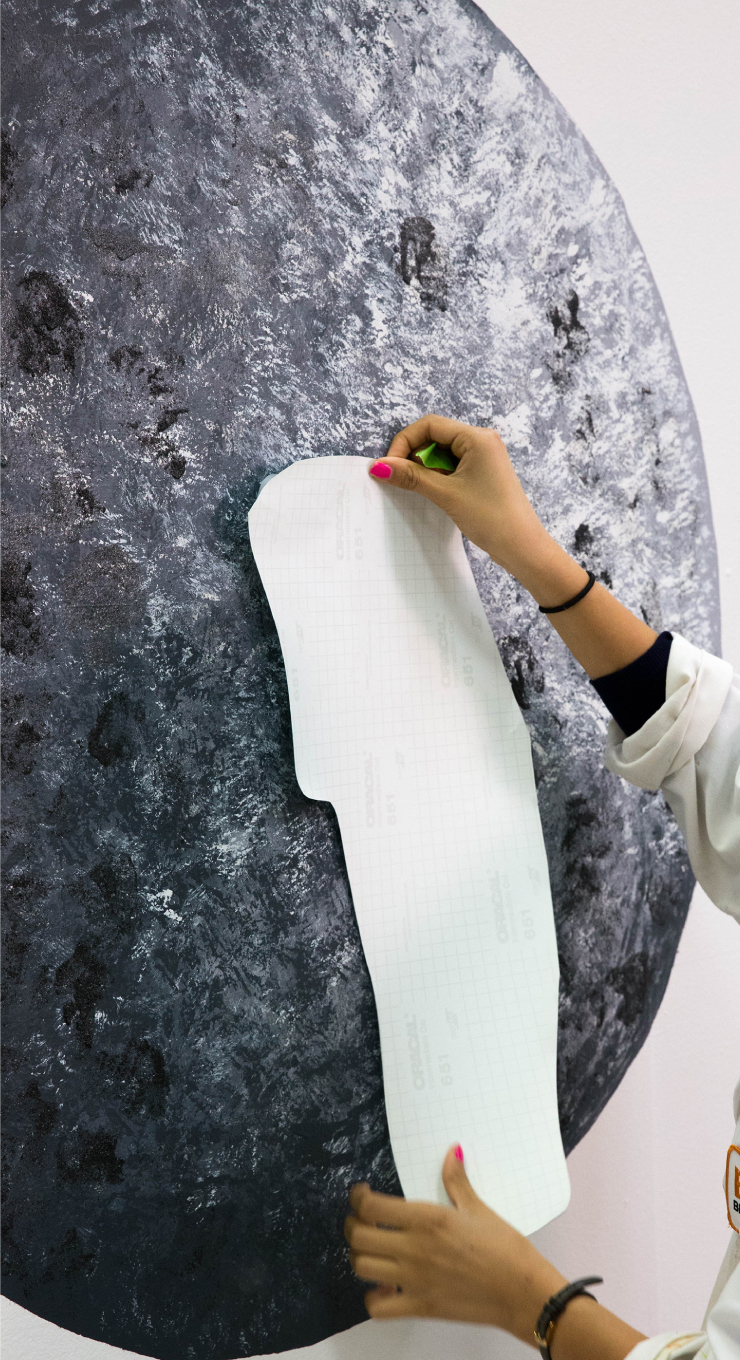
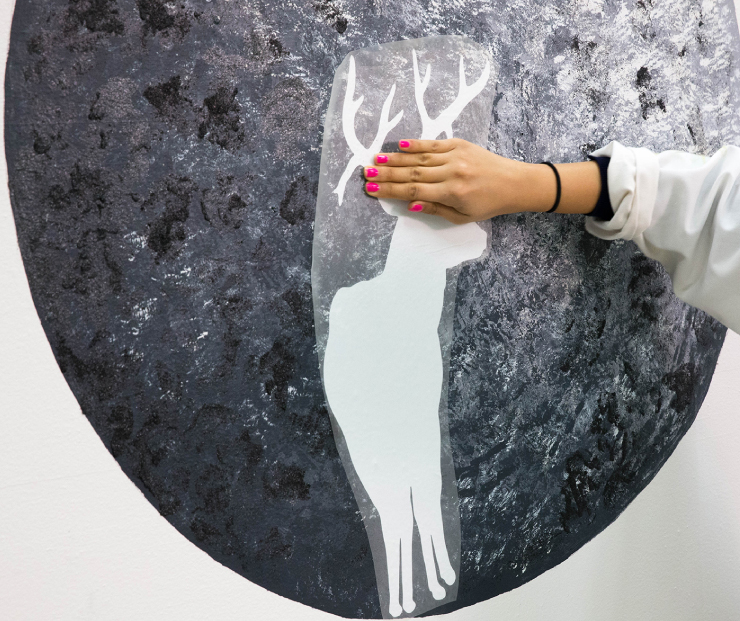
Step 8: Apply the vinyl decal
Allow your moon to dry. Once dry, position your decal in the center of your artwork. Starting at the bottom corner, peel the white backing paper off the transfer tape, rolling it up as you go. Make sure the decal is flush to the wall and gently remove your transparent tape.
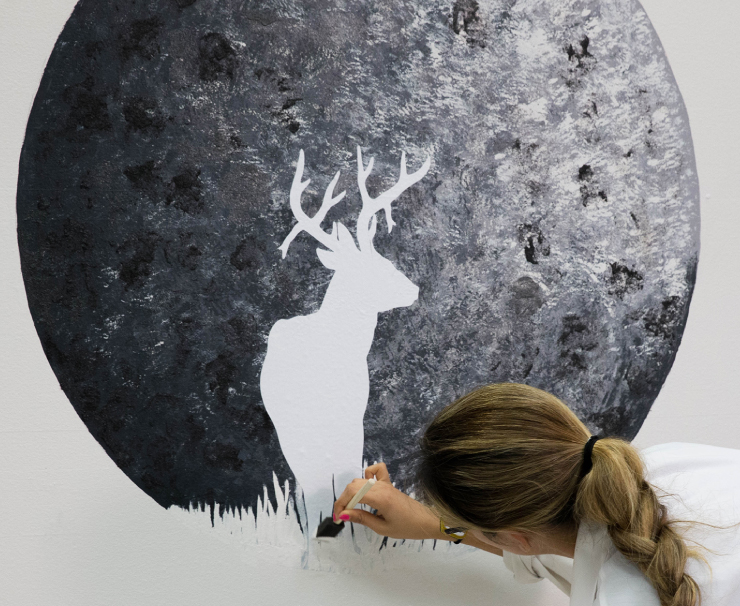
Step 9: Paint in grass
With a sponge brush paint some grass, in your wall color, on the bottom part of the moon to blend your decal into the wall.
You do not have to be an accomplished artist to paint a mural. With just a few simple steps and techniques you can create a work of moon art on your wall!
Colorfully yours,
Lala
beautiful!! love it!