

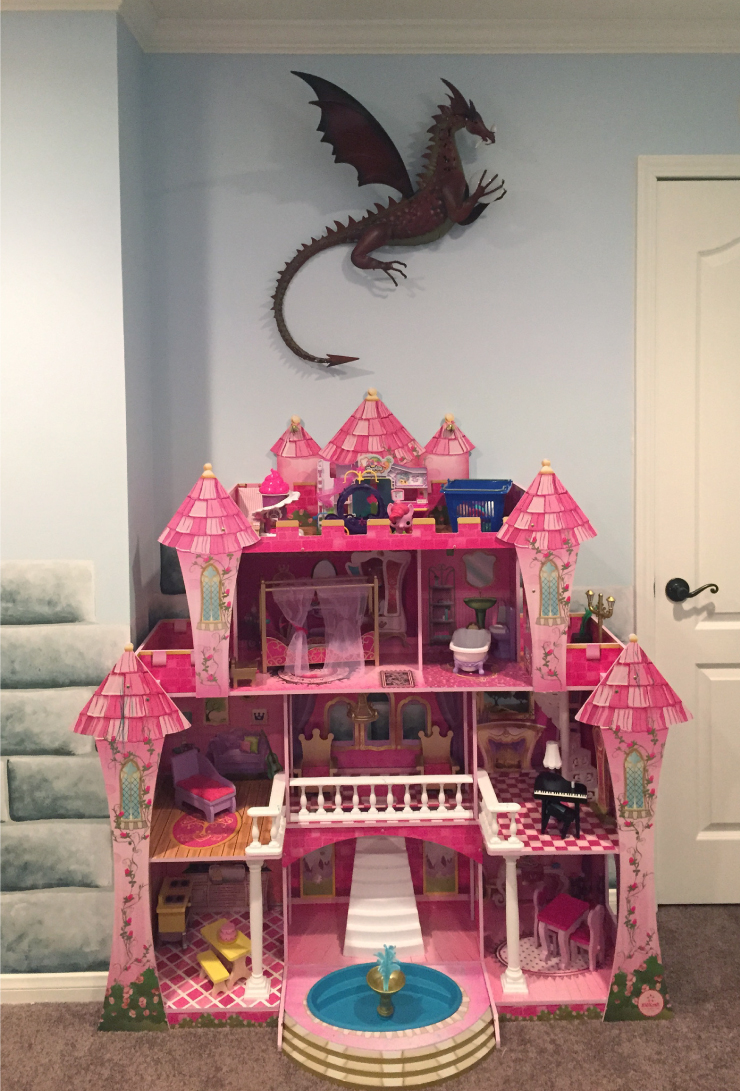
For Christmas this year my daughter received a giant pink dollhouse/castle from her grandparents. Upon assembly, Christmas eve night, it became abundantly clear that it was not going to fit in her current room, and I wasn’t about to leave it in the living room. As it turns out, 4.5′ wide pink castles are good motivators to start pending home projects.
My son Rory, is also turning two this month. My husband and I had been planning on moving him and his sister into a larger room once he was big enough to sleep in a toddler bed. As he now is, and they need more space than is available in their current room, it was time to make the move. However, I just couldn’t move them into a new room without first designating a theme. And, being a fantasy nerd and lover of castles- real and imaginary, the choice was easy.
Below are the materials and steps needed to paint a castle wall.
Materials:
Paint:
1-2 colors for wall- I used Spacious Skies P500-1 and Dew Point M450-1
3 colors for castle- 1 mid-tone gray for wall base color, 1 light gray/white for highlight and 1 dark gray for shadow- I used Silver Marlin N360-2, ULTRA PURE WHITE, and Graphic Charcoal N500-6
Roller and roller covers
Small bucket- for water
Sponge (sea or all purpose)
2 or 3″ Paintbrushes
Detail brush
Painter’s tape
Paint trays
Level
Ruler
A pencil or piece of chalk
The room I was moving the kids into was already painted Spacious Skies P500-1, a light blue and kid friendly color. To save on time and effort painting, I decided to incorporate the color into the room design. The plan was to make the room appear as if it was positioned on top of a castle tower, surrounded by blue skies. To reinforce this look I decided to first paint a horizon with an ombre technique.
Step 1: Paint your wall, add a horizon (optional)
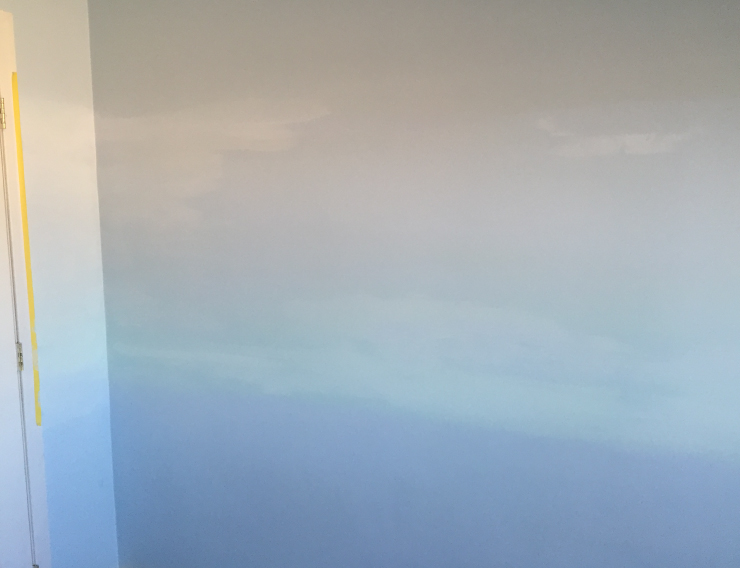
If you are going to repaint your wall a new color do so first. If you would like to recreate this room, you’ll need to paint the room a sky blue color. Once dry you can create a horizon using a lighter blue shade and an ombre painting technique outlined here. Allow to dry.
Step 2. Draw a height guideline
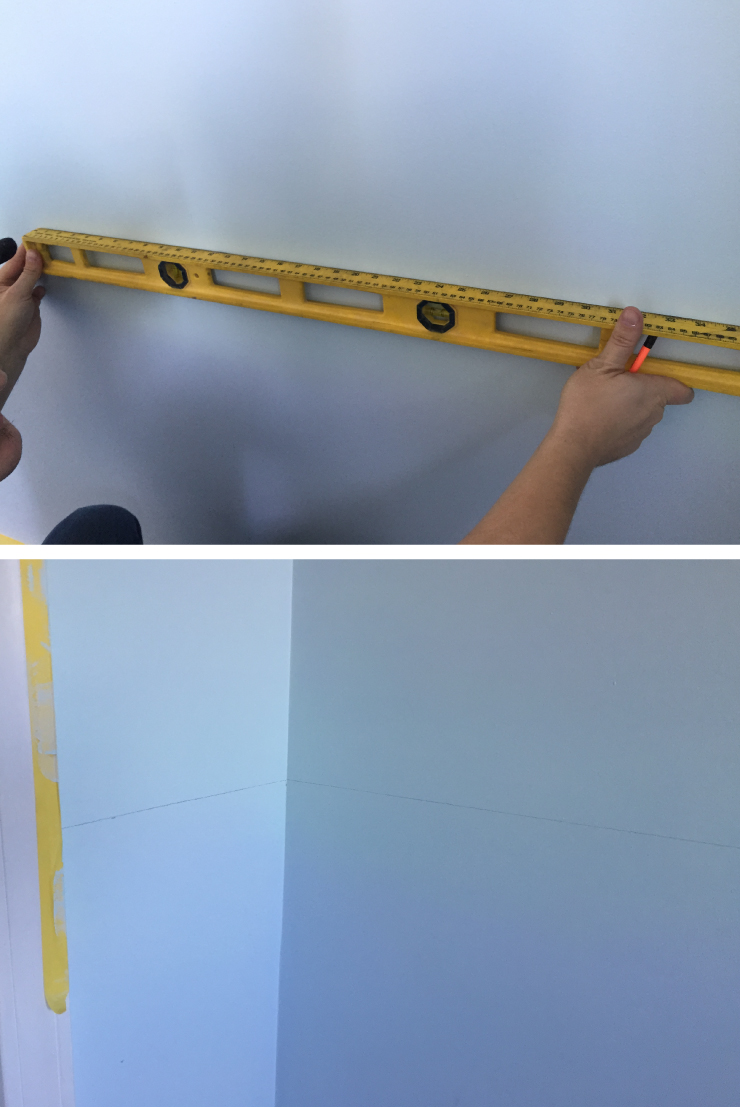
Decide how high you’d like your castle pattern to reach up the wall. Measure and mark the castle wall height with your ruler. With your level, trace a height line around the room. I wanted the battlements to cut across the horizon, making my line 36 inches from the floor.
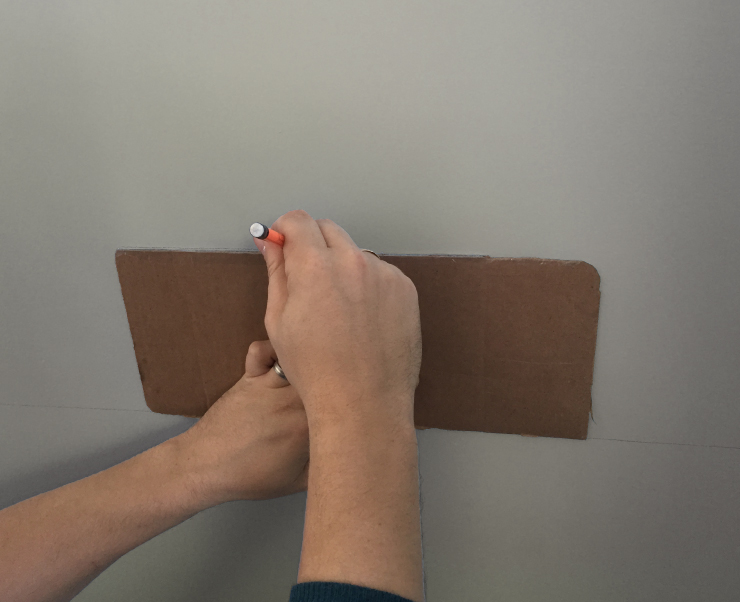
Step 3: Make a stone template
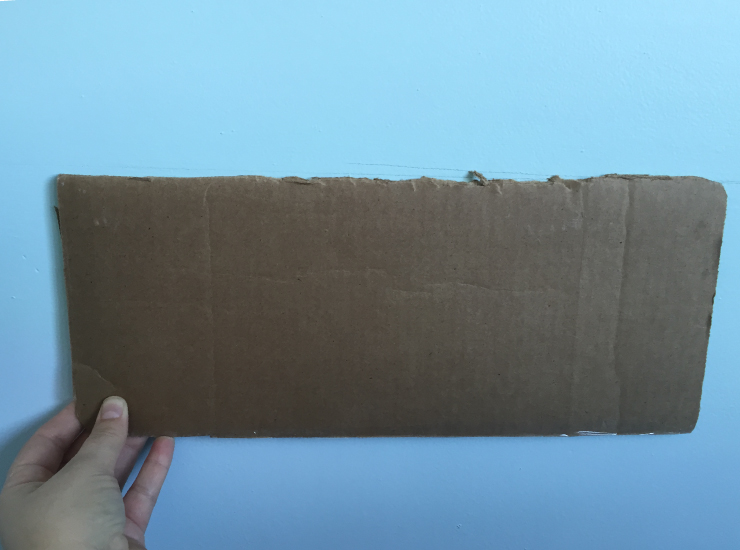
You can design your stone, or stones, in any shape- they don’t have to be square, or the same size. I created mine from a piece box top off of my son’s diaper box. I rounded a couple edges with scissors to make it appear more natural.
Step 4: Outline battlements
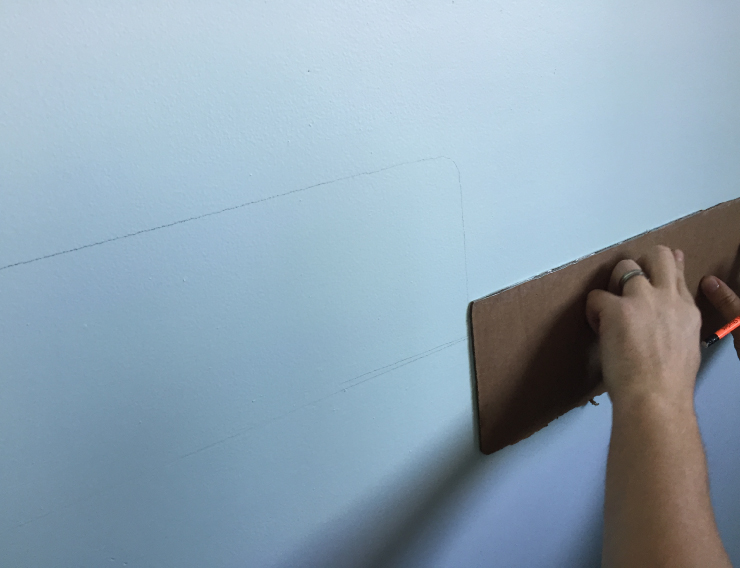
Use your template and a pencil/chalk to space and outline the castle battlements. My battlements were only one stone above the wall, but you can make them higher if desired.
Step 5: Tape castle outline
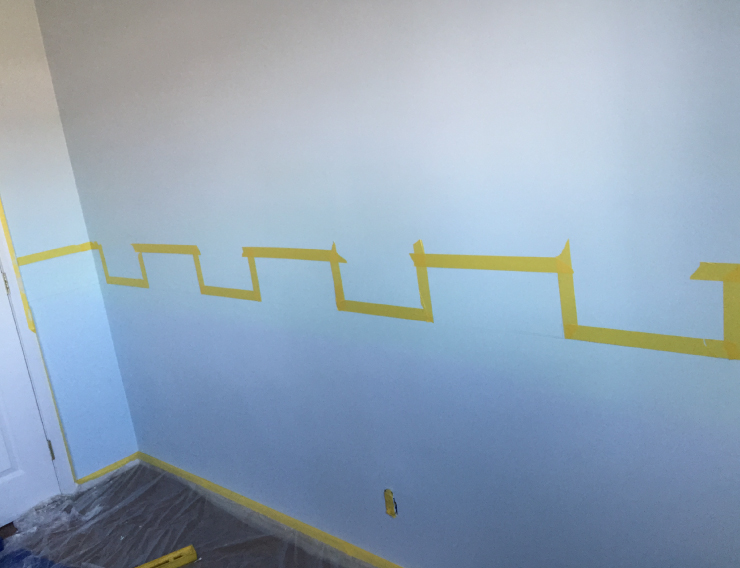
With painters tape outline the castle around the lines you just traced.
Step 6: Paint castle base color
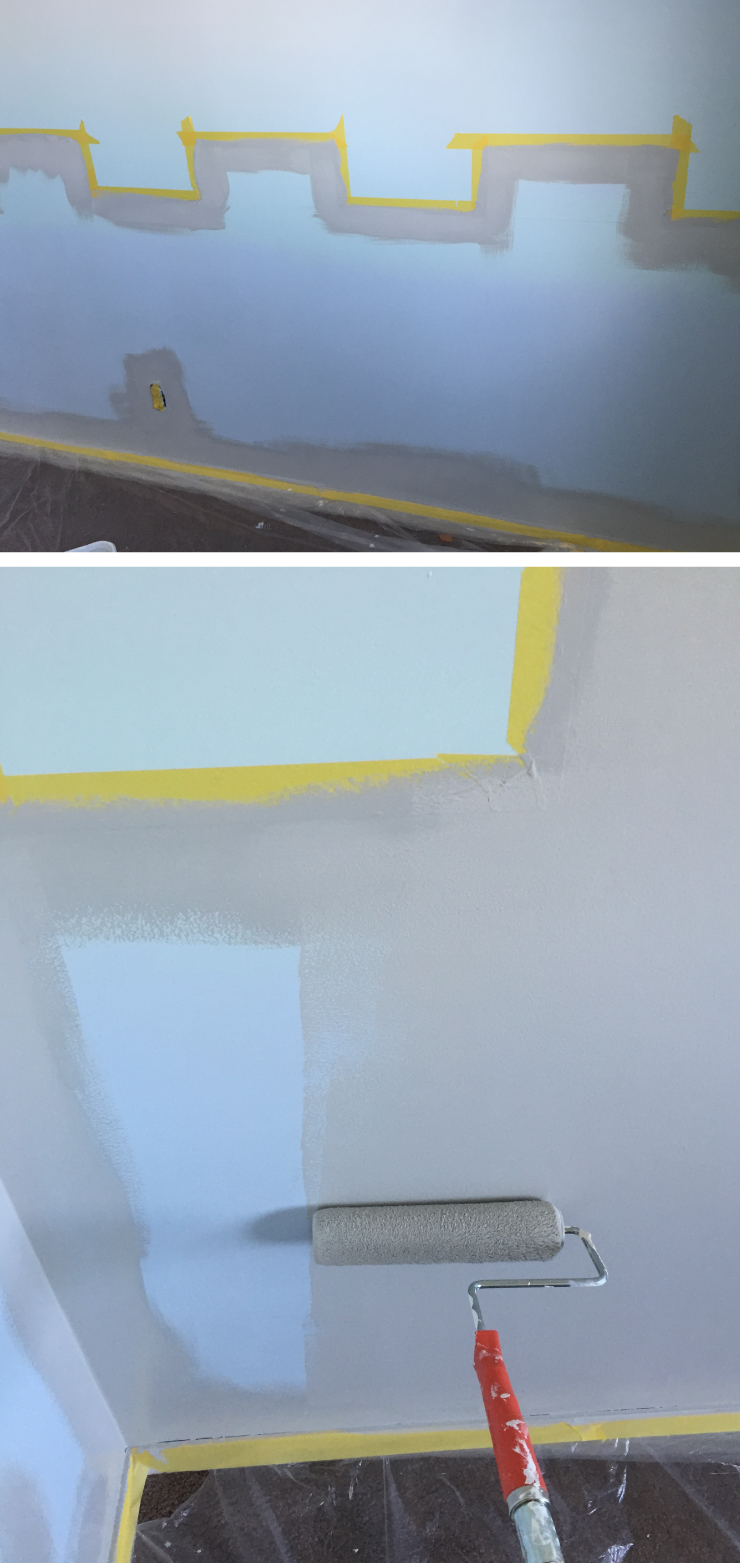
Cut in corners and edges with a paintbrush first, then roller in the rest. Allow to dry.
Because you will be painting over this, only one coat is needed. Your base color gray will become the mortar and blending color of the stone. In my observations mortar is always lighter than the stone, however, if you desire, you can paint the mortar a darker gray.
Step 7: Remove tape
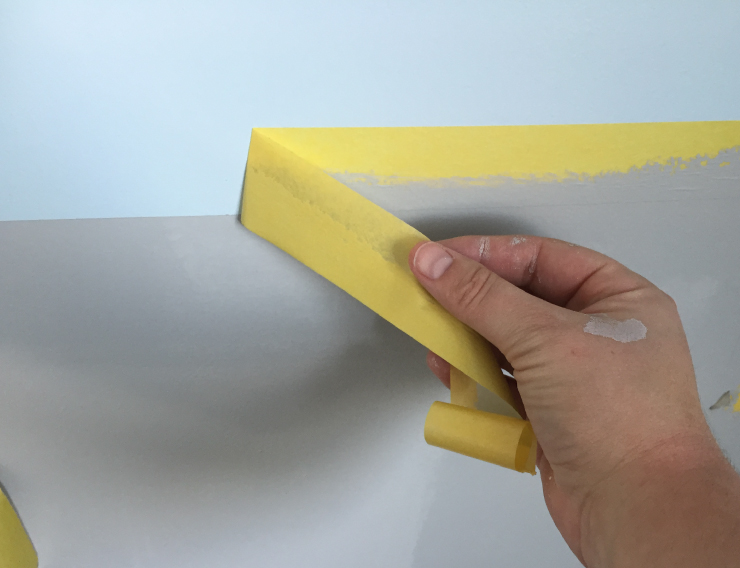
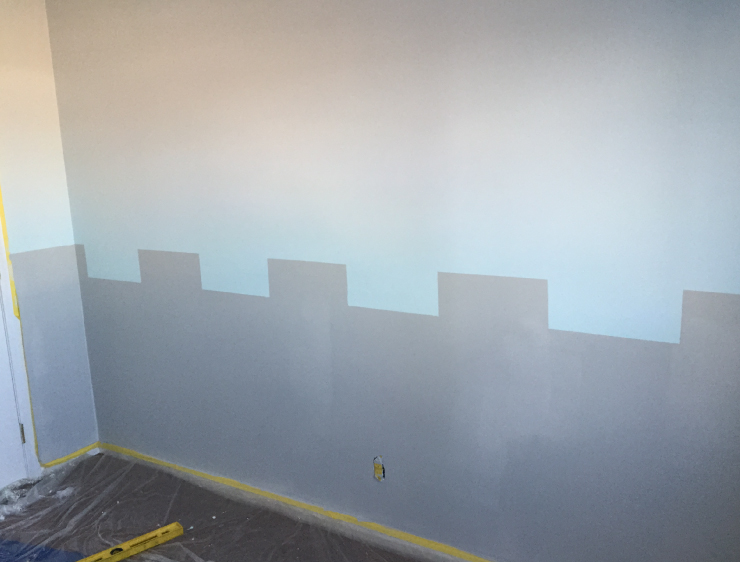
Remove the tape to reveal the castle outline.
Step 8: Outline the stone pattern
With a pencil, or chalk and your stencil, begin tracing the stone pattern on the wall line by line, staggering the stones as you go. Don’t concern yourself too much with lining things up perfectly. As in a real castle there will be smaller and larger stones to make the wall fit the space.
Step 9: Paint stone shadow
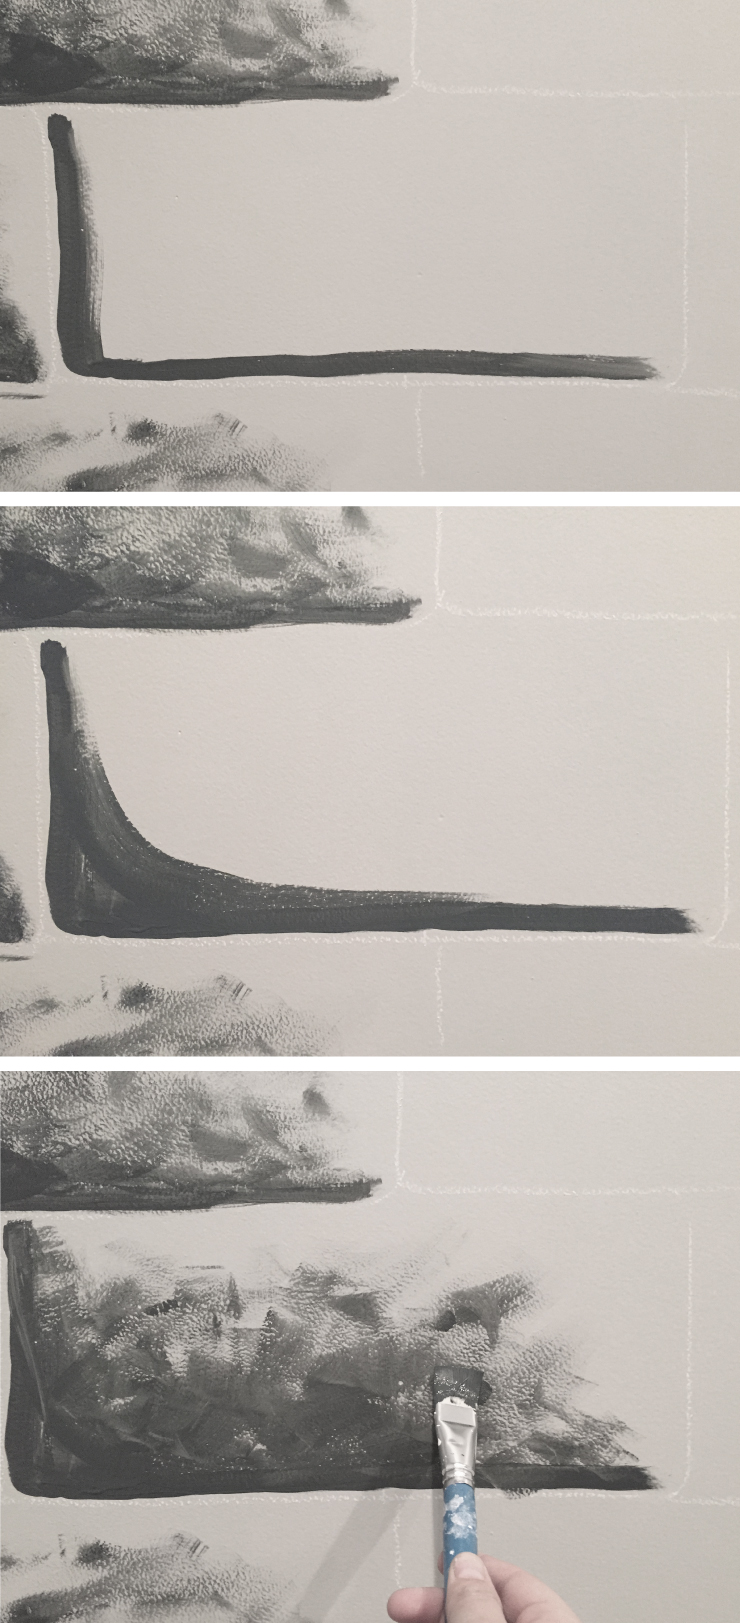
With your dark gray color and a small paintbrush make a capital “L” shape from the upper left hand corner to the lower right hand corner. Fill in the corner and apply some texture from the lower left hand corner to the upper right hand corner. This texture will give each brick individuality and dimension. Repeat this for each brick on the wall.
When complete you should be begin to see the stone dimensionality appear.
Step 10: Prep your sponges
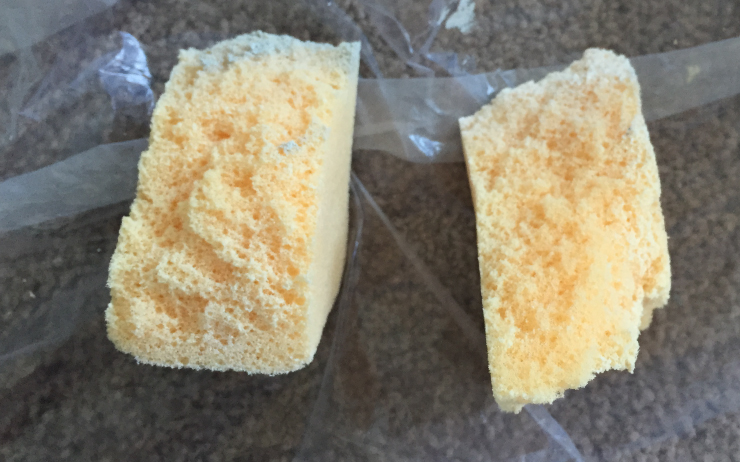
You can buy sea sponges at your local hardware or art store, or you can buy a standard all-purpose sponge and tear it into pieces. I tore the corners off of an all-purpose sponge, which gave me a corner for detail application and a round edge for blending.
Step 11: Paint highlight
For this step, you will need your white (or light gray) paint color and a small bucket of water. With one sponge and light color paint an upside down “L” from the upper left hand corner to the lower right hand corner. As you did with the dark color, fill in the corner towards the middle of the stone.
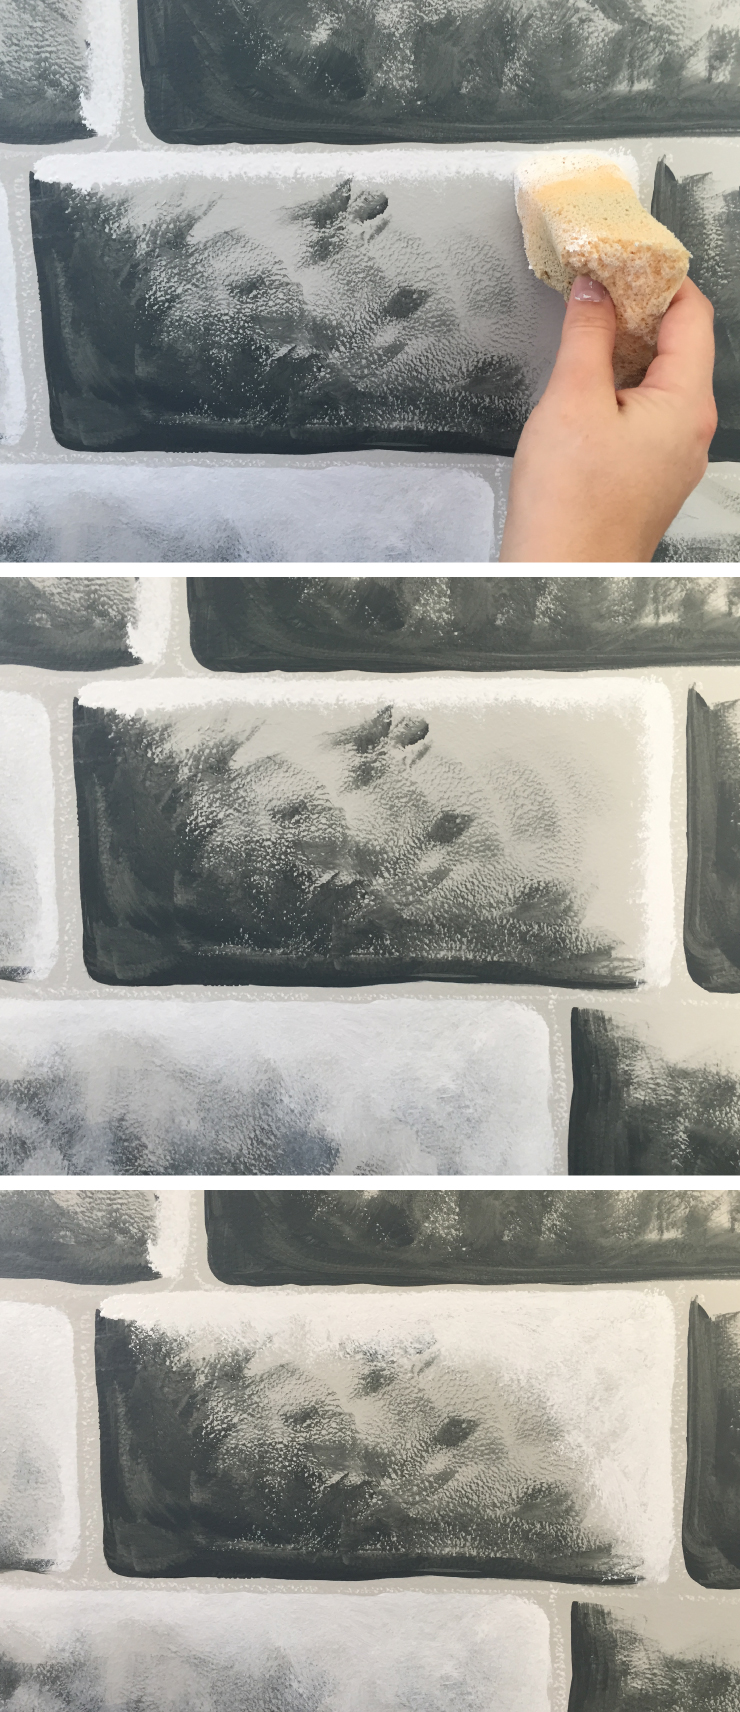
Step 12: Blend colors
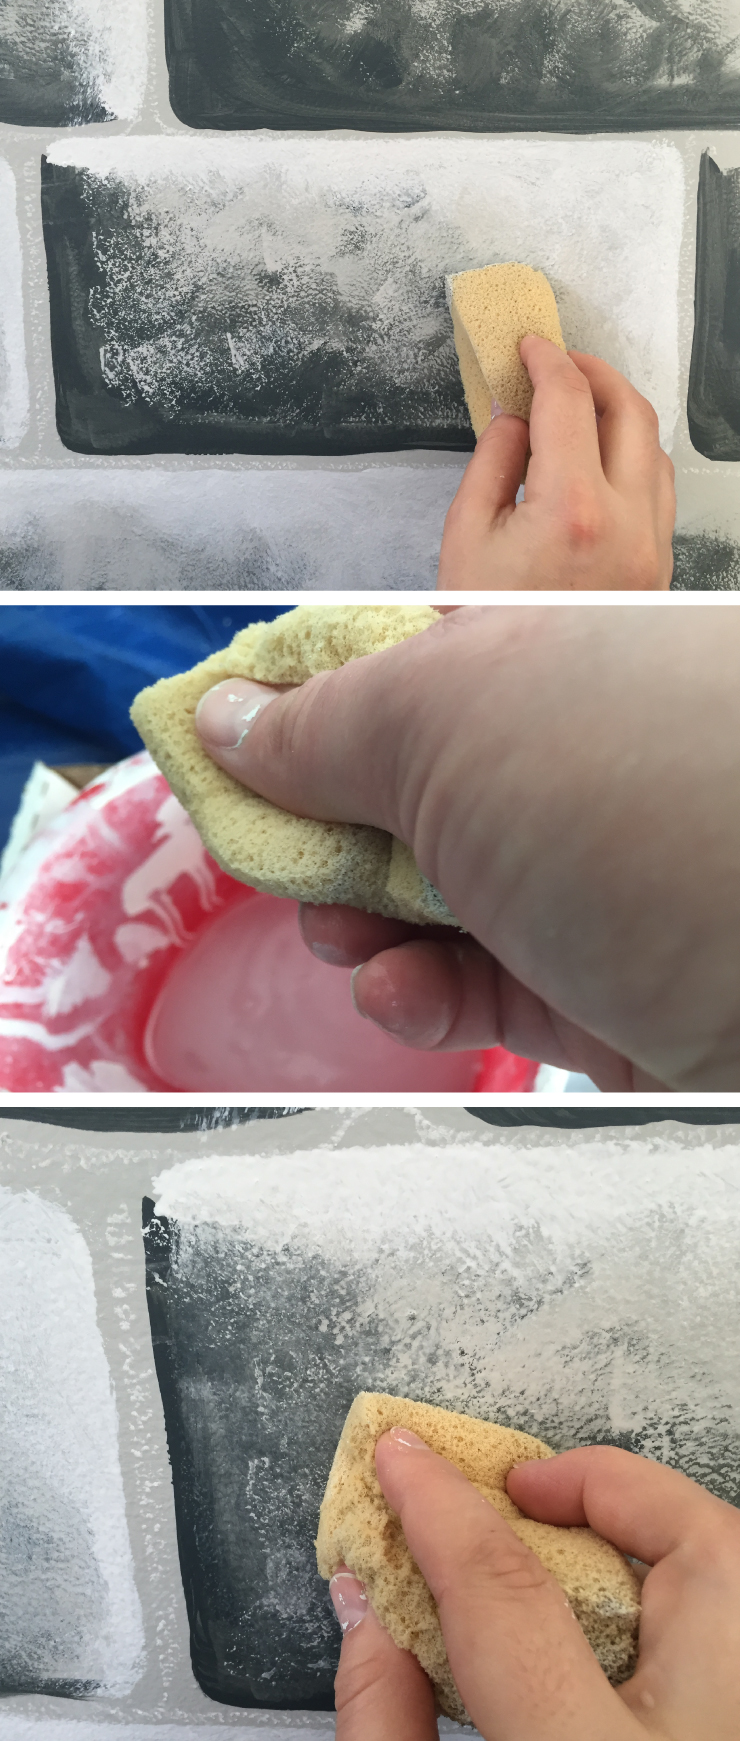
With your other sponge dab the base gray color in the middle of the stone over the dark and light colors. Dip the same sponge in your bucket of water and squeeze out excess water (too much water will cause paint to drip and run down the wall). With a damp sponge blend the base color over the light and dark colors. Stop when satisfied with the look and repeat for all stones on the wall.
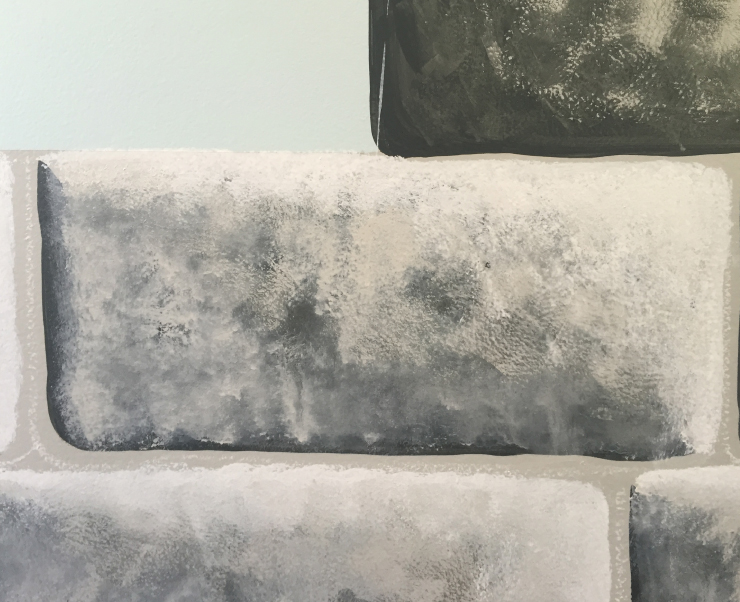
Imperfection is key for this effect. Each stone should have a unique appearance just as it would in a real castle.
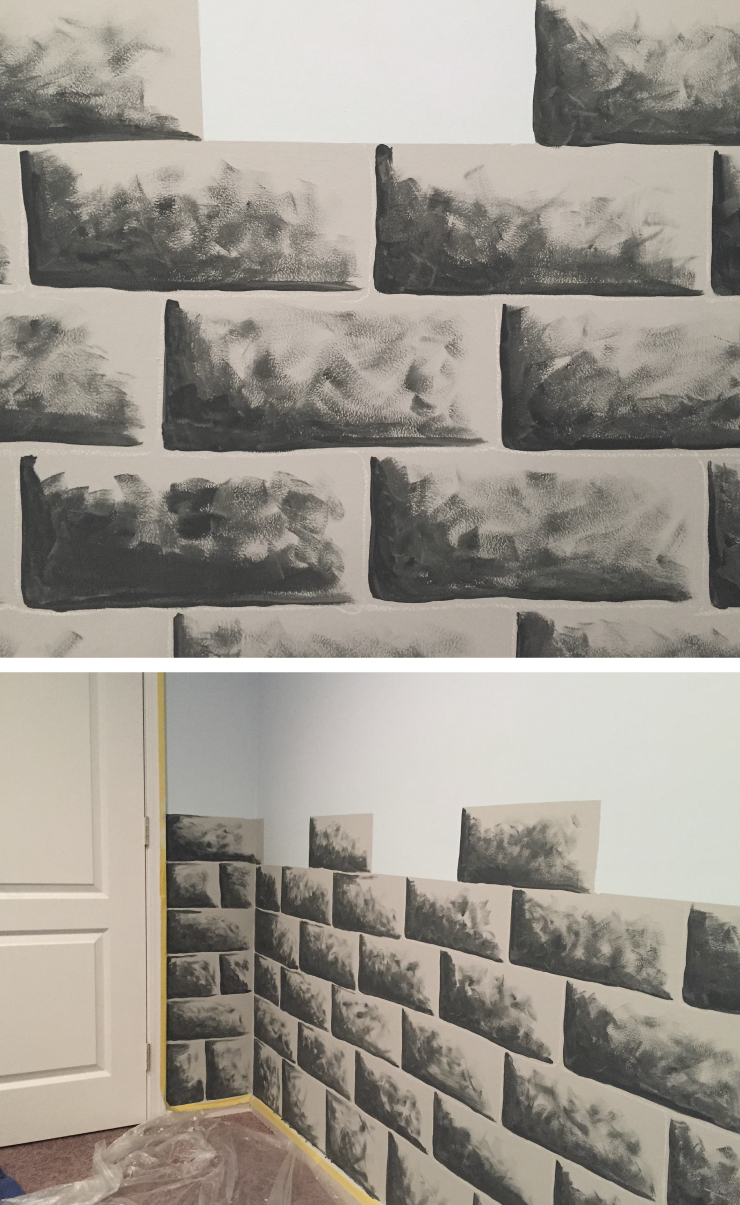
When the stones have dried, take a clean, wet washcloth and wipe away the pencil/chalk lines.
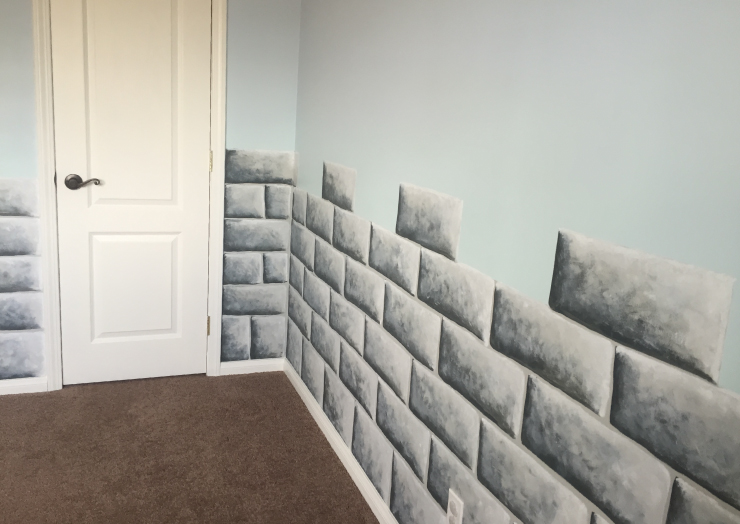

When finished you’ll have a 3-dimensional wall of stone. The perfect home for a pink castle…and it’s a dragon!
Colorfully yours,
Quinn
DIY Projects
How to Paint a Castle Wall
TIME
BUDGET
COMPLEXITY

THE BEST tutorial on this that I’ve found!!
Thank you, that was so helpful!
Wow, this castle wall looks amazing! This is perfect for my daughter’s room. Thanks so much for the detailed tutorial, I really appreciate it!
Thank you for visiting our blog and Happy Painting!
Colorfully Yours,
Deanna