Love rings, but can’t keep track of them to save your life? Unfortunately, there are those of us that are, “out of sight, out of mind” types, forgetting our rings when taking them off to wash our hands, cook meals, or get ready for bed. If this sounds like you, this easy DIY cement ring holder is the perfect preservation project.
Materials needed:
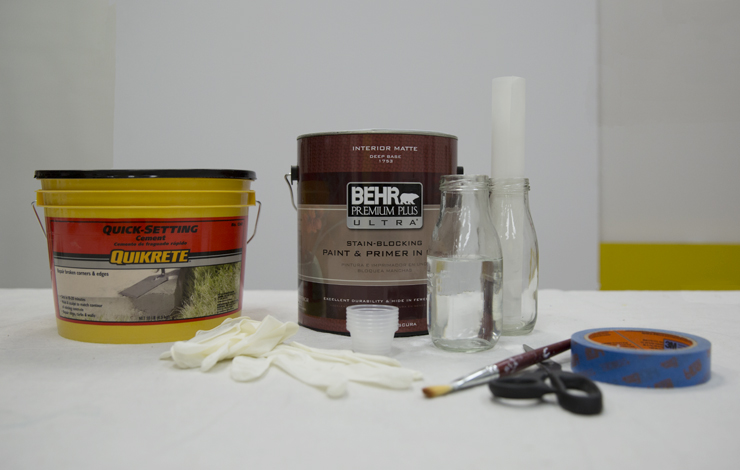
Quick-Setting Cement No. 1240
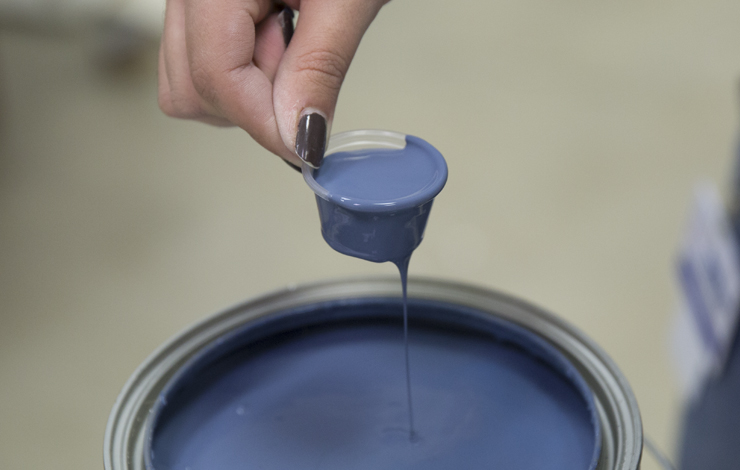
Paint – in the color/s of your choice (we used Midnight Show T17-17)
Clean water
Tracing or wax paper
Painters tape
Small containers
Detail paint brush
Disposable gloves
Scissors
Sandpaper
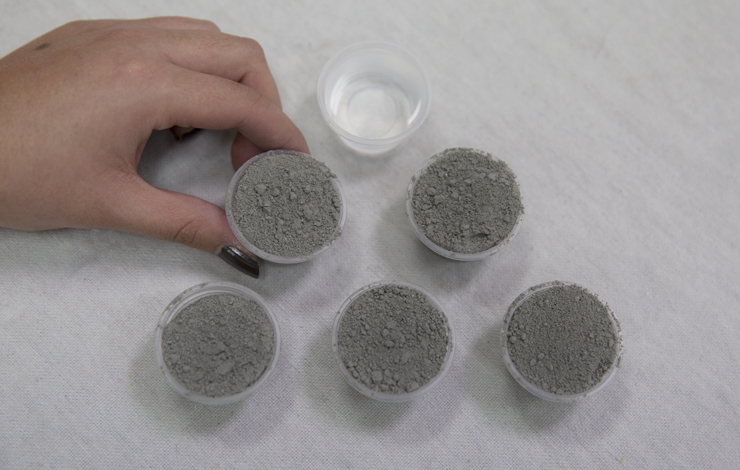
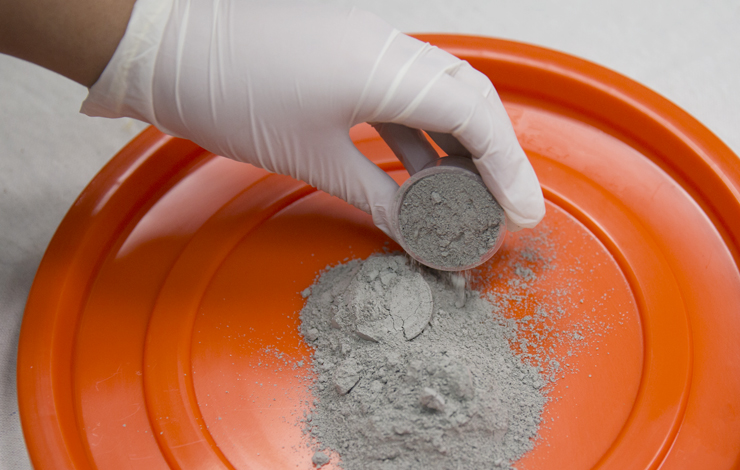
Step 1: Measure out cement needed
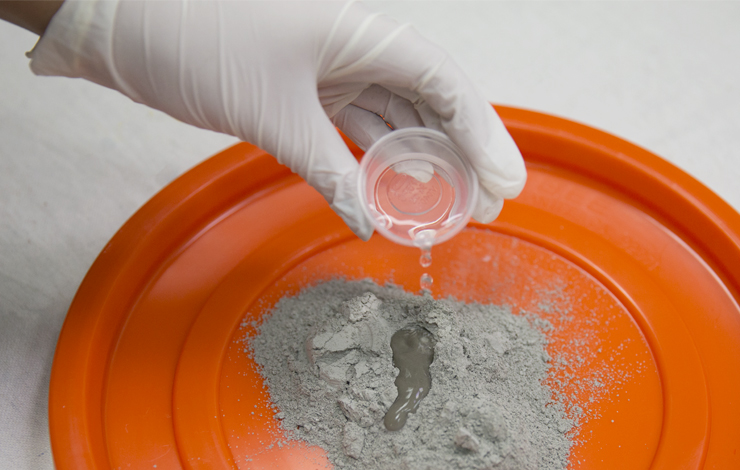
In order to get the right consistency, the ratio of the cement to water must be 5:1. Use small containers to help get this proportion right.
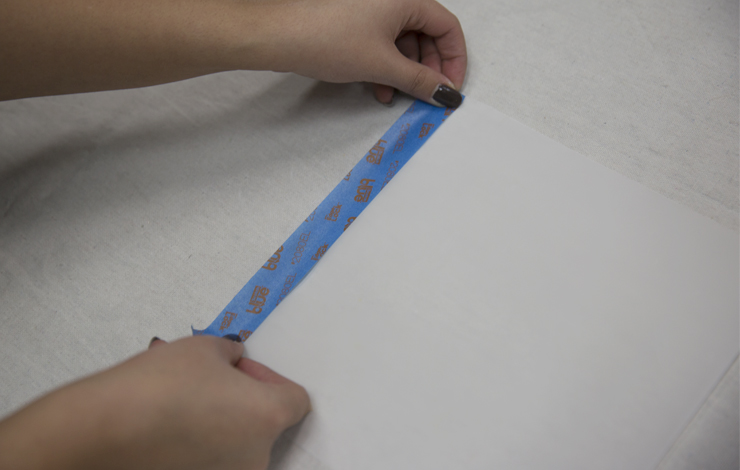
Step 2: Tape One Side of the tracing paper
After cutting a square piece of tracing paper, attach a length of painters tape along one side.
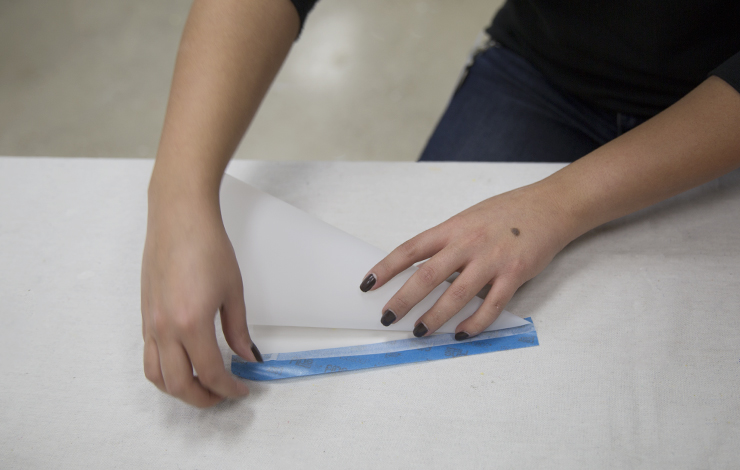
Step 3: Create a cone
Create a cone by rolling the tracing paper over from one corner of the square to the side with the taped edge. Secure the cone together with the painters tape.
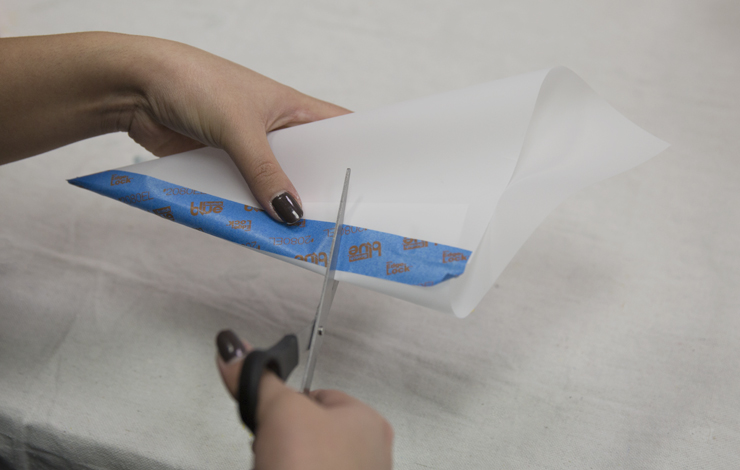
Cut your cone to desired length with scissors.
Step 4: Add water to cement
Put on your gloves and begin mixing cement by slowly adding water to it.
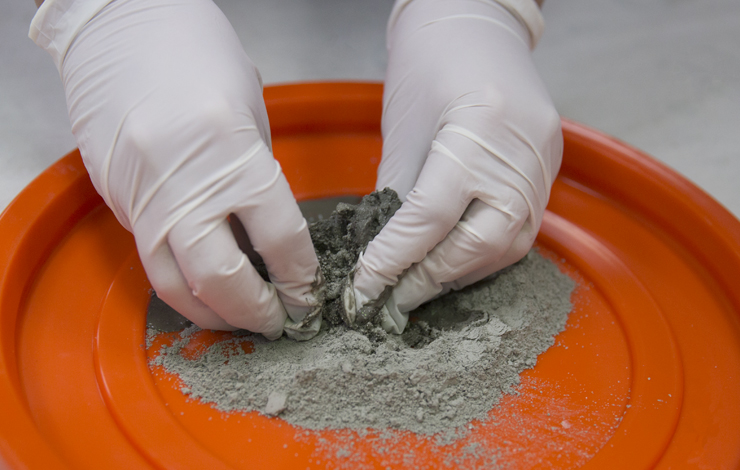
Step 5: Mix
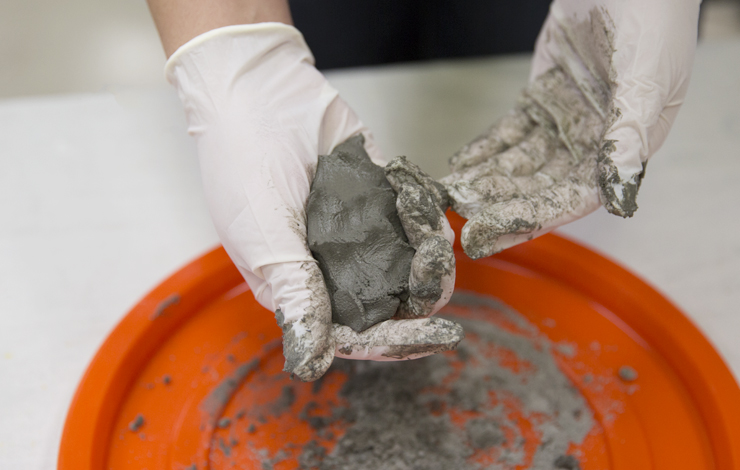
Mix water with cement slowly by massaging them together. Continue the process until the cement takes on a clay like consistency.
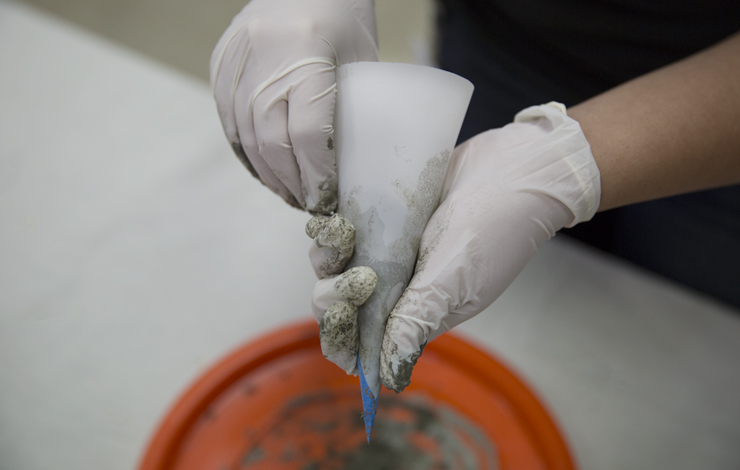
Step 6: Fill cone with cement
Push cement into the cone, gently press out the air bubbles as you do so.
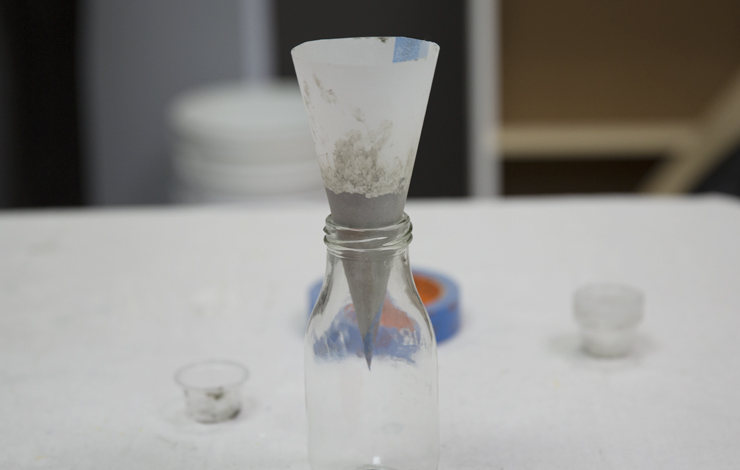
Step 7: Let dry
Place the cone in a container and leave it to set for 12 hours.
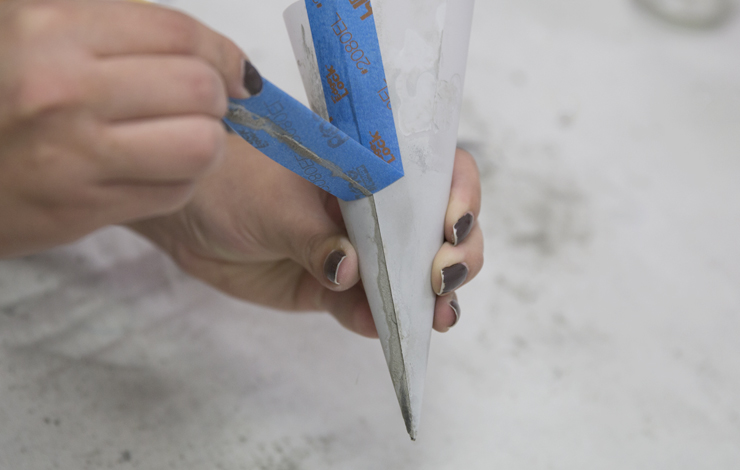
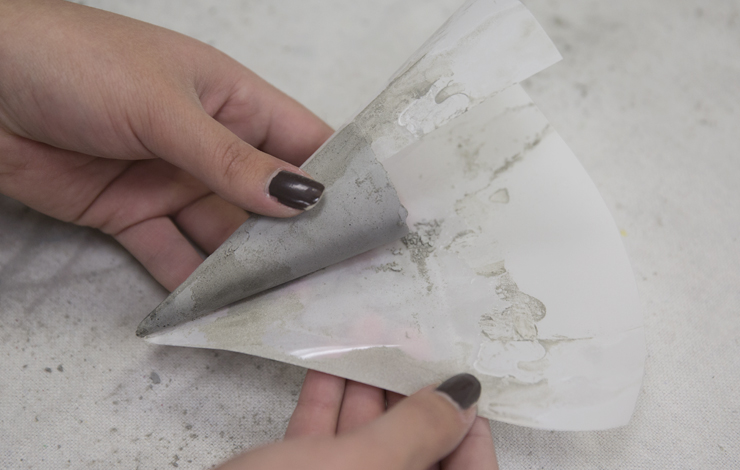
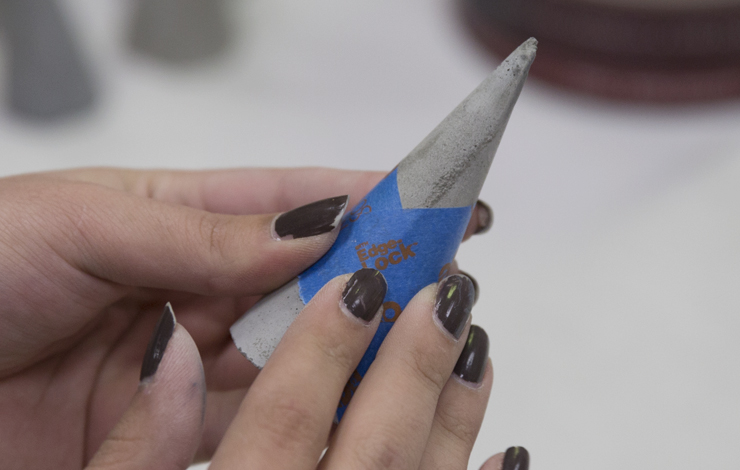
Step 8: Remove cement cone from paper
Slowly remove the painters tape from the head of the cone and unwrap the tracing paper.
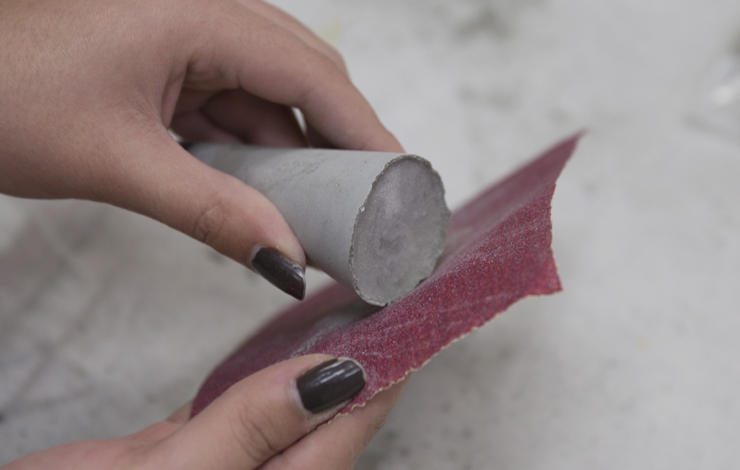
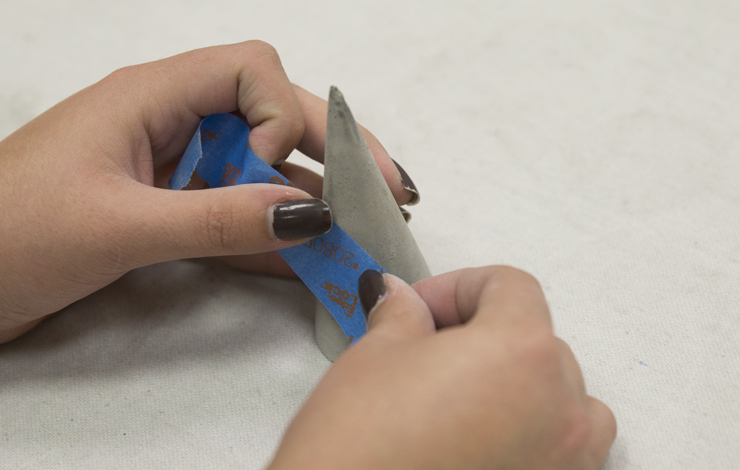
Step 9: Sand
Step 10: Design
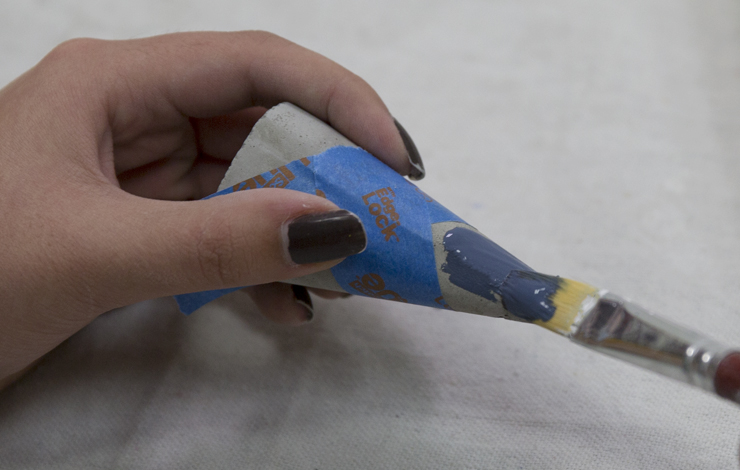
You can choose to paint the whole cement cone, or give it a custom design. Use painters tape to mask out a simple design.
Step 11: Paint
Step 13: Display in our desired place
Place your ring holders wherever you might take off your rings. Soon you’ll be in the habit of setting your rings on them and (hopefully) always know just where to look!
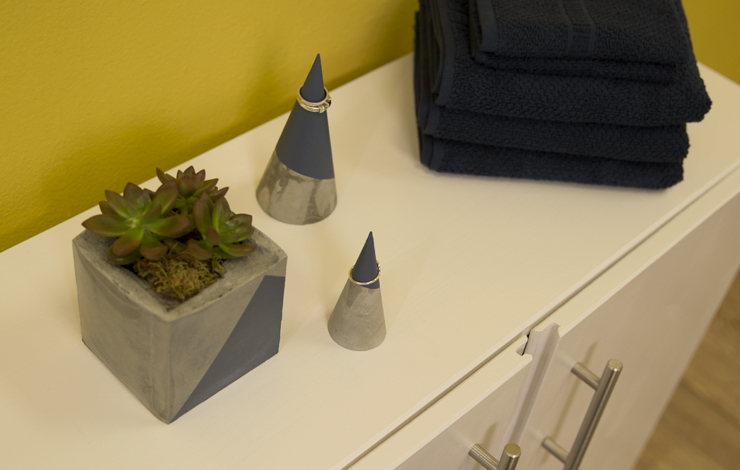
Wall: Luscious Lemon HDC-MD-24, Cabinet: Ultra Pure White, Accent: Midnight Show T17-17
Colorfully yours,
-Sha Khezri