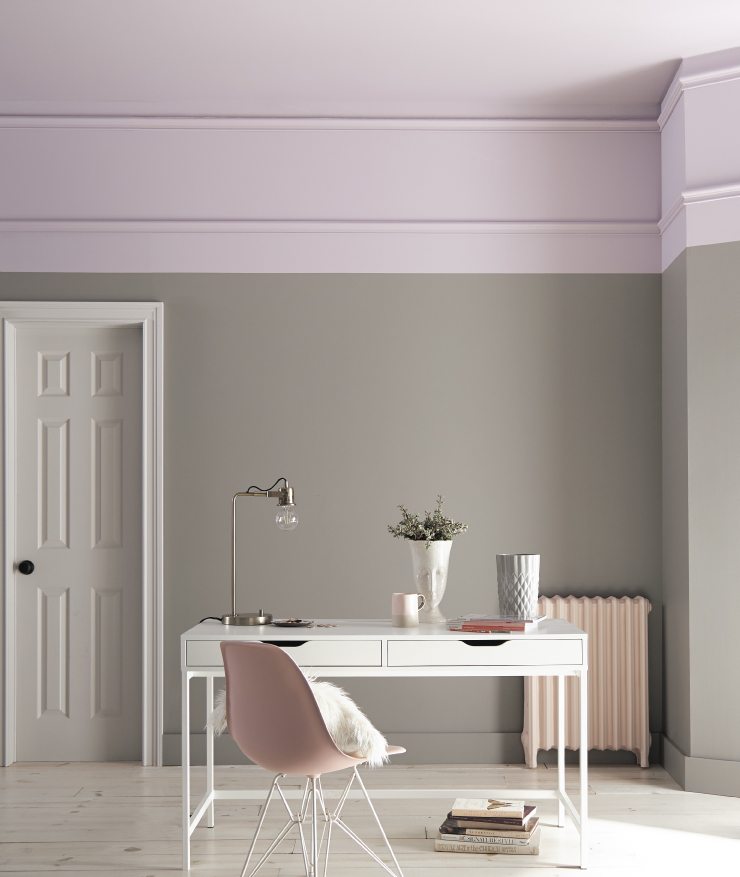
High cathedral ceilings, though cherished for their ability to open up a space, can make a room feel a bit vacant. If you would like to add some intimacy to your high ceiling space, check out or 2019 Color Trends ceiling accent project below.
[sciba leftsrc=”https://www.behr.com/colorfullybehr/wp-content/uploads/2018/08/Ceiling-Accent-Before.jpg” leftlabel=”” rightsrc=”https://www.behr.com/colorfullybehr/wp-content/uploads/2018/08/Ceiling-Accent-After.jpg” rightlabel=”” mode=”vertical” width=””]
To achieve this transformation you will need the following:
• Molding- chair and crown
• Paint- in the colors of your choice (we used Elephant Skin PPU18-16, and Standing Ovation N570-2)
• Painter’s Tape
• Paint Rollers
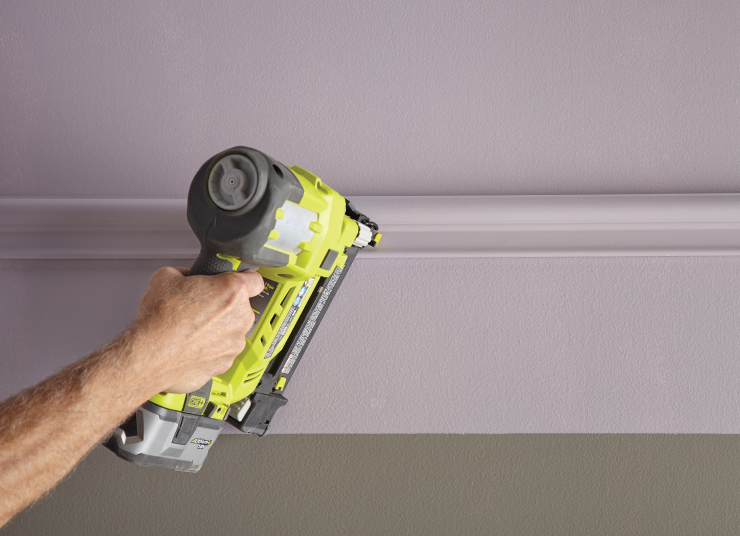
• Brad Gun
• Level
• Tape Measure
• Miter Saw or Hand Saw
STEP 1: Prep Wall
Remove all furnishings and décor items from on and around wall. Measure the length and width of the walls you will be painting and installing molding on. Mark on the wall where you’d like the two colors to meet.

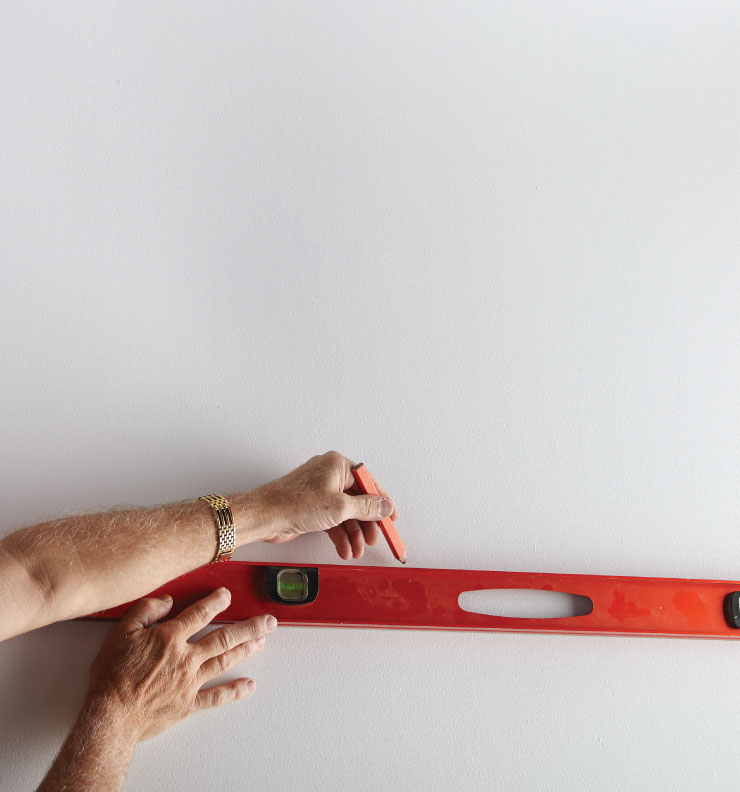
STEP 2: Divide Wall In Two
With a pencil and a level draw a line across the wall from the mark you just made.
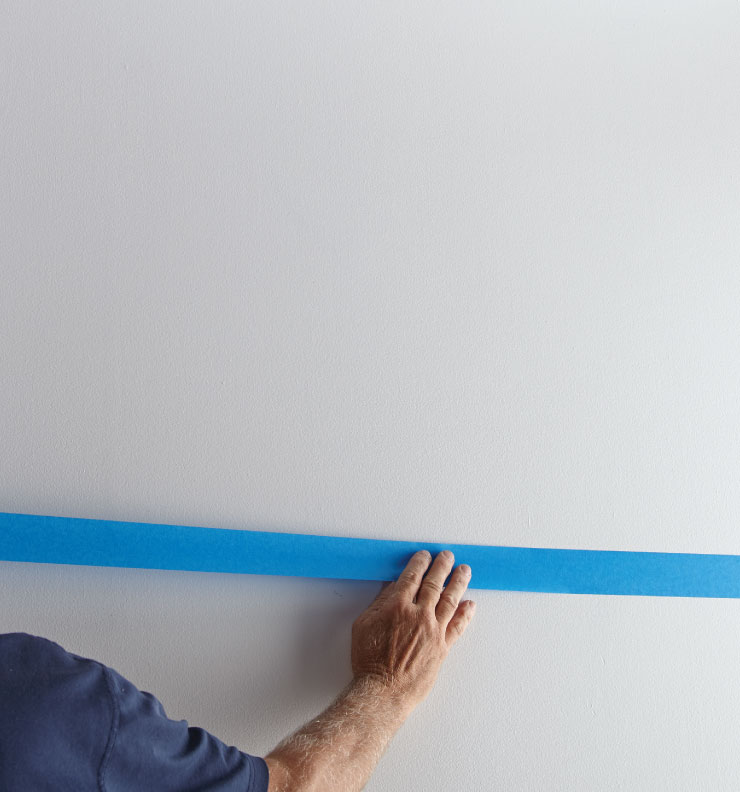
STEP 3: Tape Above Line
Apply painter’s tape along the wall above the line you just drew.
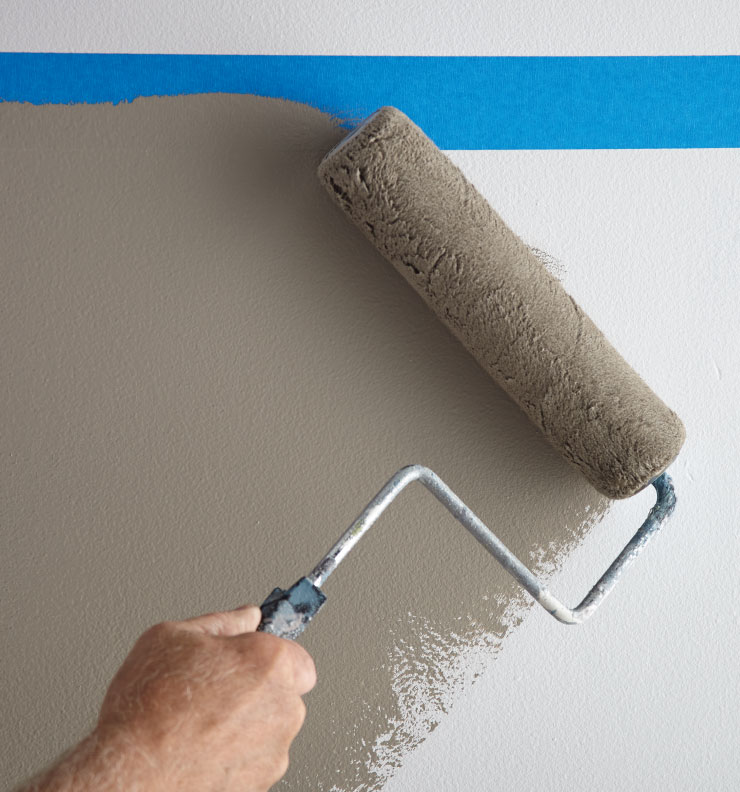
STEP 4: Paint Color 1
Paint the wall below the tape with the color you have chosen for the lower wall. Allow 2 hours to dry and apply second coat if necessary/desired.
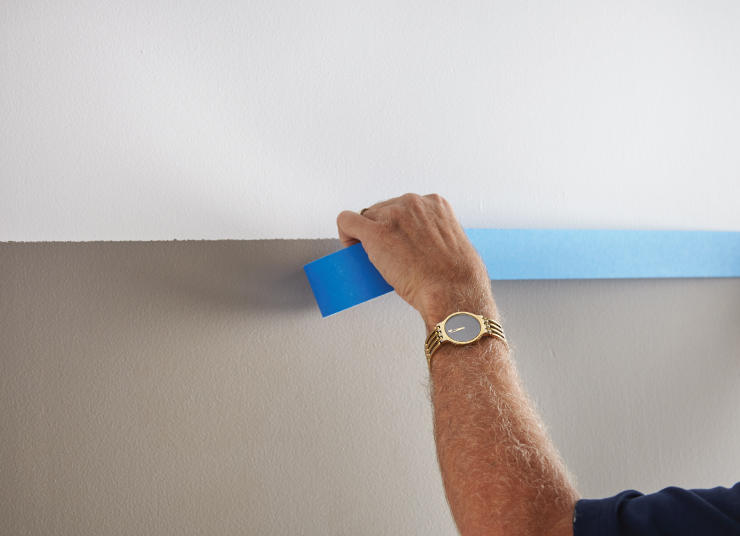
STEP 5: Remove and Reapply Tape
Remove the tape from the first color and reapply painter’s tape along the top edge of the color just painted.
STEP 6: Paint Color 2
Paint the wall above the tape with the color you have chosen for the upper wall. Allow 2 hours to dry and apply second coat if necessary/desired. Remove tape when dry.

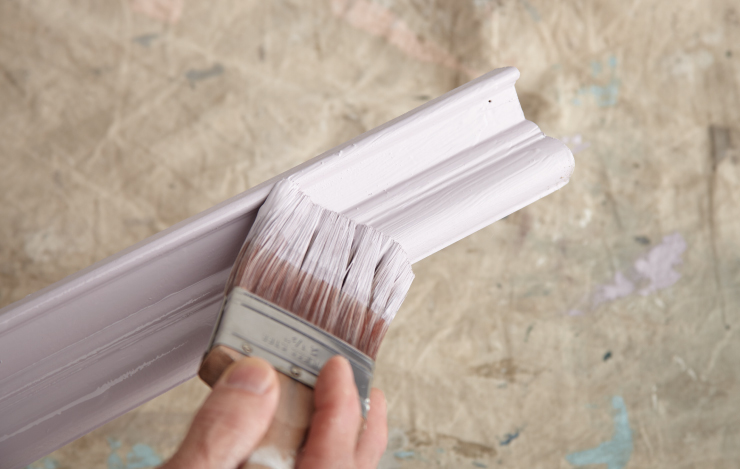
STEP 7: Cut and Paint Molding
Measure and cut your lengths of molding to size. Crown and chair rail work best for this look. Paint the molding the color selected for the upper wall. Allow 2 hours to dry and apply second coat if necessary/desired.
STEP 7: Cut and Paint Moulding
Measure and cut your lengths of molding to size. Crown and chair rail work best for this look. Paint the molding the color selected for the upper wall. Allow 2 hours to dry and apply second coat if necessary/desired.
STEP 9: Enjoy
Move your furnishings back in place and enjoy your new look.
Featured Colors: Upper wall and ceiling- Standing Ovation N570-2, Lower wall: Elephant Skin PPU18-16, Trim: Cotton Grey HDC-NT-20, Accent: Sand Dance S190-2
For more 2019 Color Trends inspiration see out our article on behr.com.
Colorfully yours,
Quinn
DIY Projects
How to: Ceiling Molding
TIME
BUDGET
COMPLEXITY