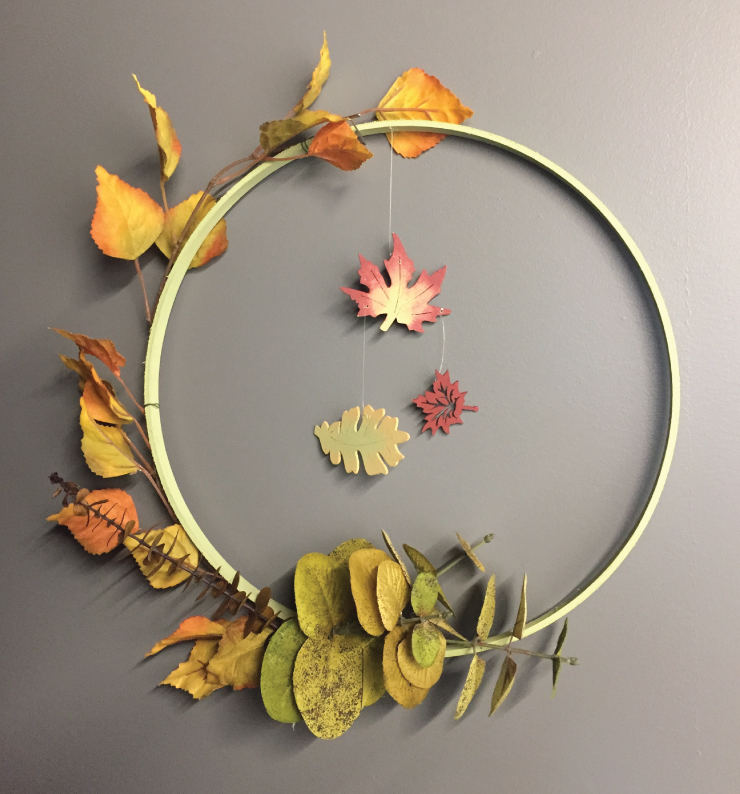
Looking to bring in a bit of seasonal ambiance into your space? Look not further than these customizable DIY floral wreaths. Whether it be spring, summer fall or winter, these lovely, hand crafted wreaths will bring just the right amount of festive flair to your home.
To complete this project you will need the following materials and tools:
Wooden embroidery hoop
Wooden cutouts in the season/holiday shapes of your choice
Paint-in the colors of your choice
Detail paint brush
Floral wire
Transparent fishing line
Power drill and drill bit (1/16″ or 1.5mm)
Artificial or dried flowers- in the season/holiday of preference
Wire cutters
Step 1: Gather materials
Line up all the materials you will need to complete your wreath. For our wreath we decided on a fall theme, but one could just as easily use this how-to to make any season themed wreath.

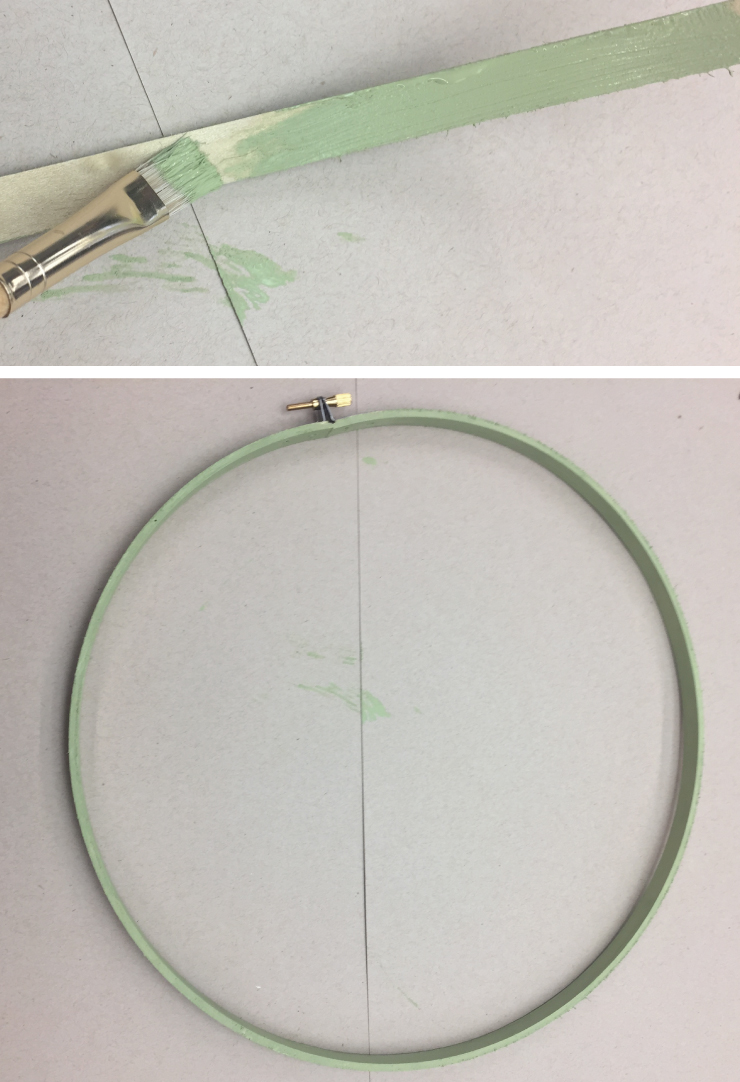
Step 2: Paint embroidery hoop
Paint your embroidery hoop in the color of your choice. We painted ours in Behr® Decorative Chalk Style Paint in Picking Apples BCP17.
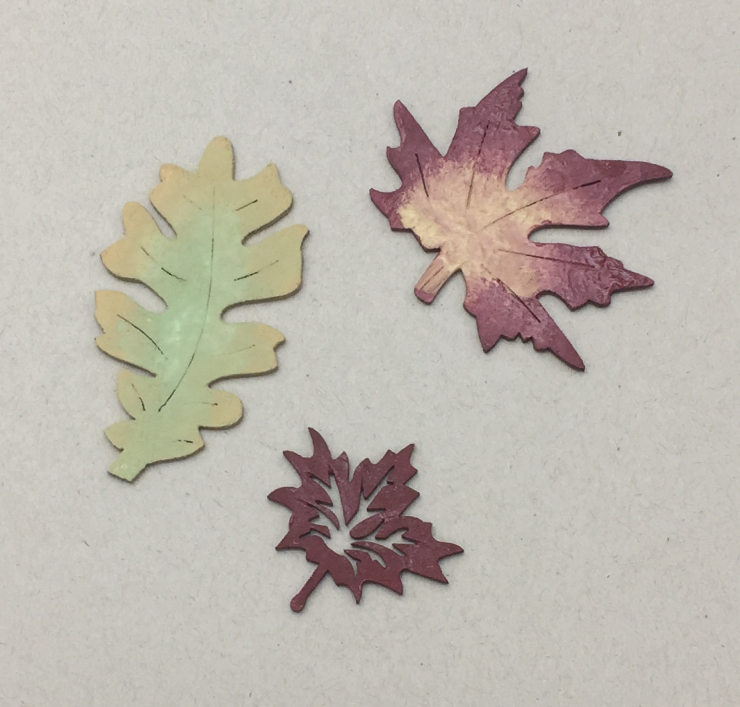
Step 3: Paint wooden cutouts
Select colors to paint your wooden cut outs, we used Red Ochre BCP06, Vintage Mustard BCP13 and Picking Apples BCP17. You can easily add a bit of dimension to your cutouts by blending your colors together. We created a turning leaves look by painting the cutout one color, then applying another color over it while still wet.

Step 4: Allow items to dry
Allow your hoop and cutouts to dry for a min of 15 minutes, or until they are no longer tacky. When dry flip cutouts over and repeat steps 3 and 4. Feel free to continue on to step 5 while they are drying.
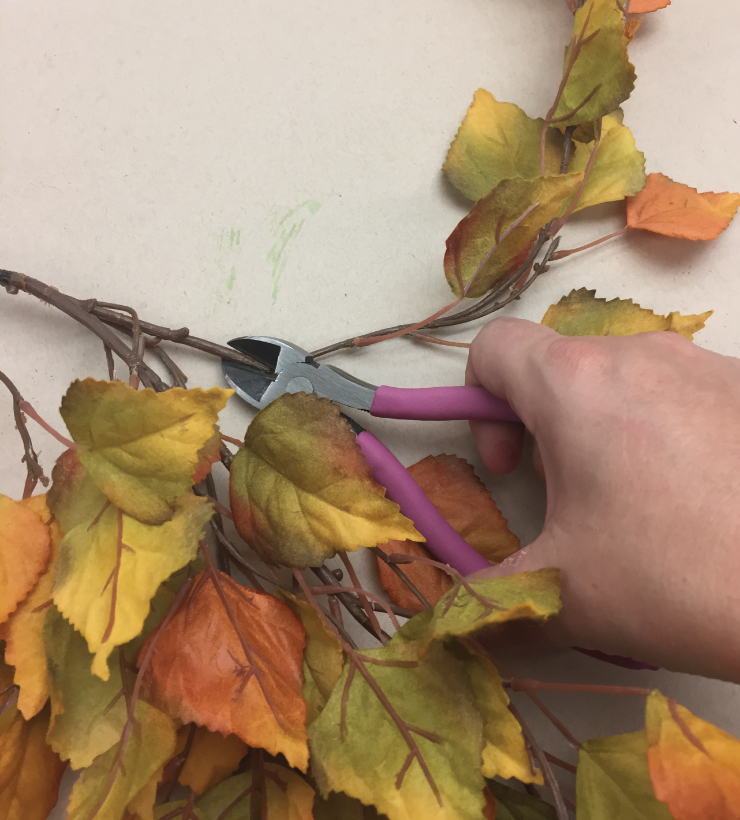
Step 5: Select floral pieces
Clip lengths of your floral selections to wrap around the embroidery hoop.
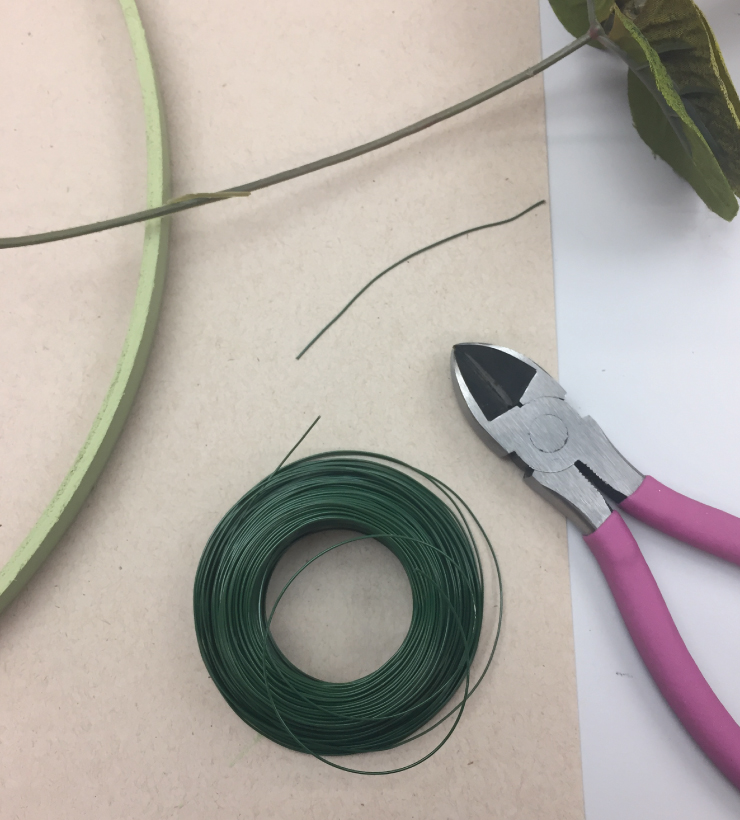
Step 6: Cut wire
Cut 3-4, 2.5″ pieces of floral wire. These will be used to attach your floral lengths to the hoop.
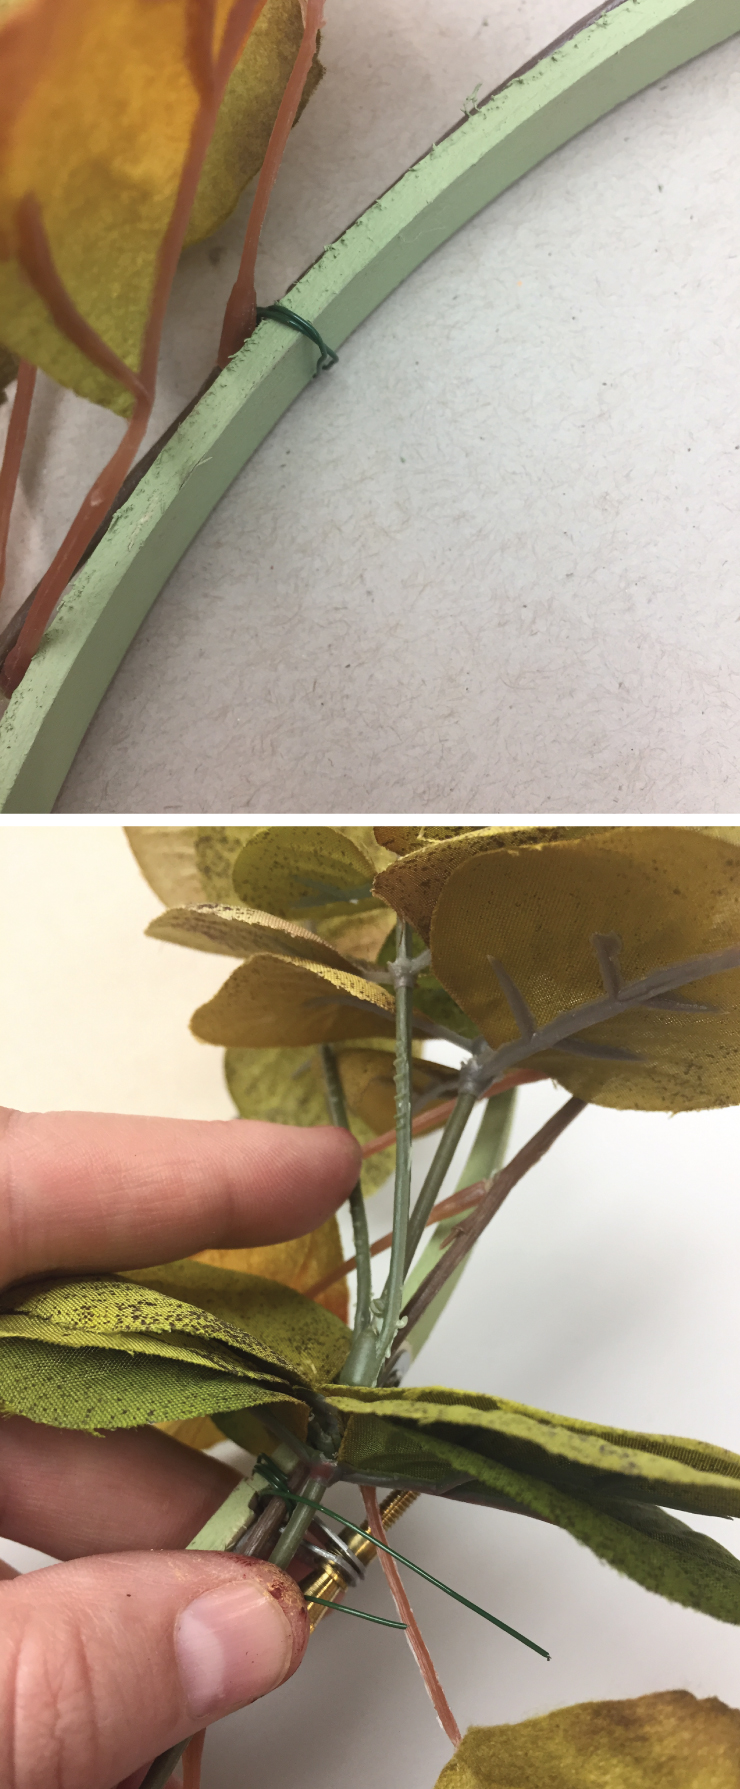
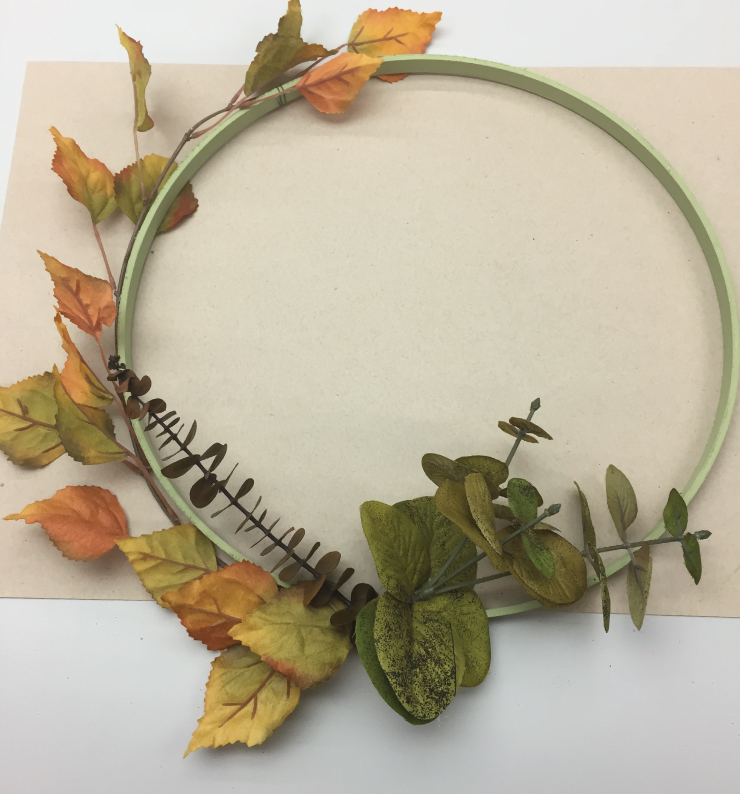
Step 7: Attach floral to hoop
Wrap your floral lenghts to the hoop and secure them in place with the pieces of wire.
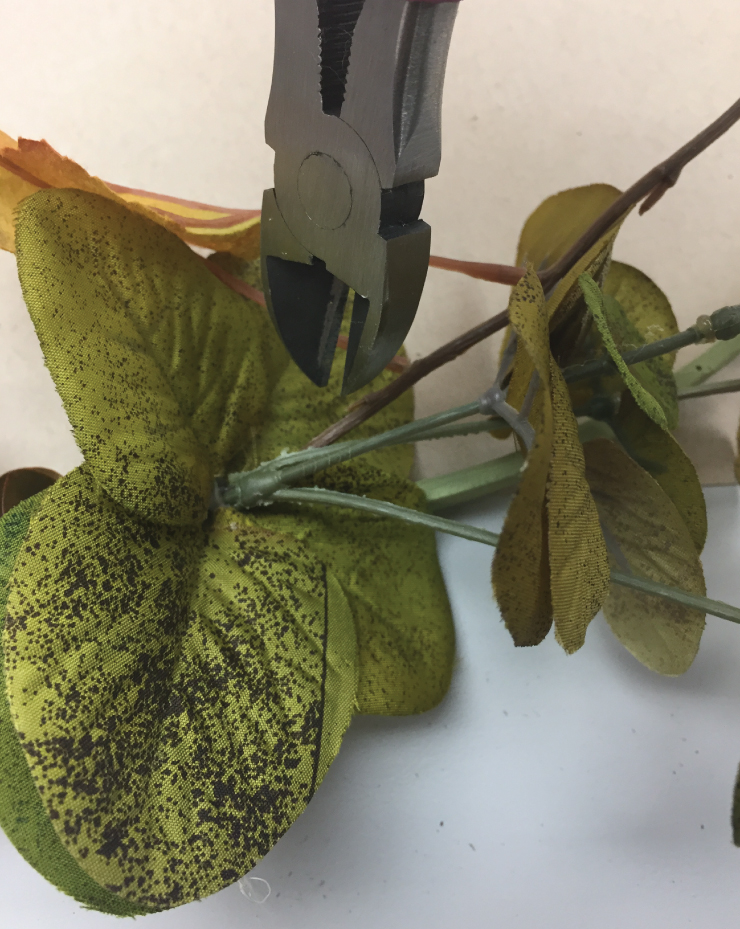
Step 8: Trim pieces
Clip off any stems or leaves that don’t align with the shape of your wreath.
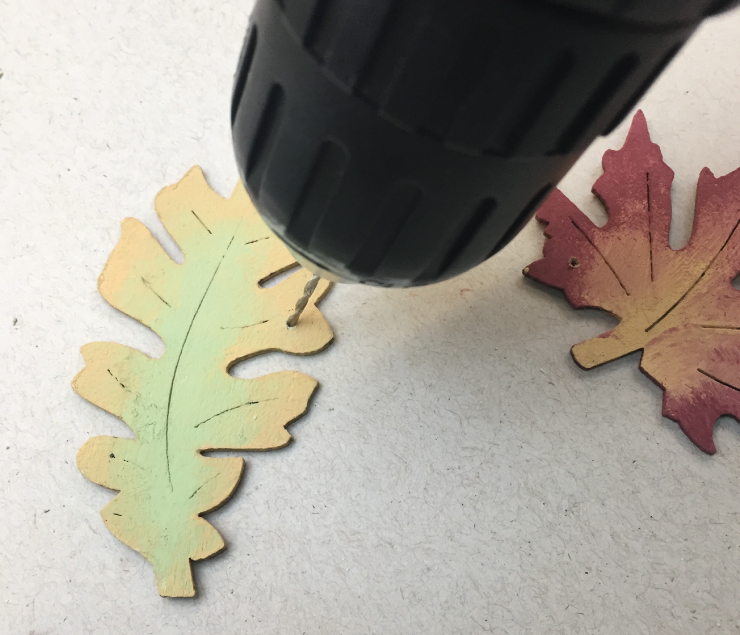
Step 9: Drill holes (optional)
To complete the look of your wreath you will need to suspend your cutouts within the hoop. If your cutouts already have holes this step can be skipped, otherwise drill small holes into the cutouts from which you’d like them to hang.
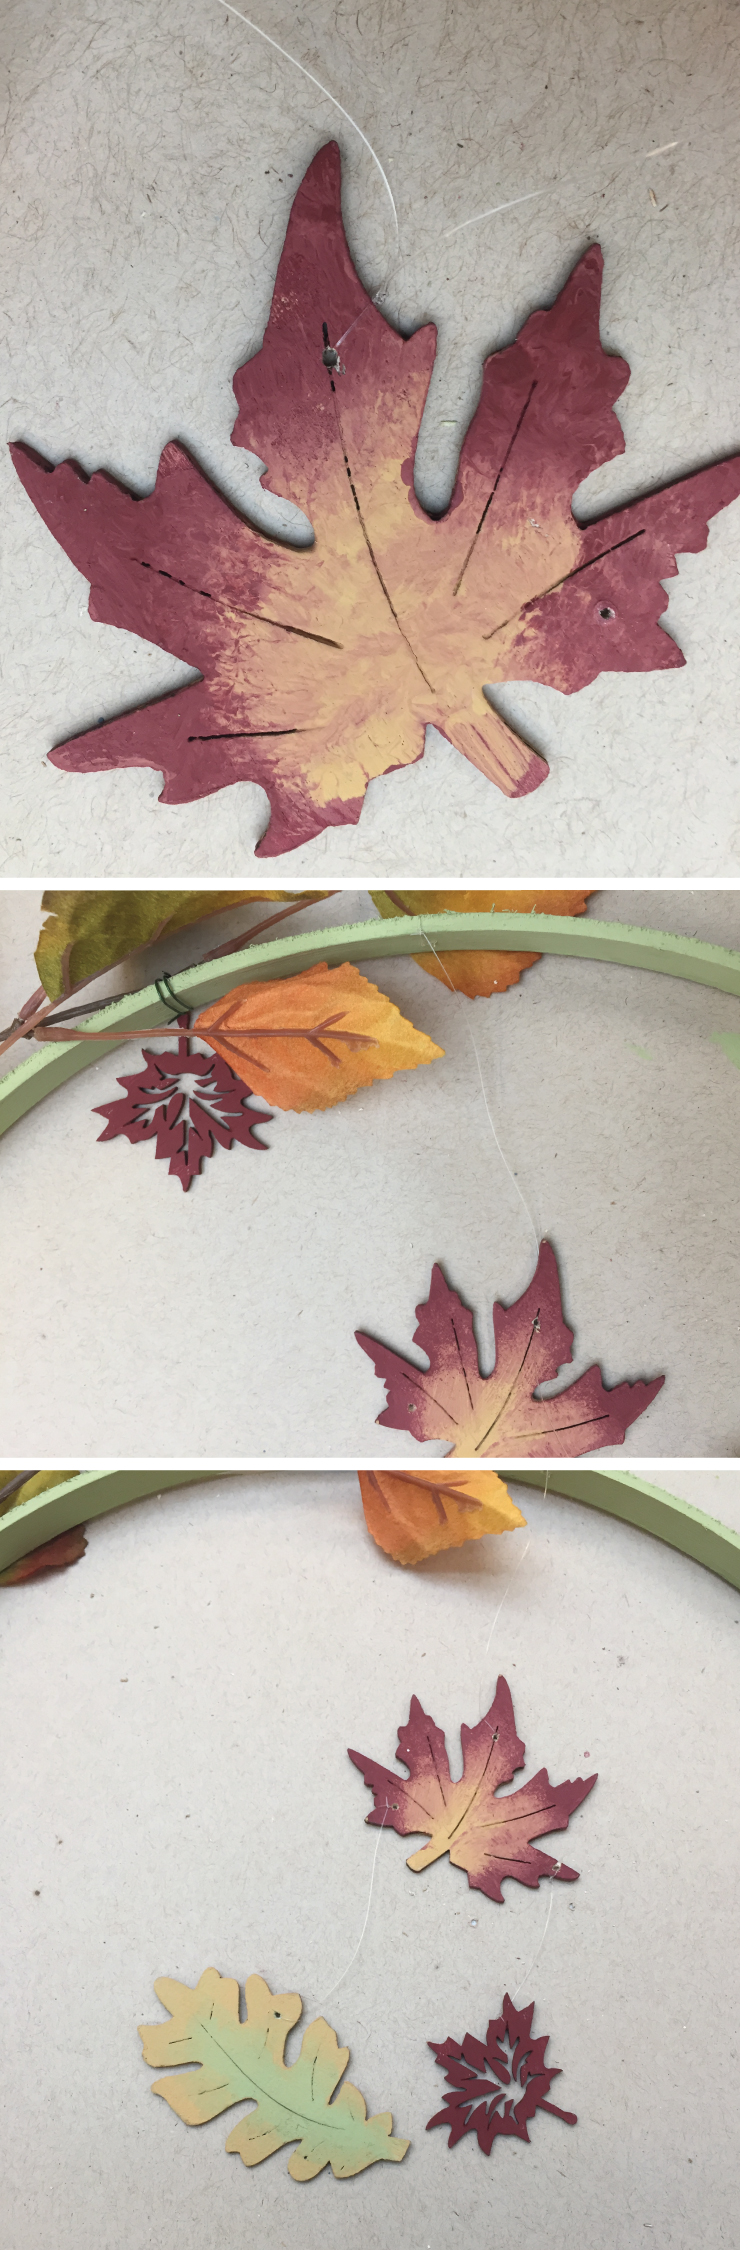
Step 10: Thread and suspend cutouts
Thread your transparent fishing line through the holes you have created and secure the line to the hoop. Repeat this step for all your cutouts.
Step 10: Hang and enjoy!
Place your wreath somewhere you’d like to bring in the festive feeling of the season.
For more holiday color and project ideas check out the Colorfully Behr Holiday Collection.
Colorfully yours,
-Quinn
DIY Projects
DIY Seasonal Wreath
TIME
BUDGET
COMPLEXITY