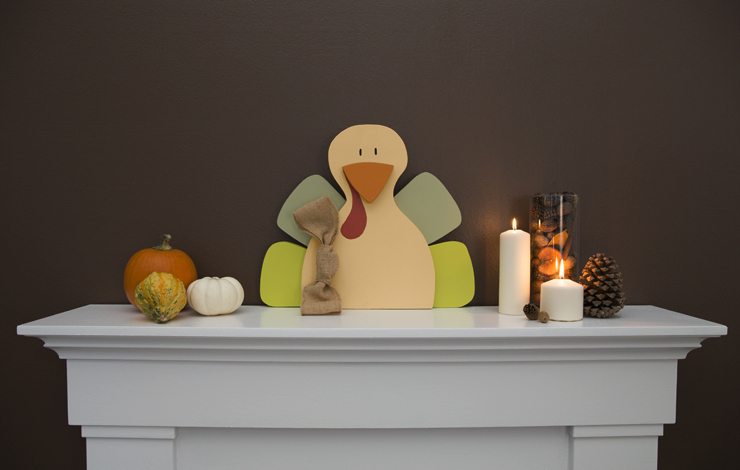
Get your cooking and craft on this holiday, dazzling your guests with, not only your culinary talents but DIY skills as well. This adorable, turkey centerpiece, in festive fall colors, is sure to be a perfect fit for your home this holiday.
Materials needed:
Paper
Pencil
1/2″ wood board
Paint – in the color/s of your choice
Paper towels
Mini roller, or 2″ paintbrush
Detail paintbrush
Wood glue
Tools:
Jigsaw
Sandpaper, or sanding block
Clamps
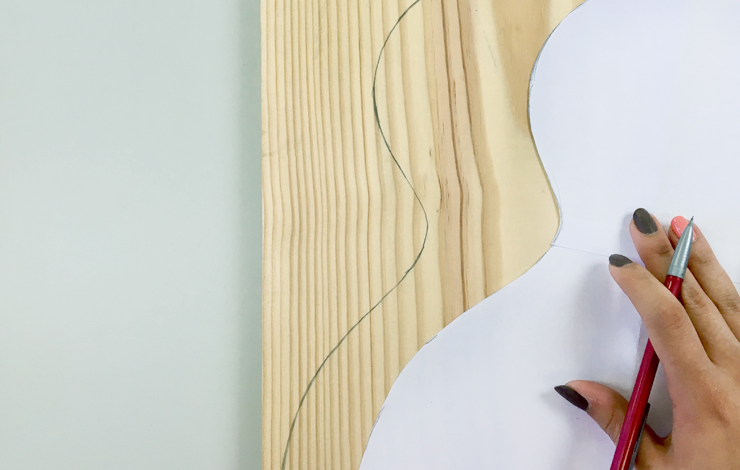
Step 1: Create Template
Draw out the different parts of your turkey on a piece of paper to size. Cut them out when you are happy with the design.

Step 2: Trace Shapes on Wood
Trace your shapes on a piece of wood board. Flip the tail feather pieces and trace the mirror image for the left hand side of the turkey body.
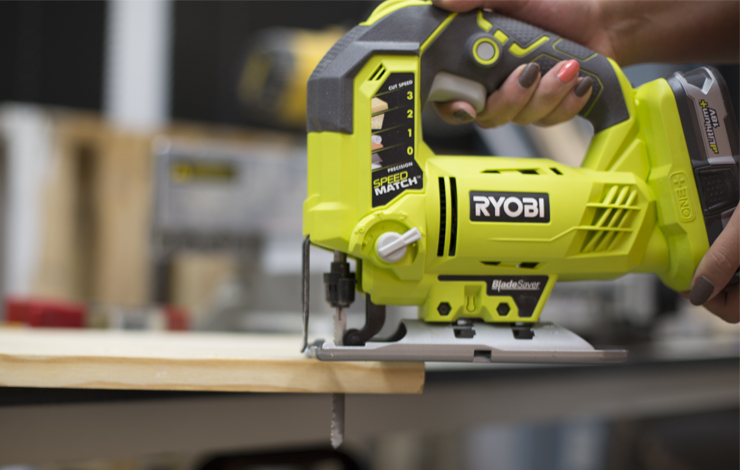
Step 3: Cut out design
Use a jigsaw along the outlines to cut the turkey pattern out of the wood.
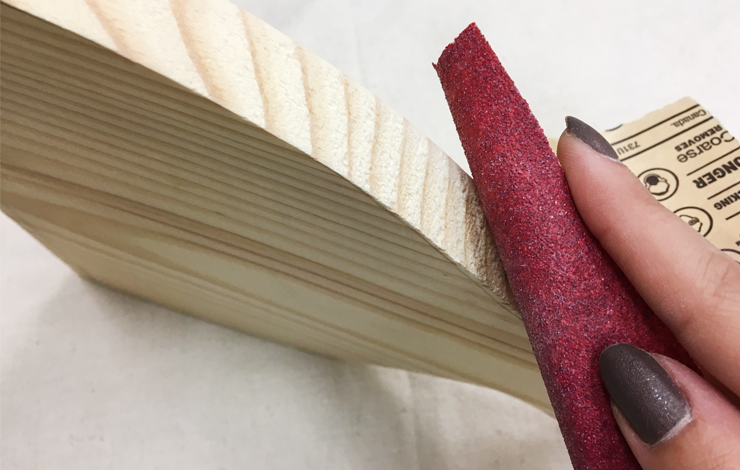
Step 4: Sand
After you’ve cut out all the shapes, smooth out the rough edges with a piece of sandpaper.
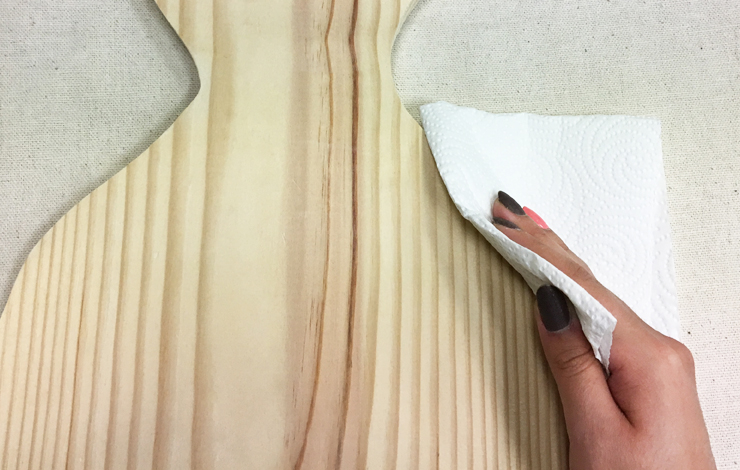
Step 5: Prep for painting
Prepare your pieces for paint by wiping clean the wood dust from the sanding step.
Step 6: Paint
With a brush or a mini roller paint your turkey pieces in the colors of your choice. Allow to dry and apply a second coat if necessary/desired.
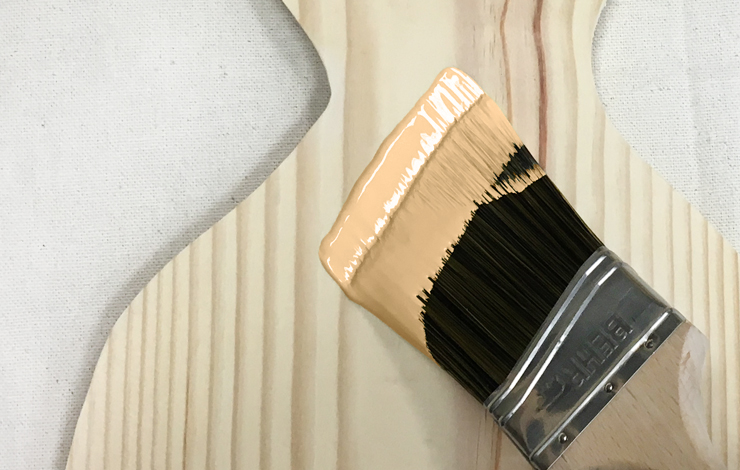
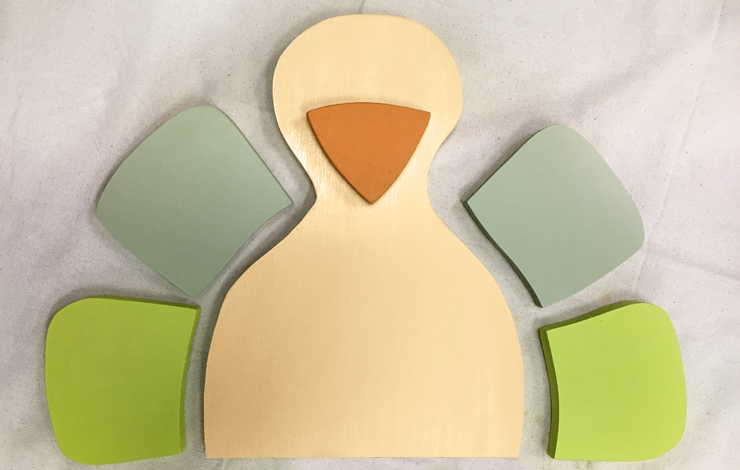
Colors used- Turkey body: Gold Hearted T17-02, Top feathers: Sustainable S350-4, Bottom feathers: Midori P330-5, Beak: Joyful Orange P240-7
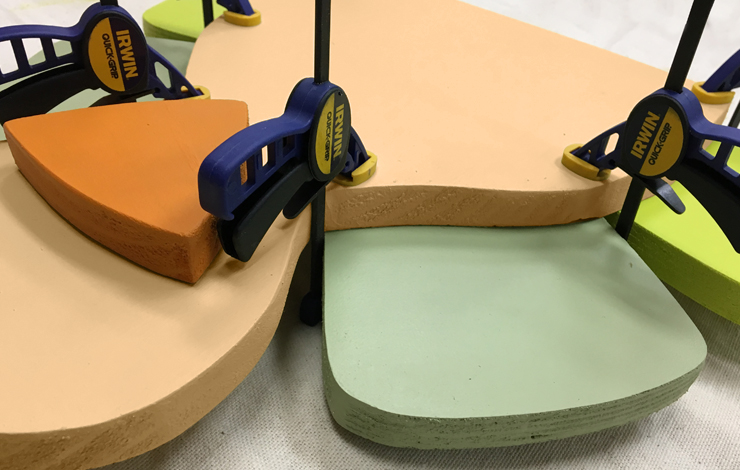
Step 7: Glue Together
Once the paint has dried, glue the pieces together with wood glue. Overlap them over the back of the turkey’s body.


Step 8: Let Dry
Clamp your pieces together and allow them to dry for one hour.
Step 9: Paint Details
Paint the eyes and any other details that you desire by using a detail paintbrush.
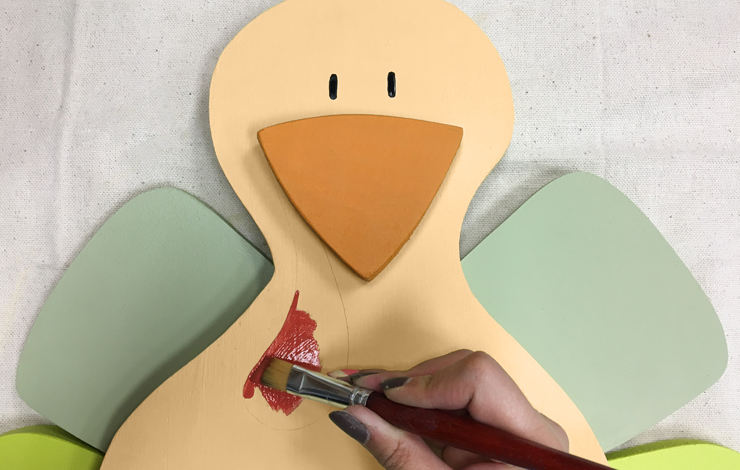
Turkey eyes: Carbon N520-7, Wattle: Hot and Spicy T17-18
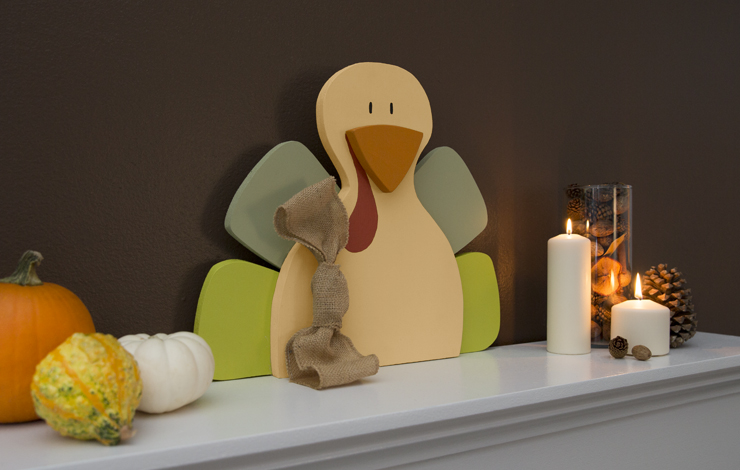
Step 10: Display your new, festive centerpiece
Celebrate this Thanksgiving by being thankful for your blessings, and your DIY wooden turkey. Happy Thanksgiving!
Colorfully yours,
-Sha Khezri
DIY Projects
DIY Turkey Centerpiece
TIME
BUDGET
COMPLEXITY