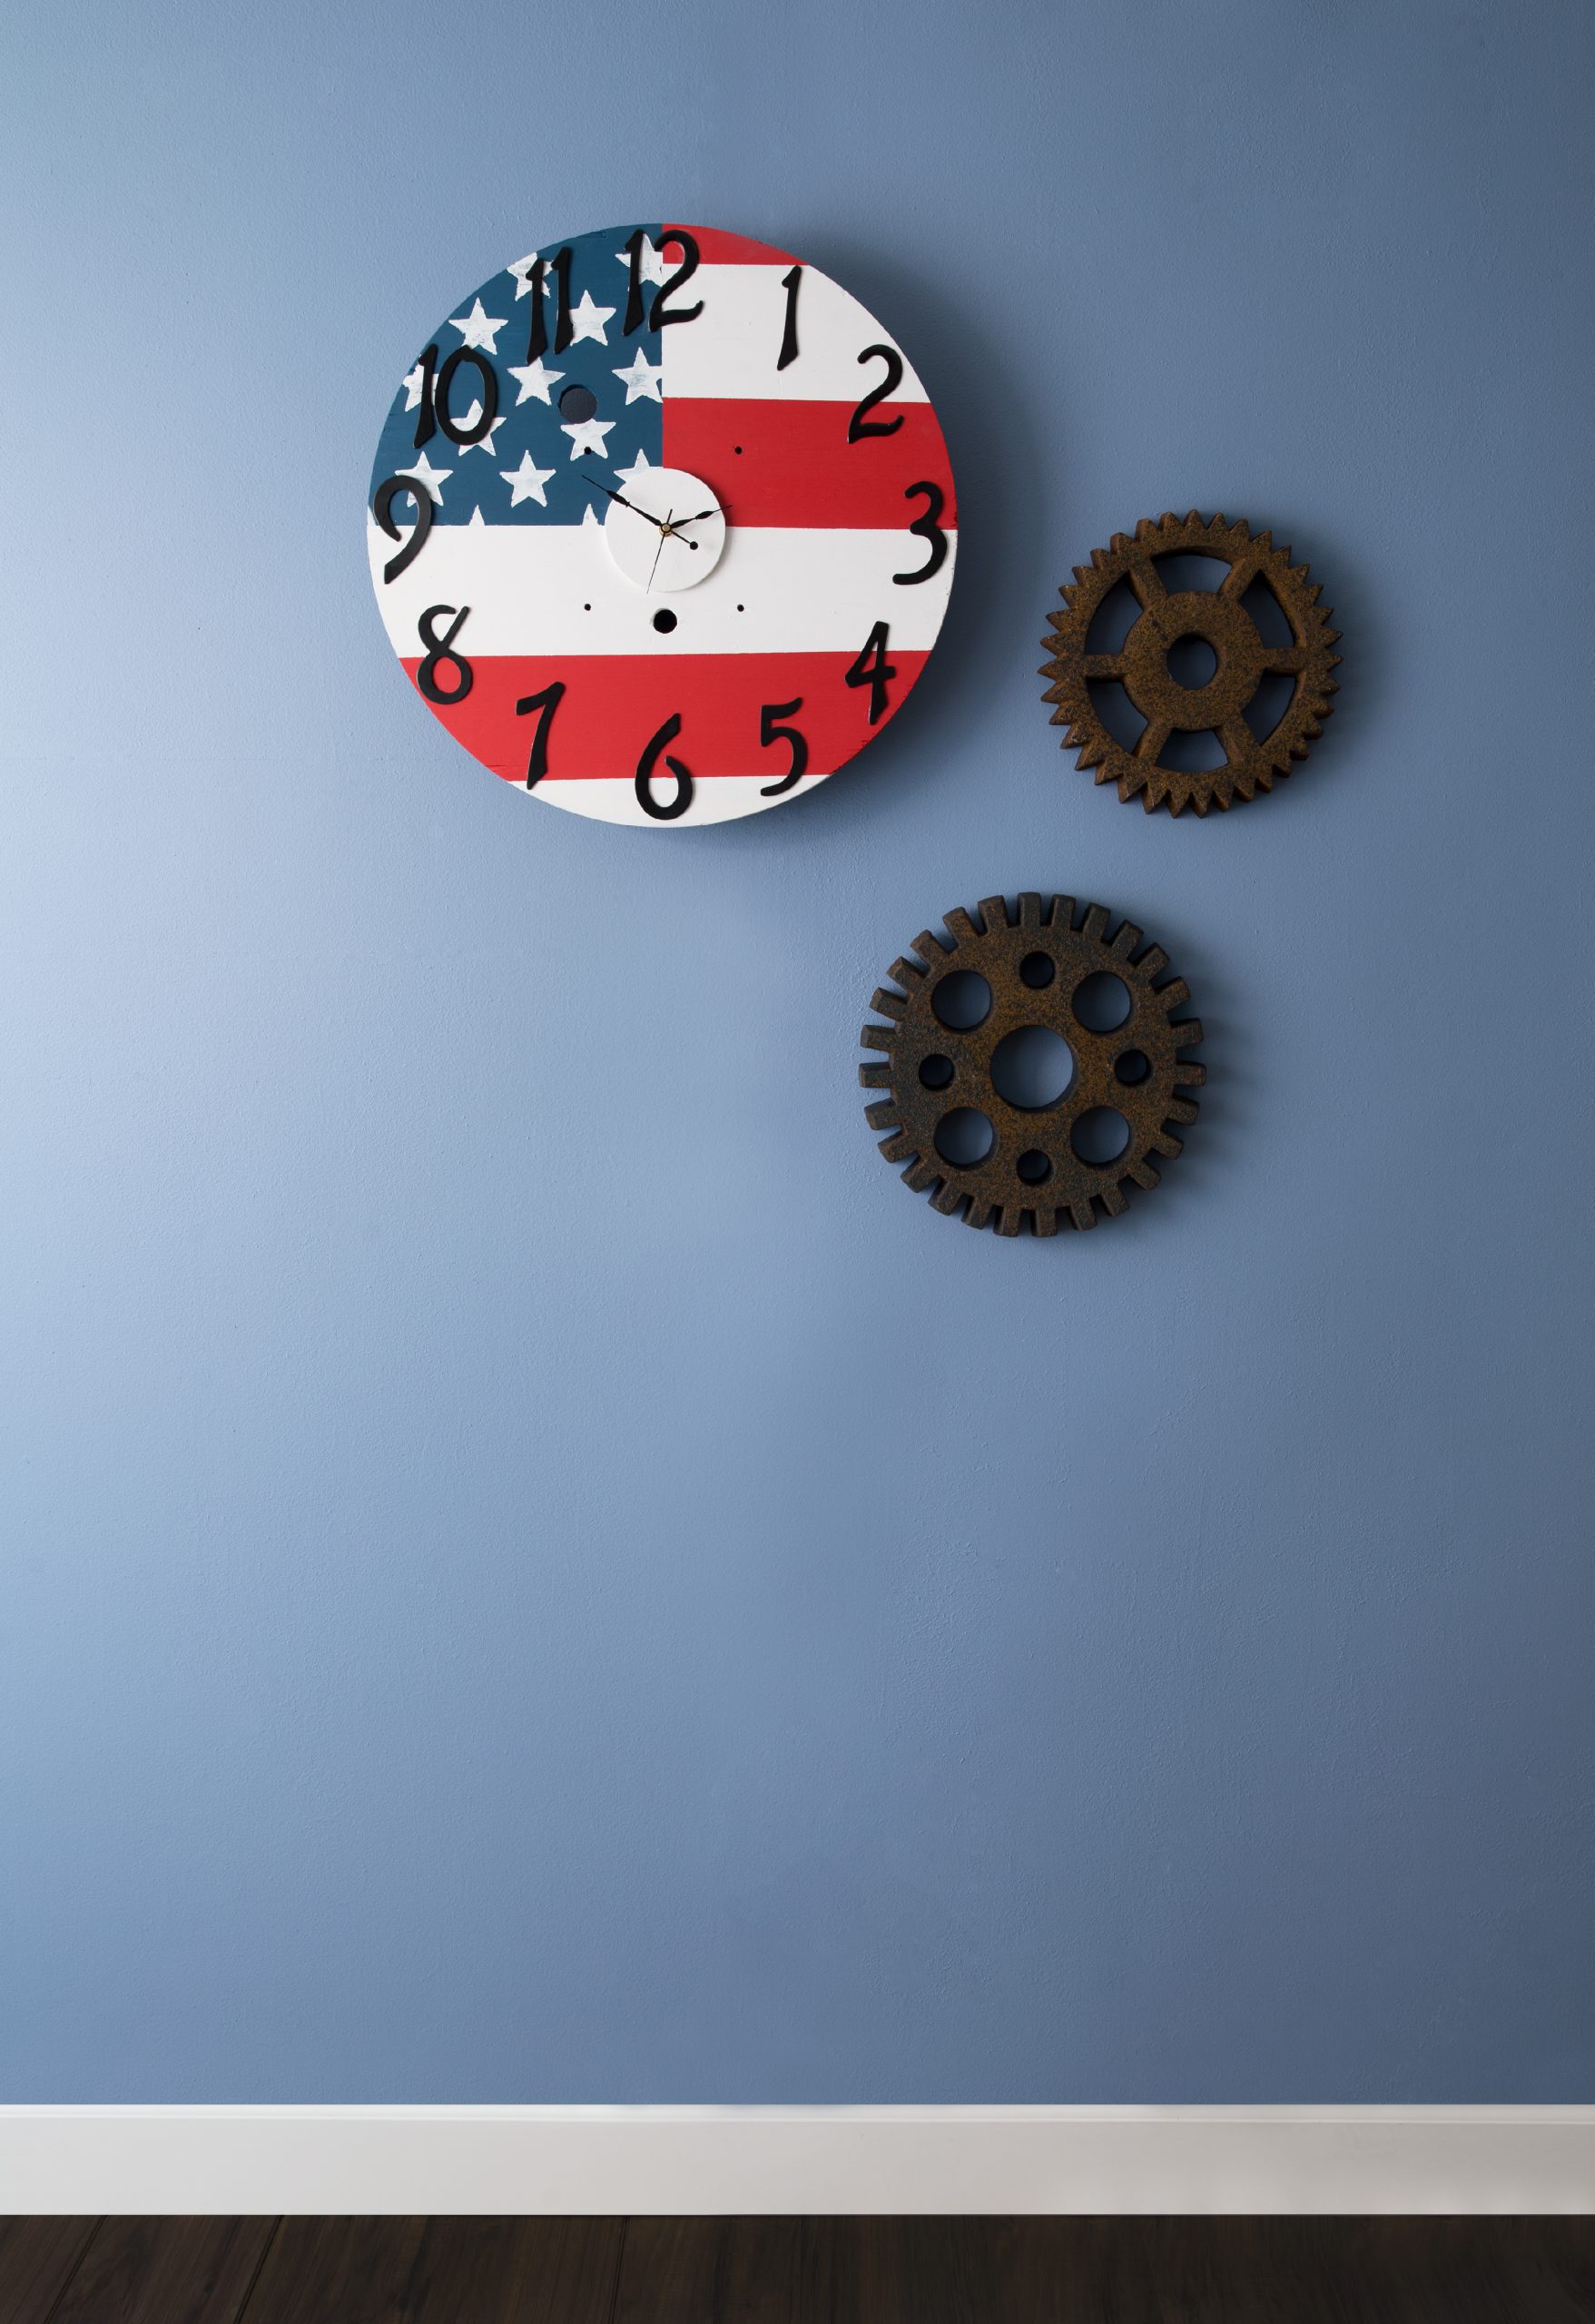
The 4th of July is only a couple of days away. It’s time to adorn your patriotic spirit and make this fabulous red, white, and blue timepiece. Henceforth, you can always celebrate the 4th of July each time you look at your clock!
Materials needed:
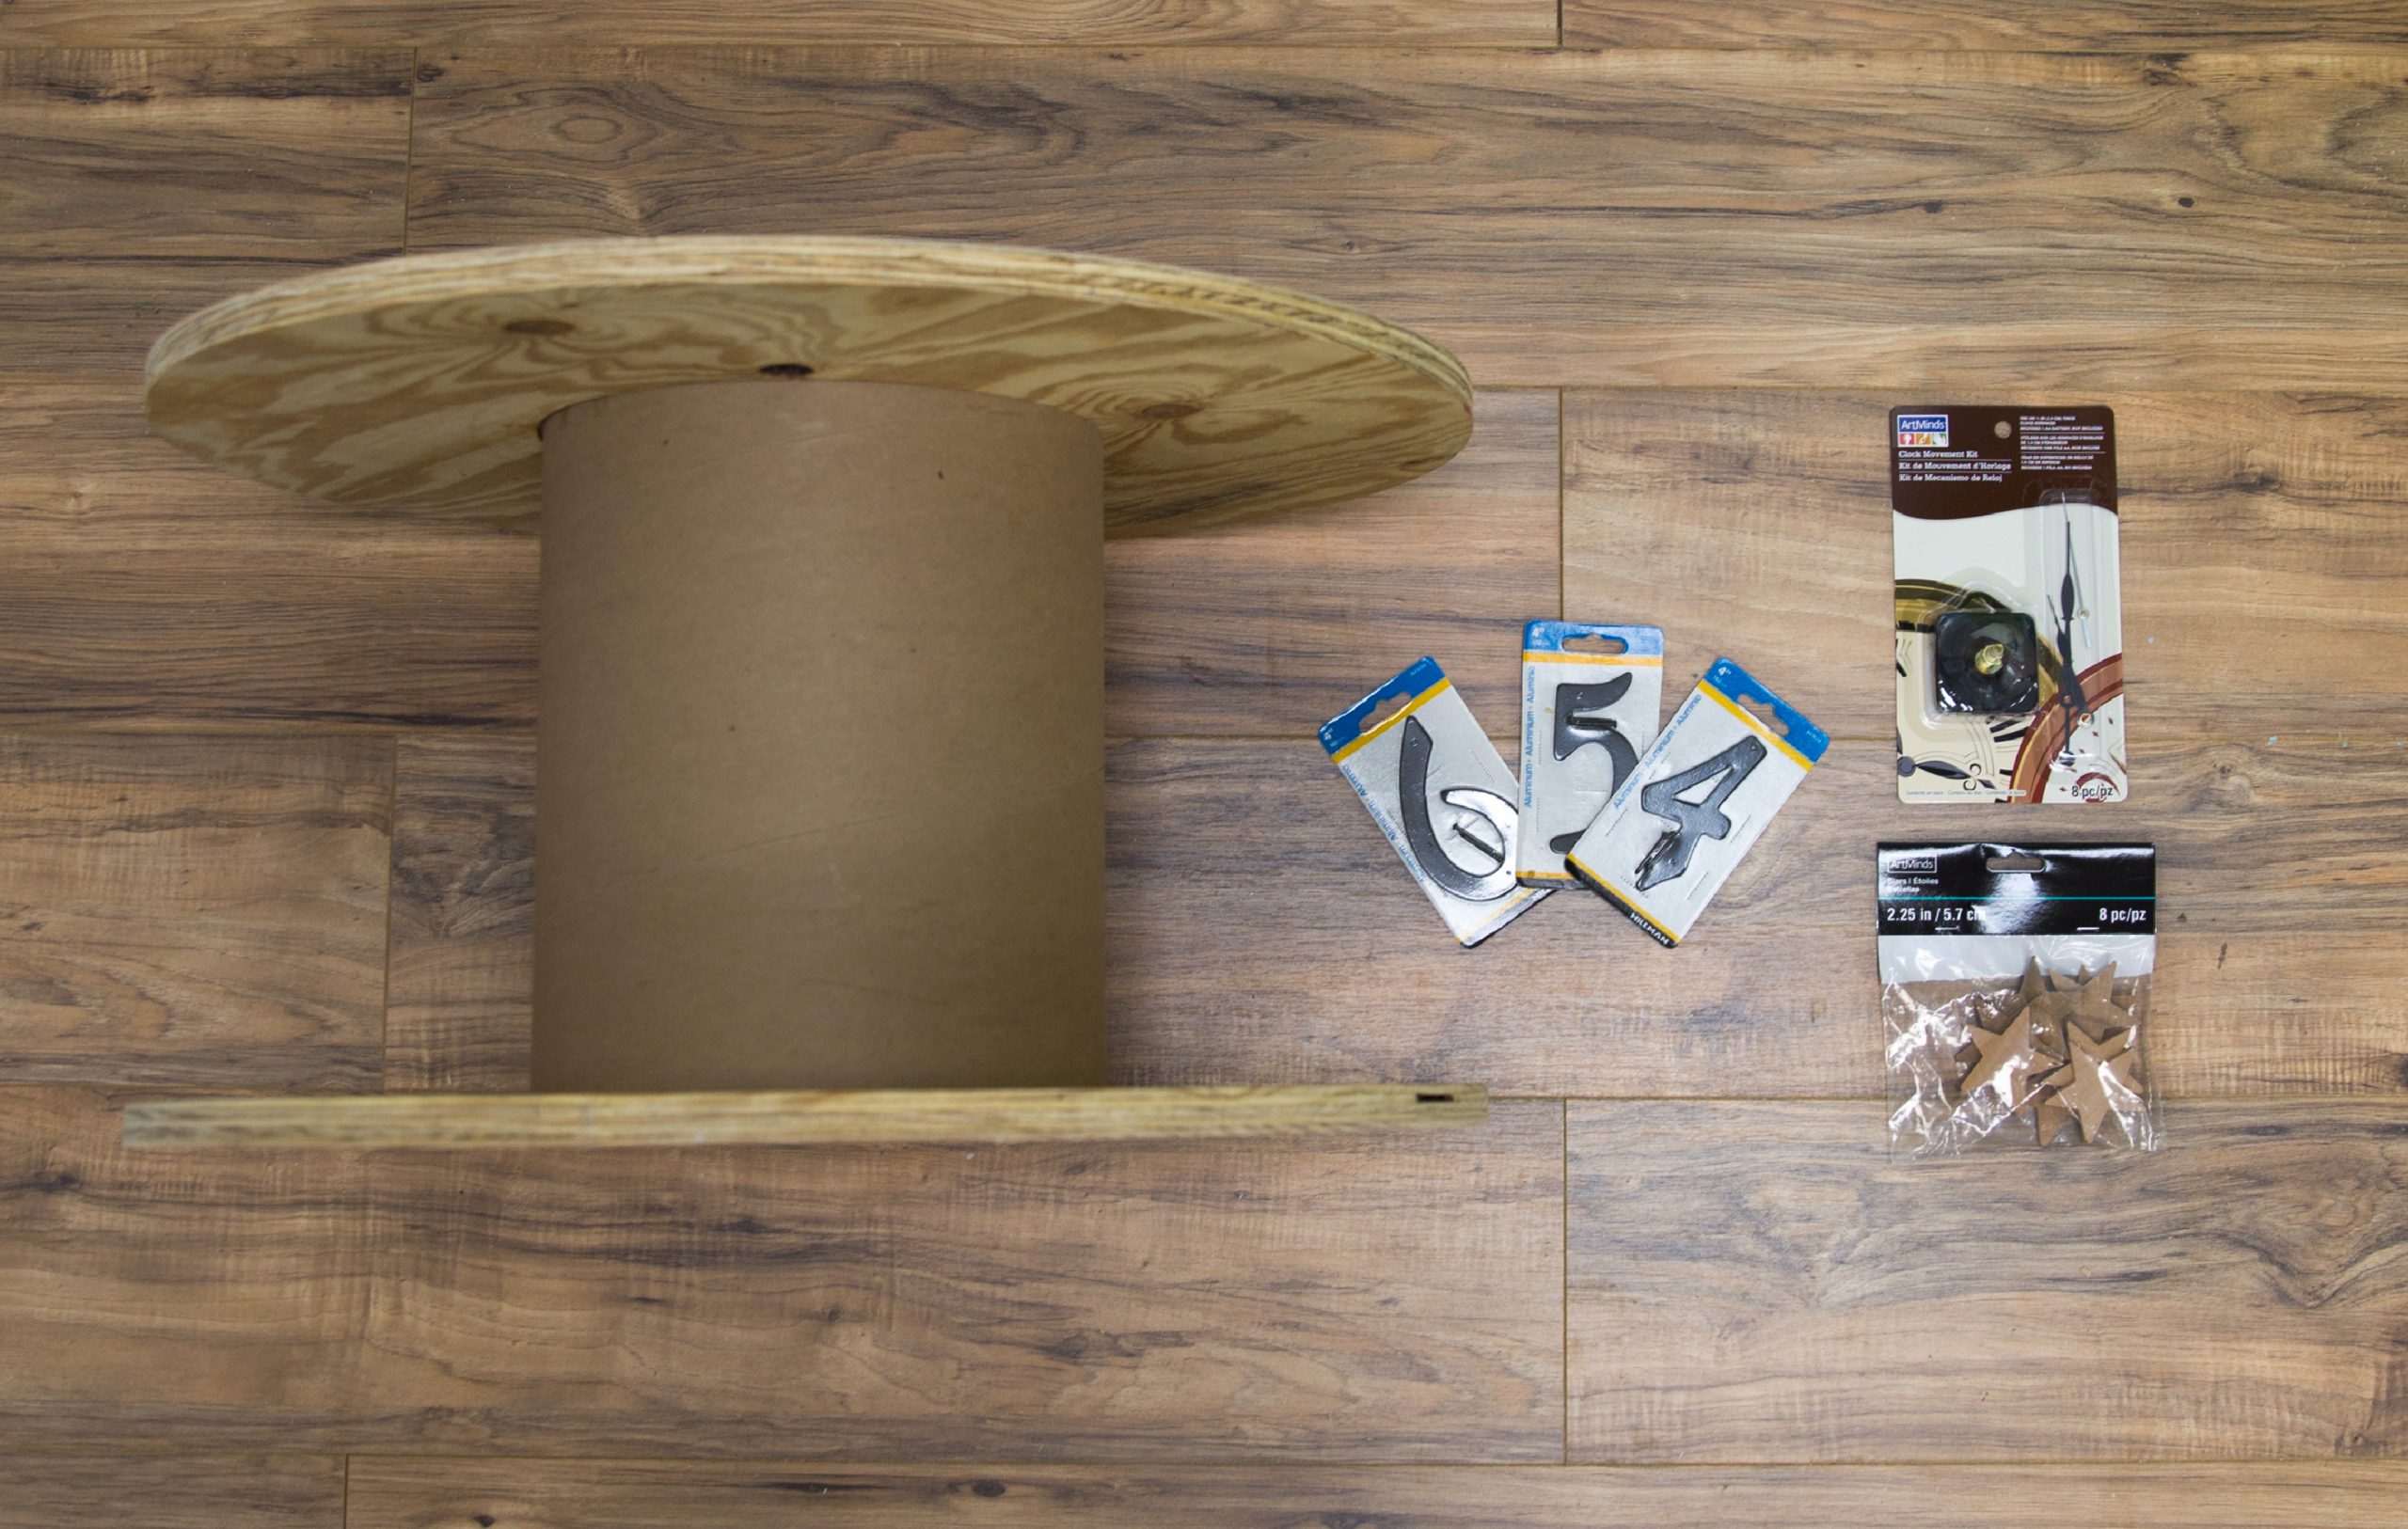
Wooden wire spool
Clock movement kit
Paint (We used No More Drama P140-7, Deep Breath S460-7, and New House White RD-W10)
Wooden stars
House numbers (1-12)
Tools needed:
Sandpaper
Mini roller or paintbrush
Hammer
Jigsaw
Saw
Power drill
Wood glue
Ruler
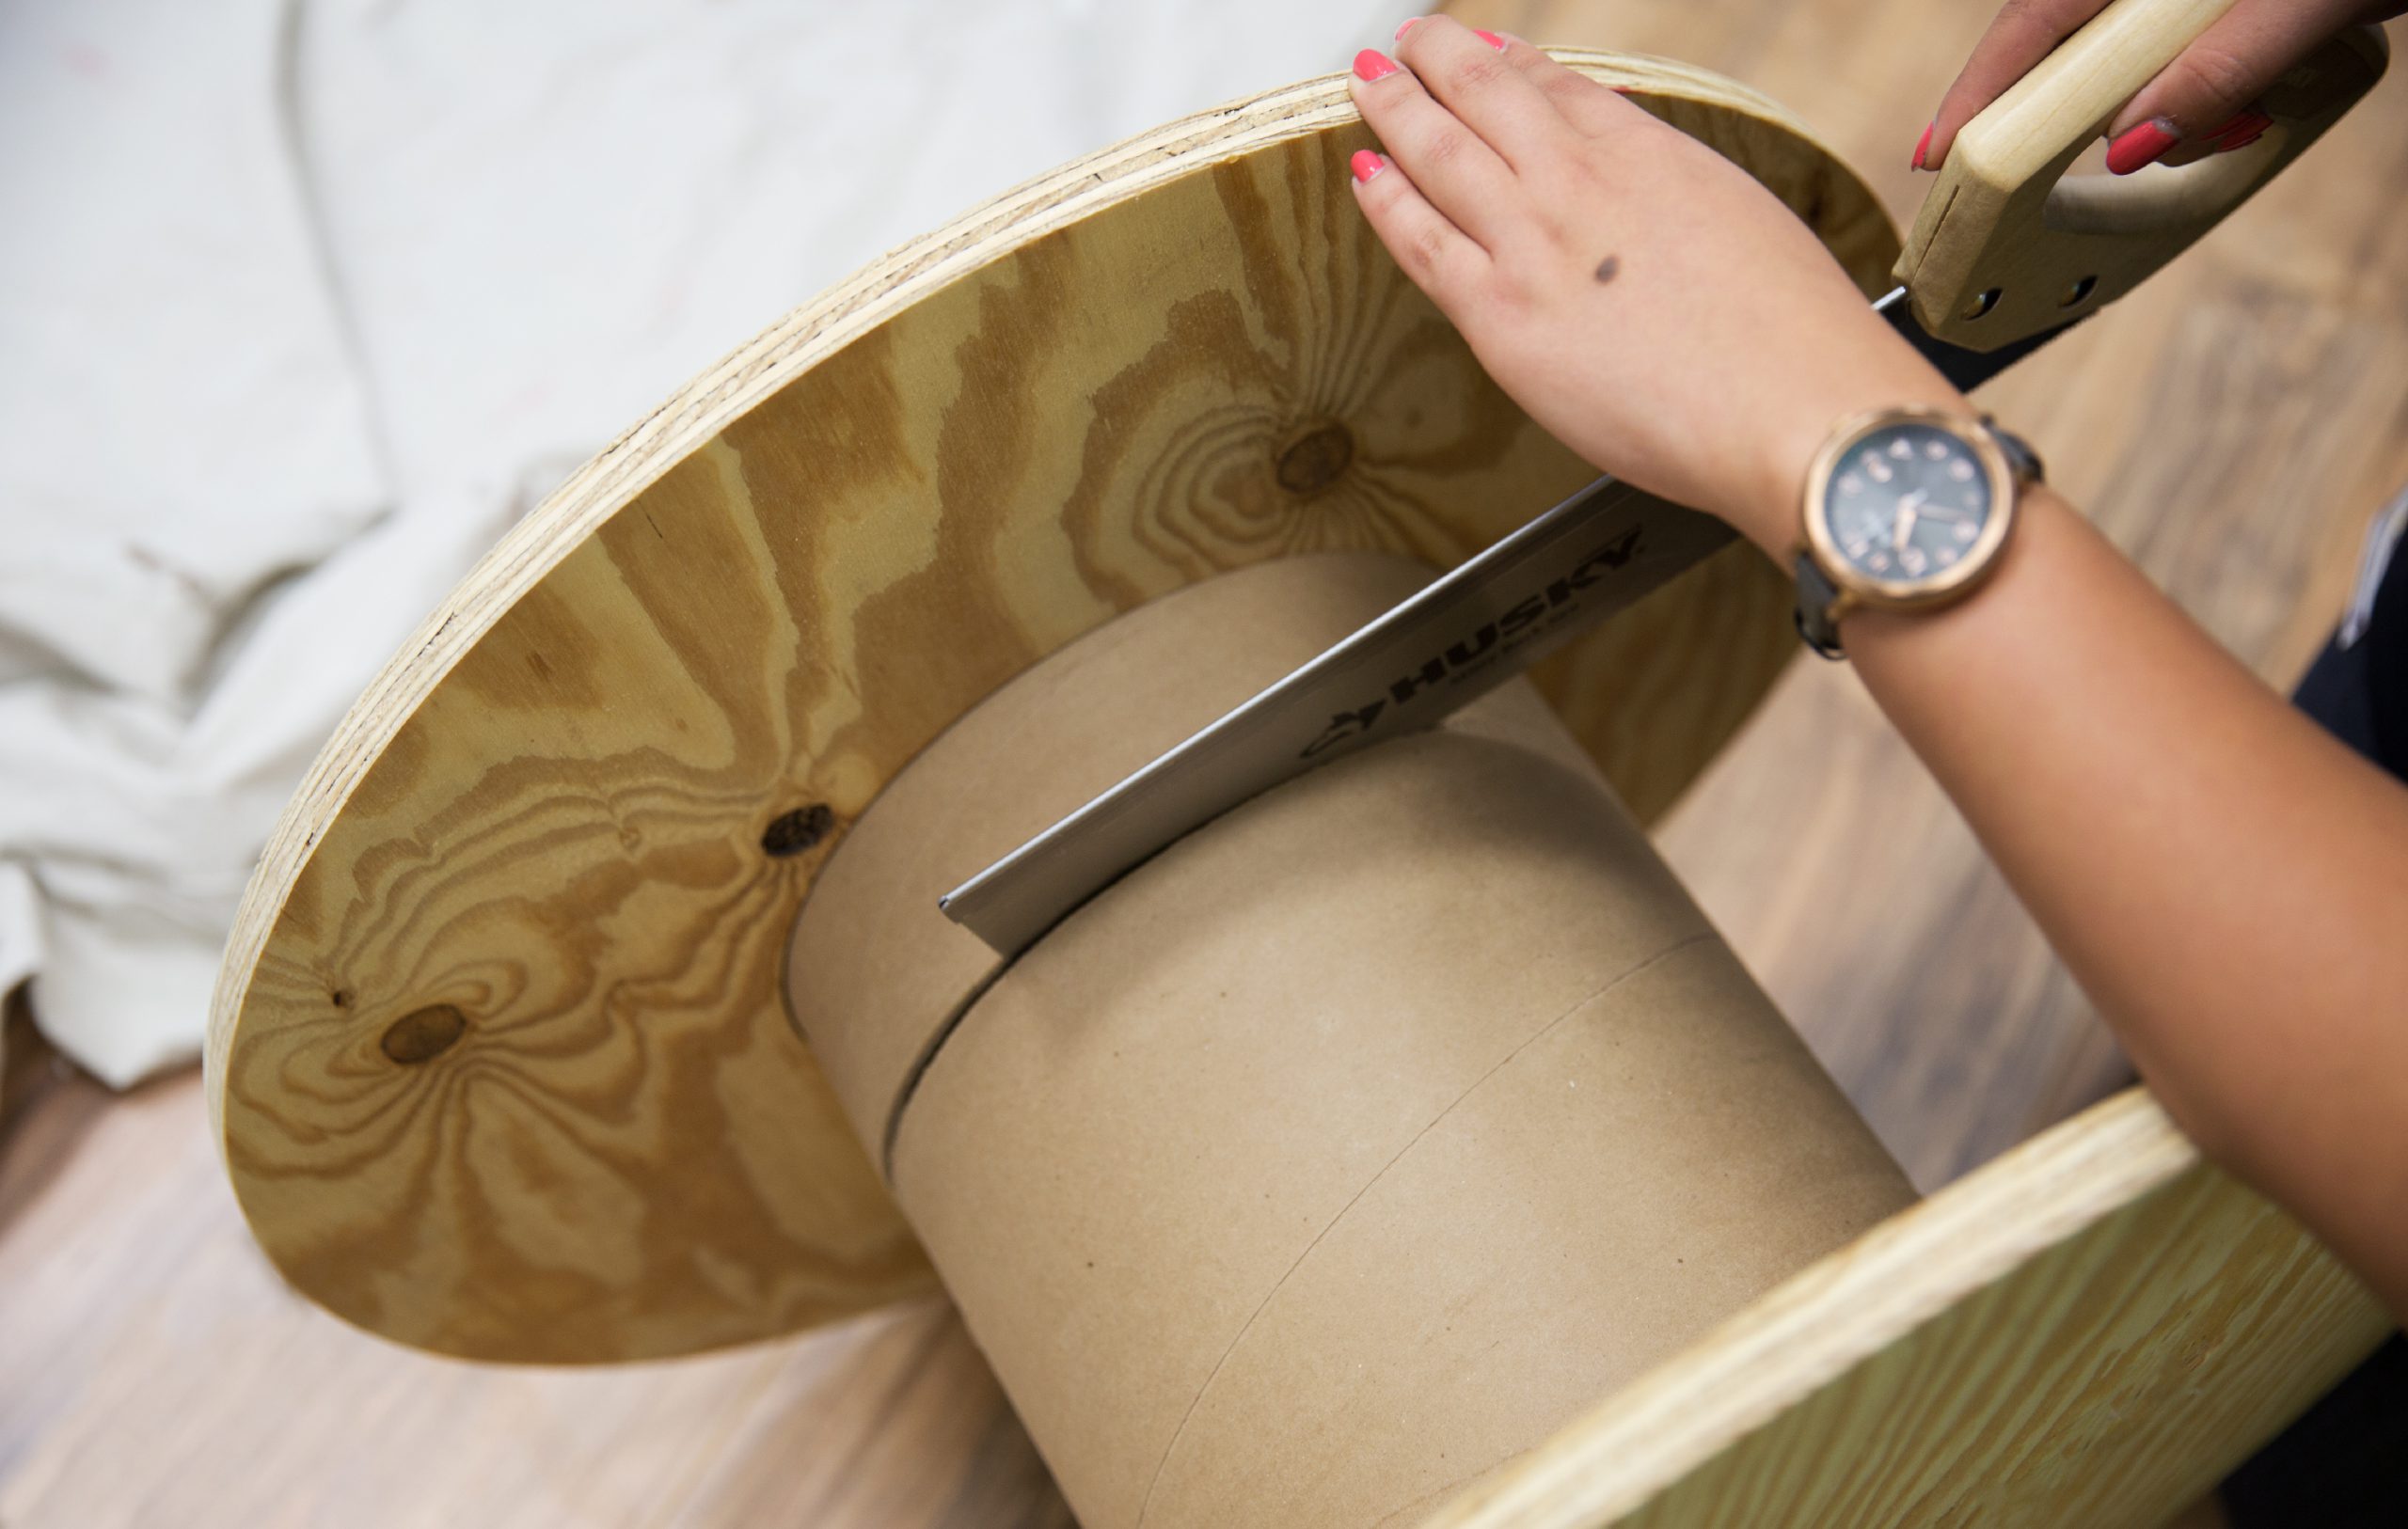
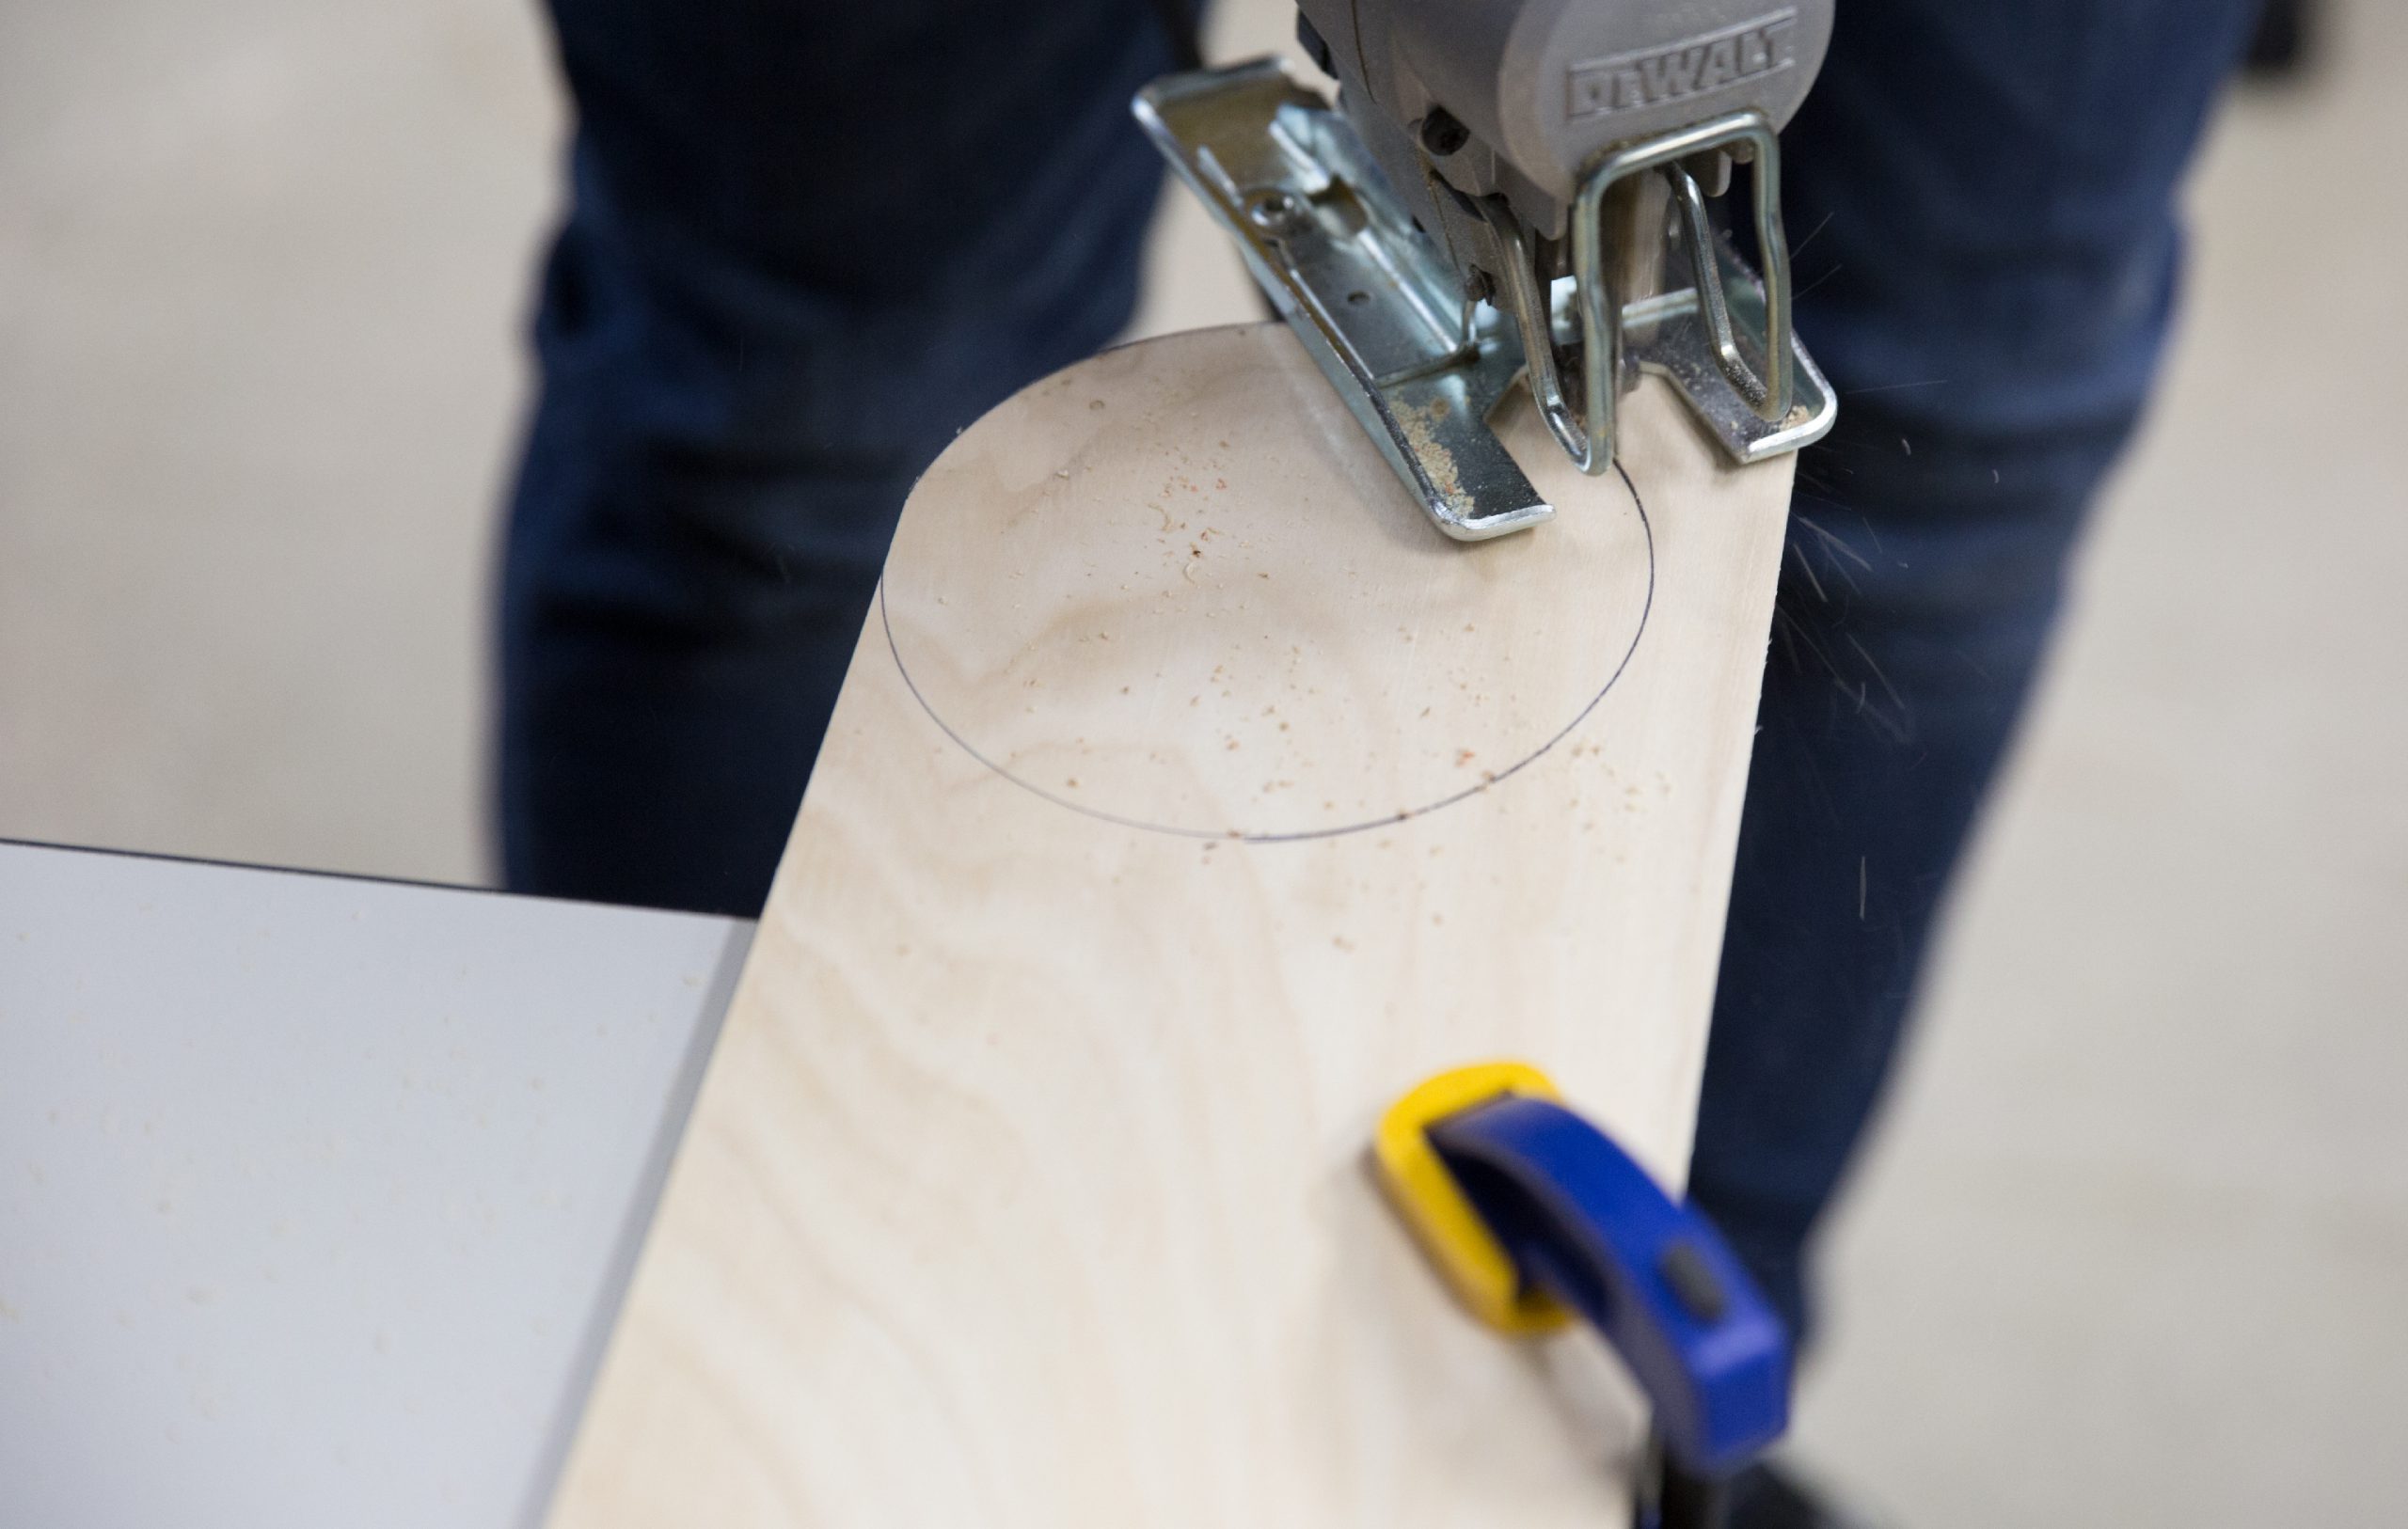
Step 1: Cut your wire spool
Use a saw to cut your wooded wire spool into two pieces. Keep a small length of the center portion of the piece on the side the clock face will be.
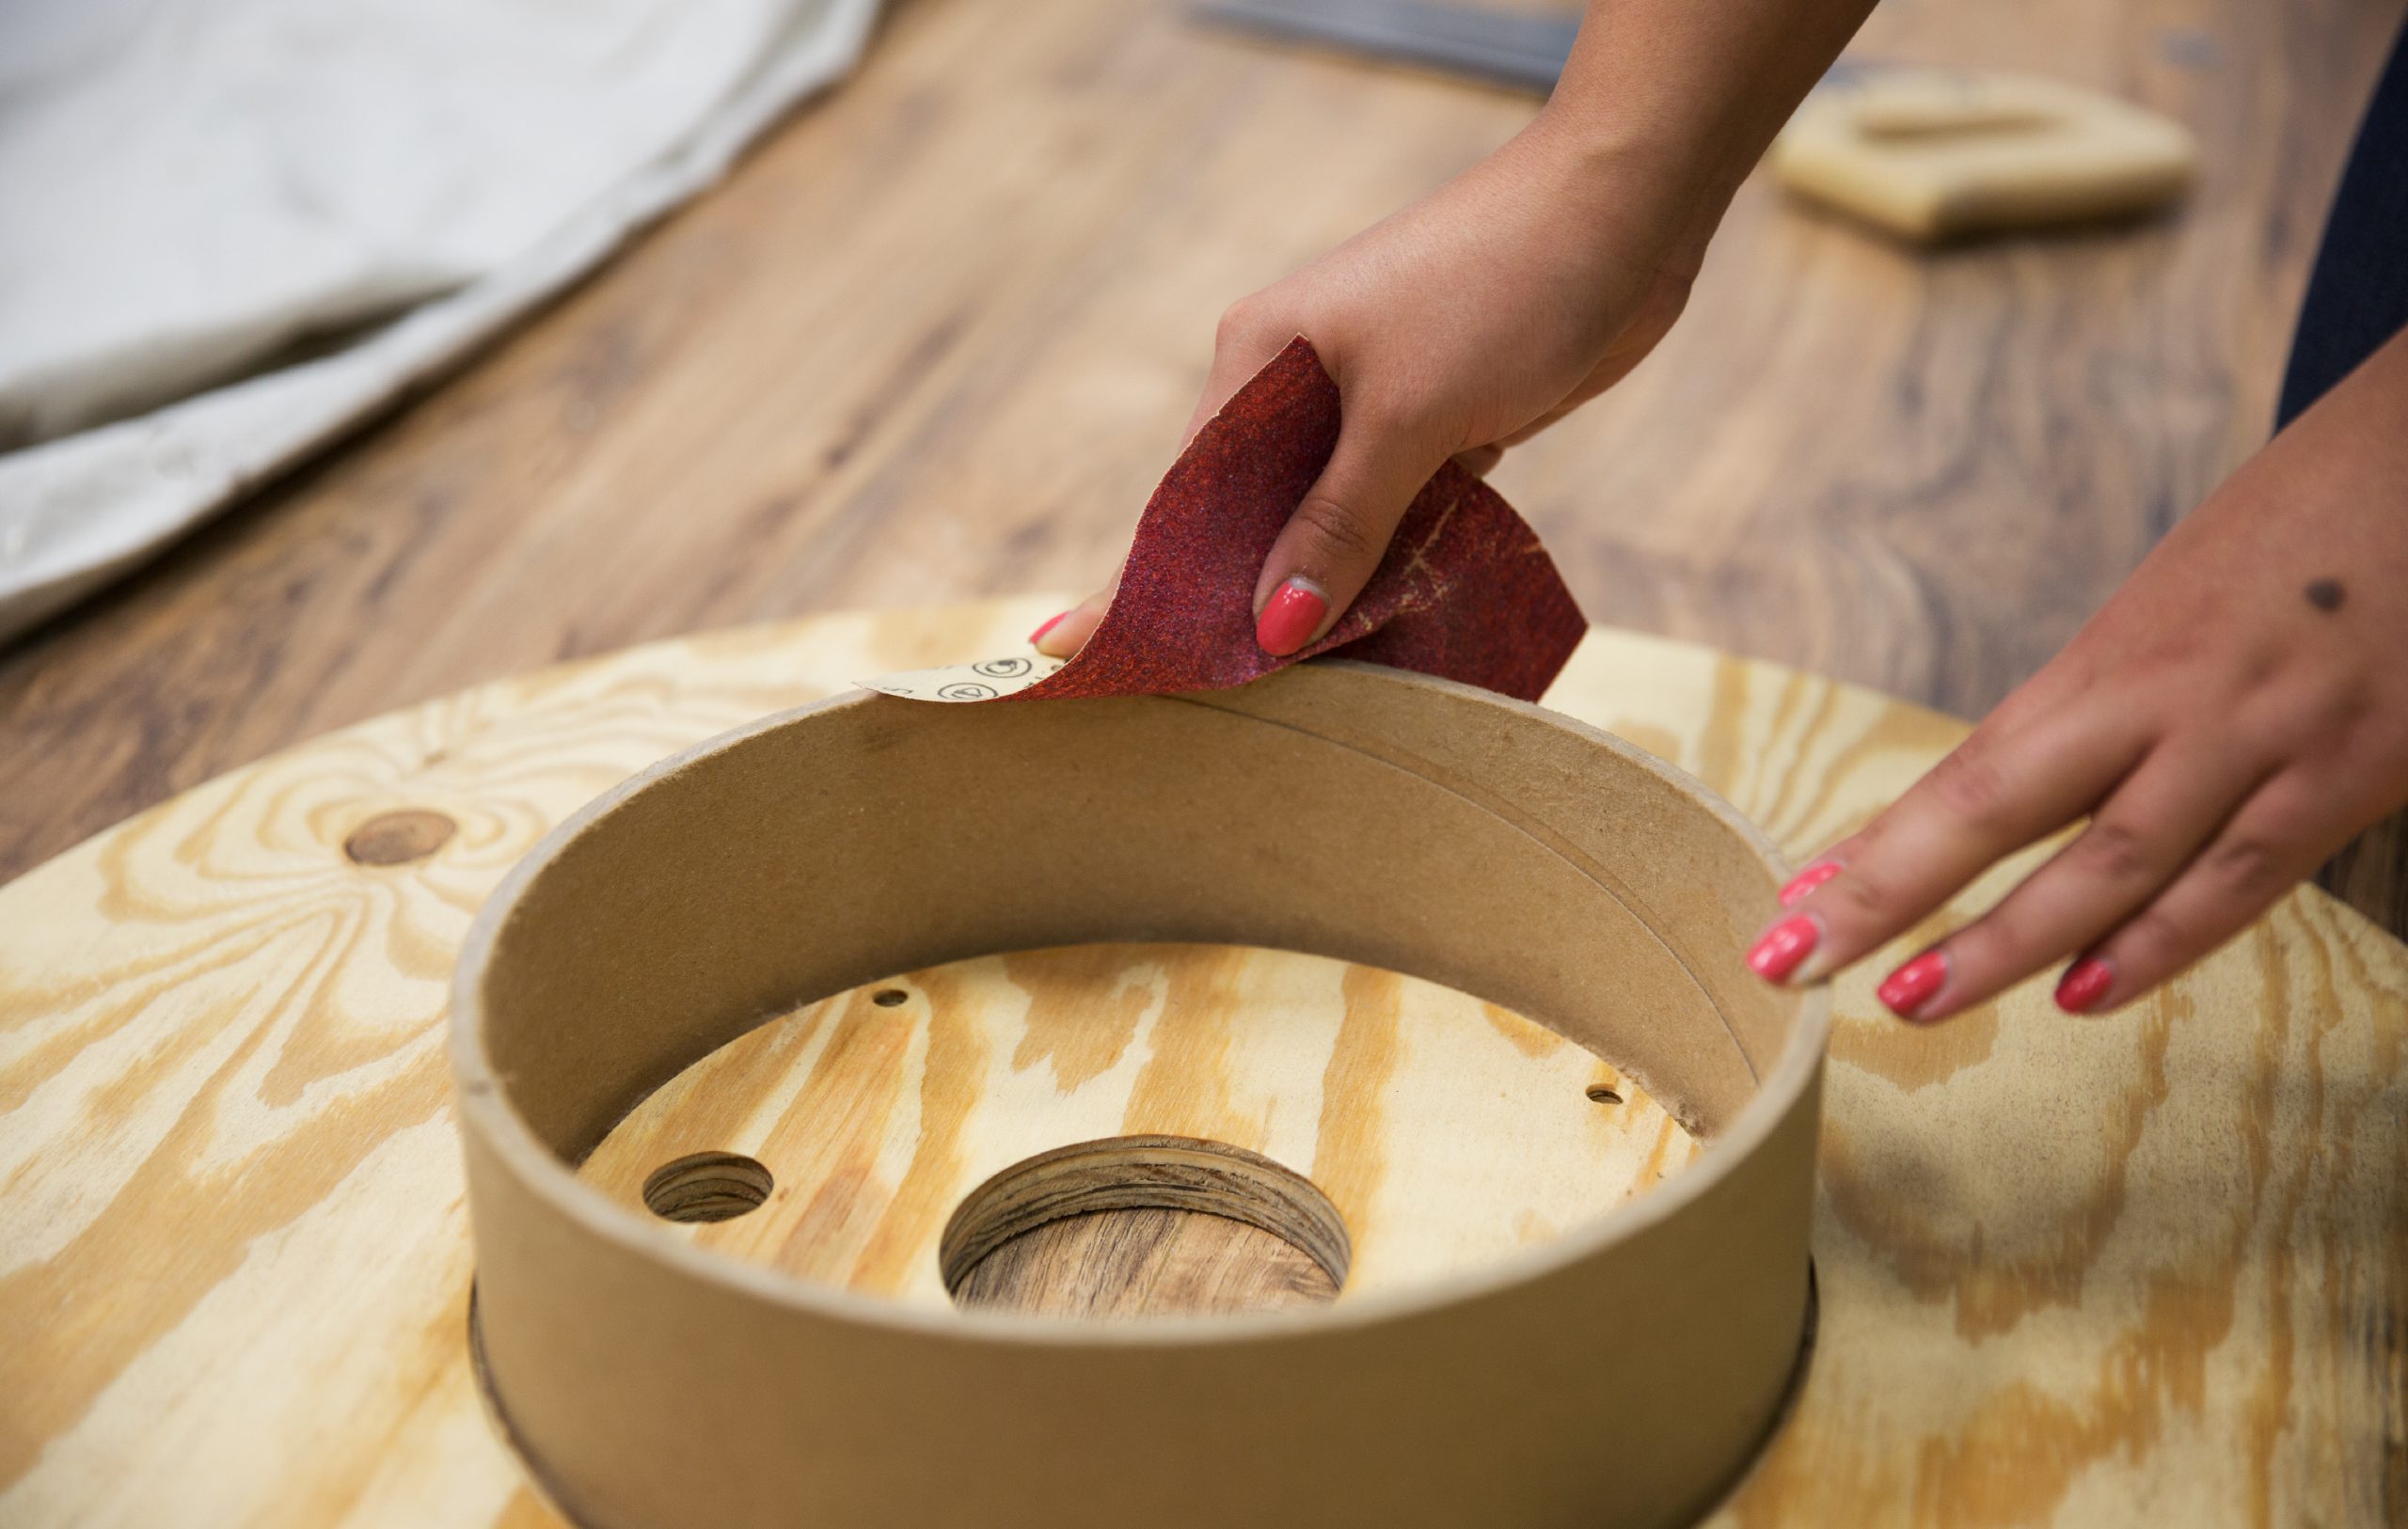
Step 2: Sand
Sand down any sharp or uneven surfaces on the side of the wooden wire spool that you want to use.
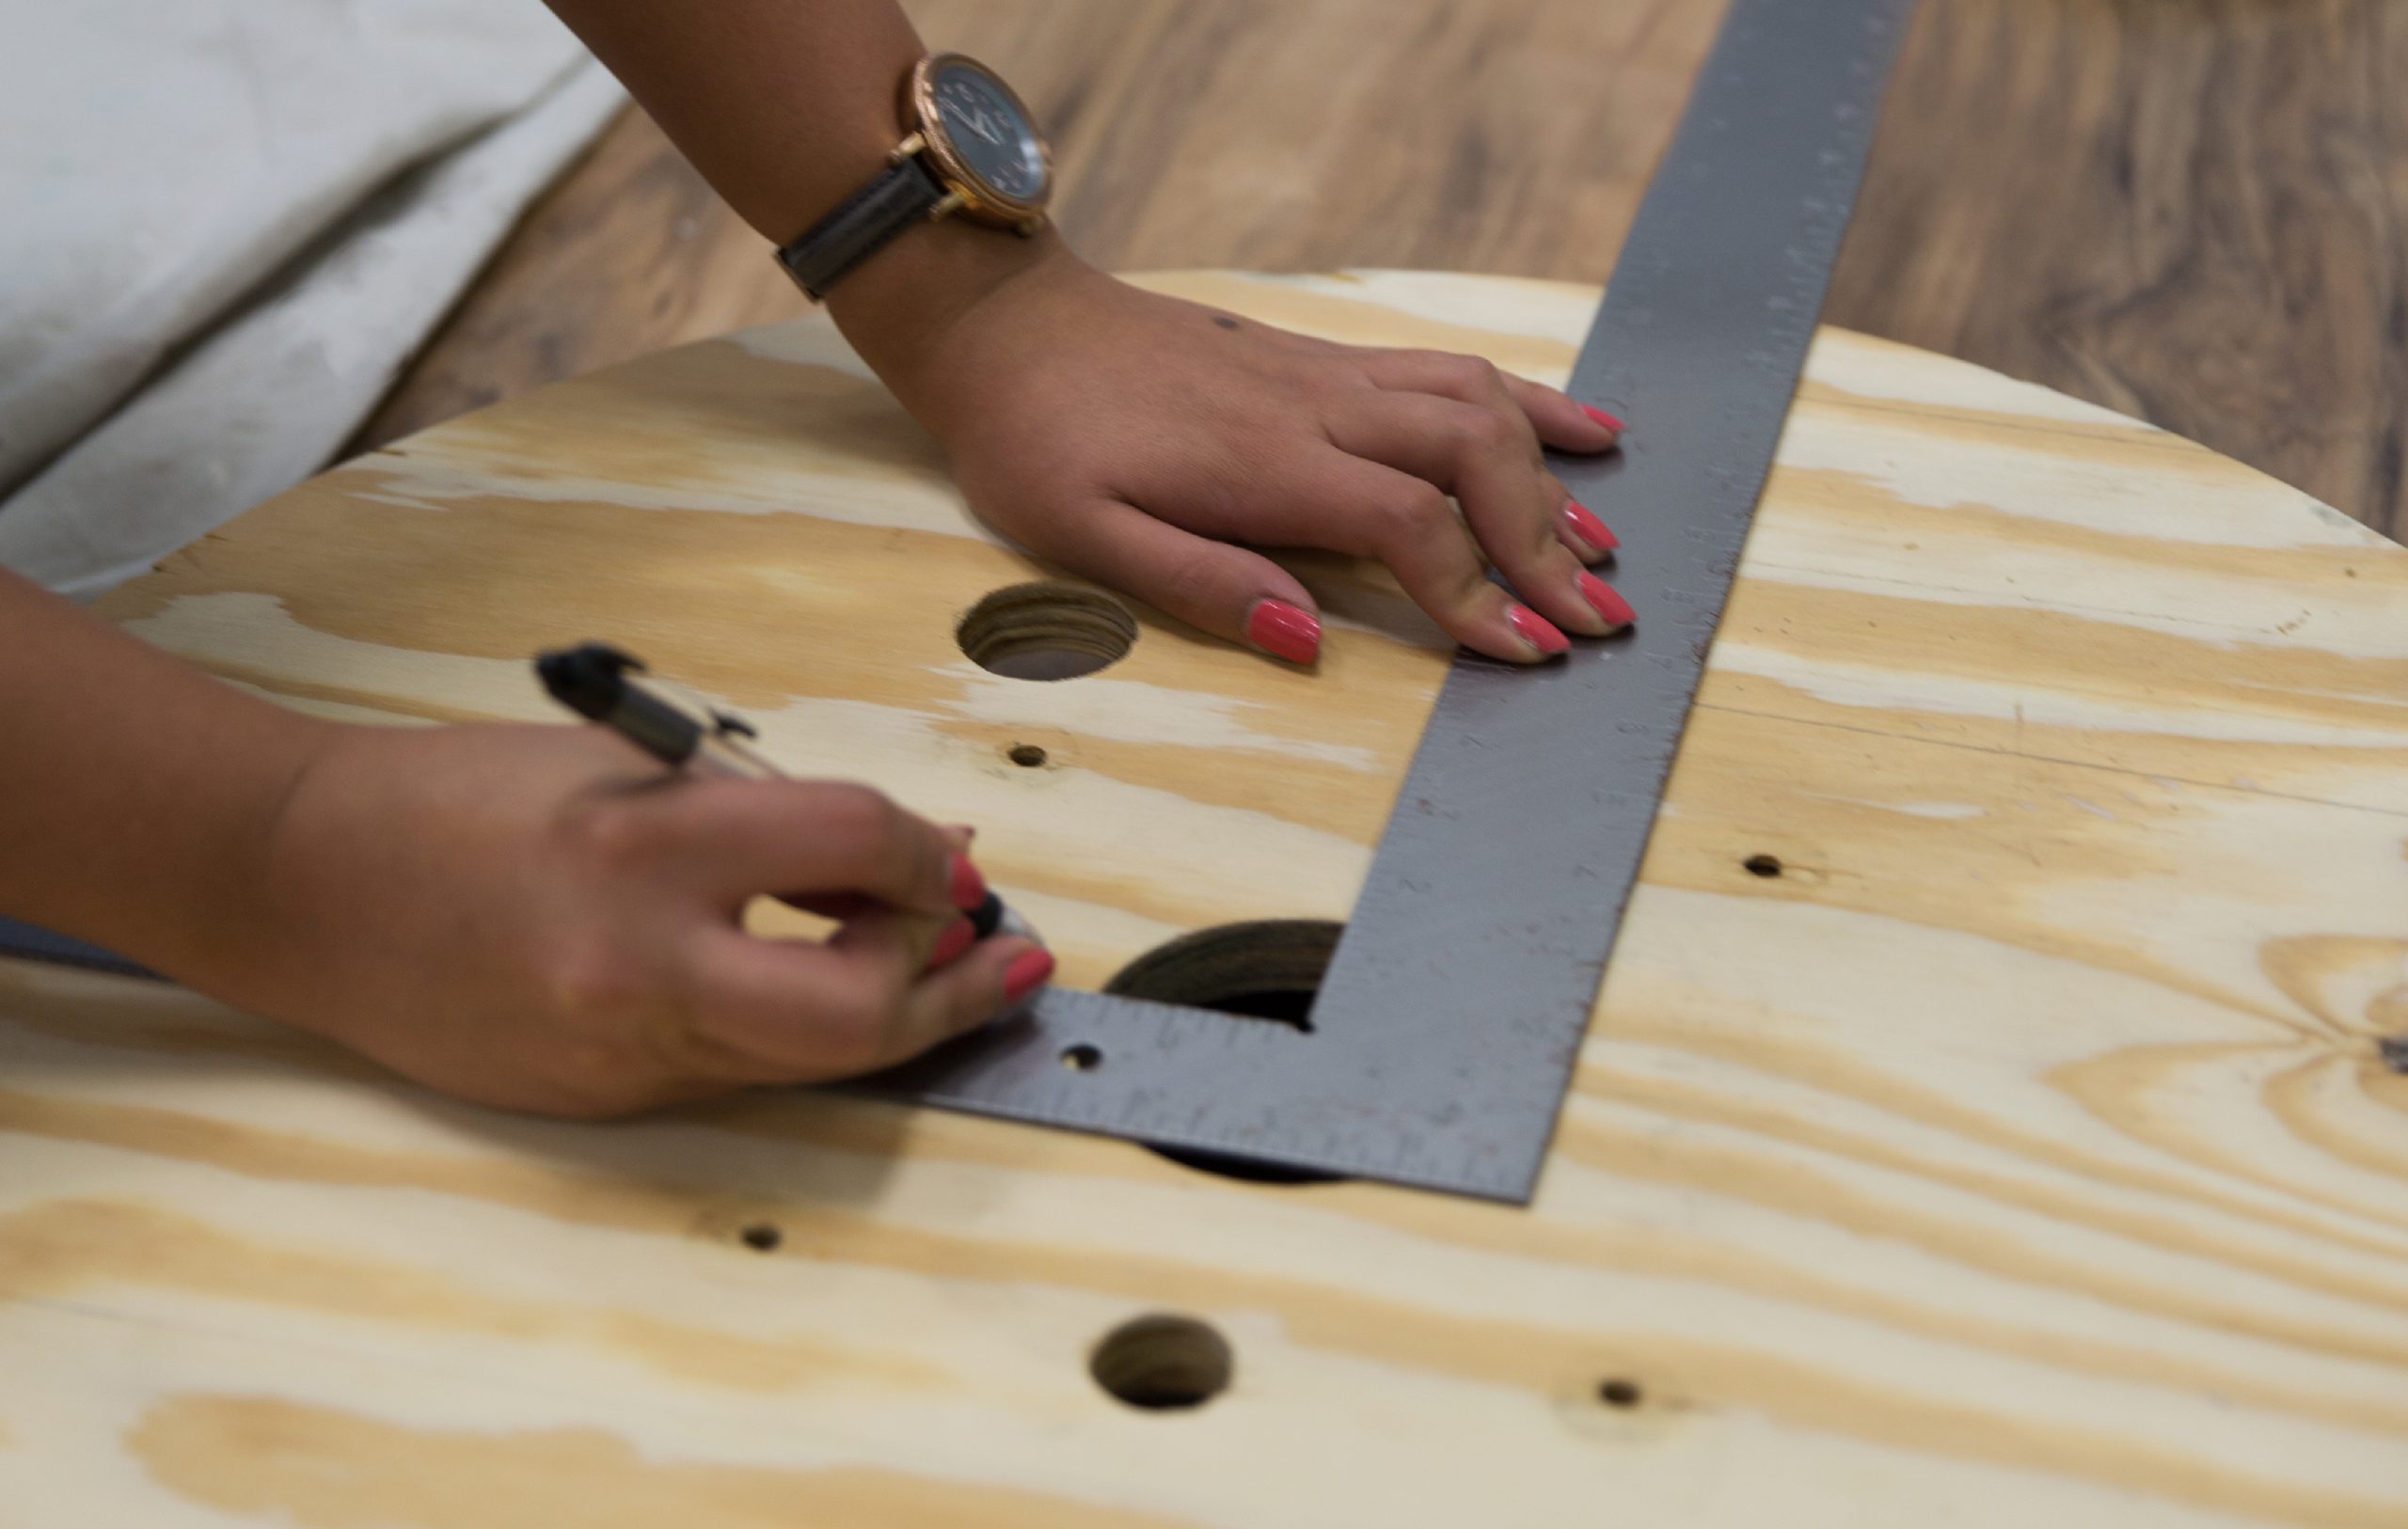
Step 3: Trace flag pattern
With a ruler measure out and trace the American flag on your spool. 1/4 of the spool face should be reserved for the stars, the remaining 3/4 for the stripes.
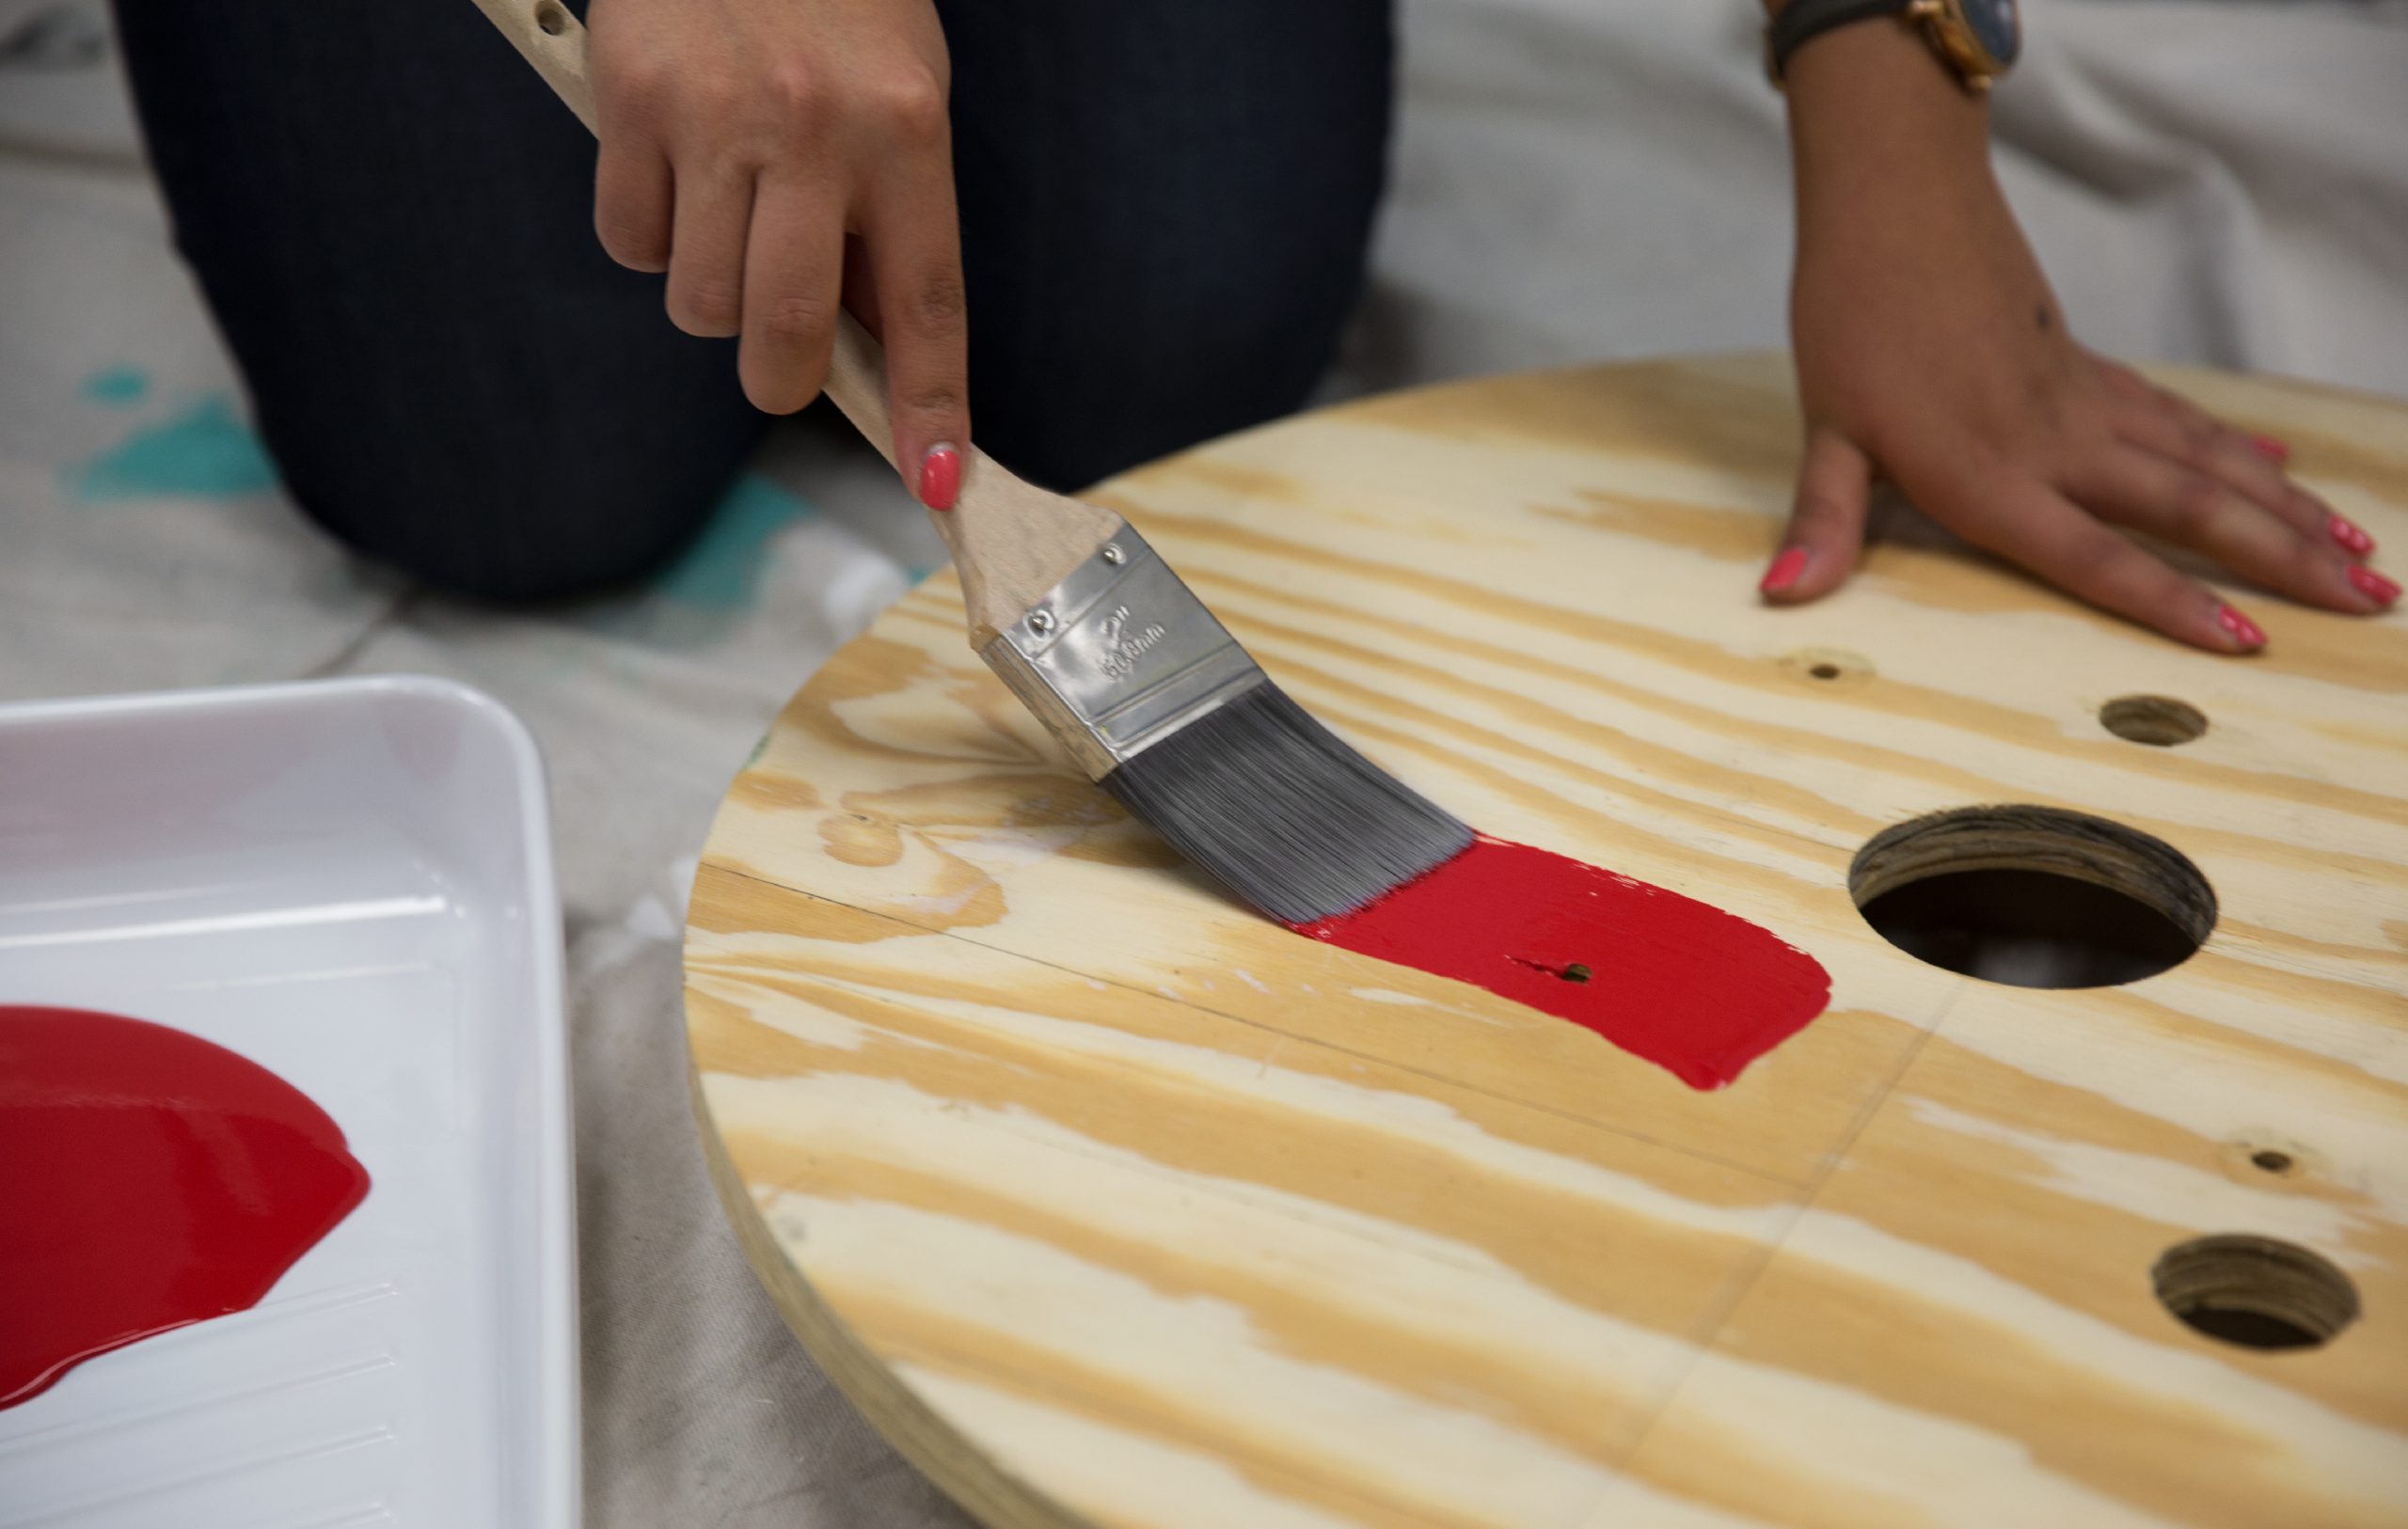
Step 4: Paint
Once you have traced all of the lines, start painting your colors in. Allow the paint to dry and apply a second coat if necessary/desired.
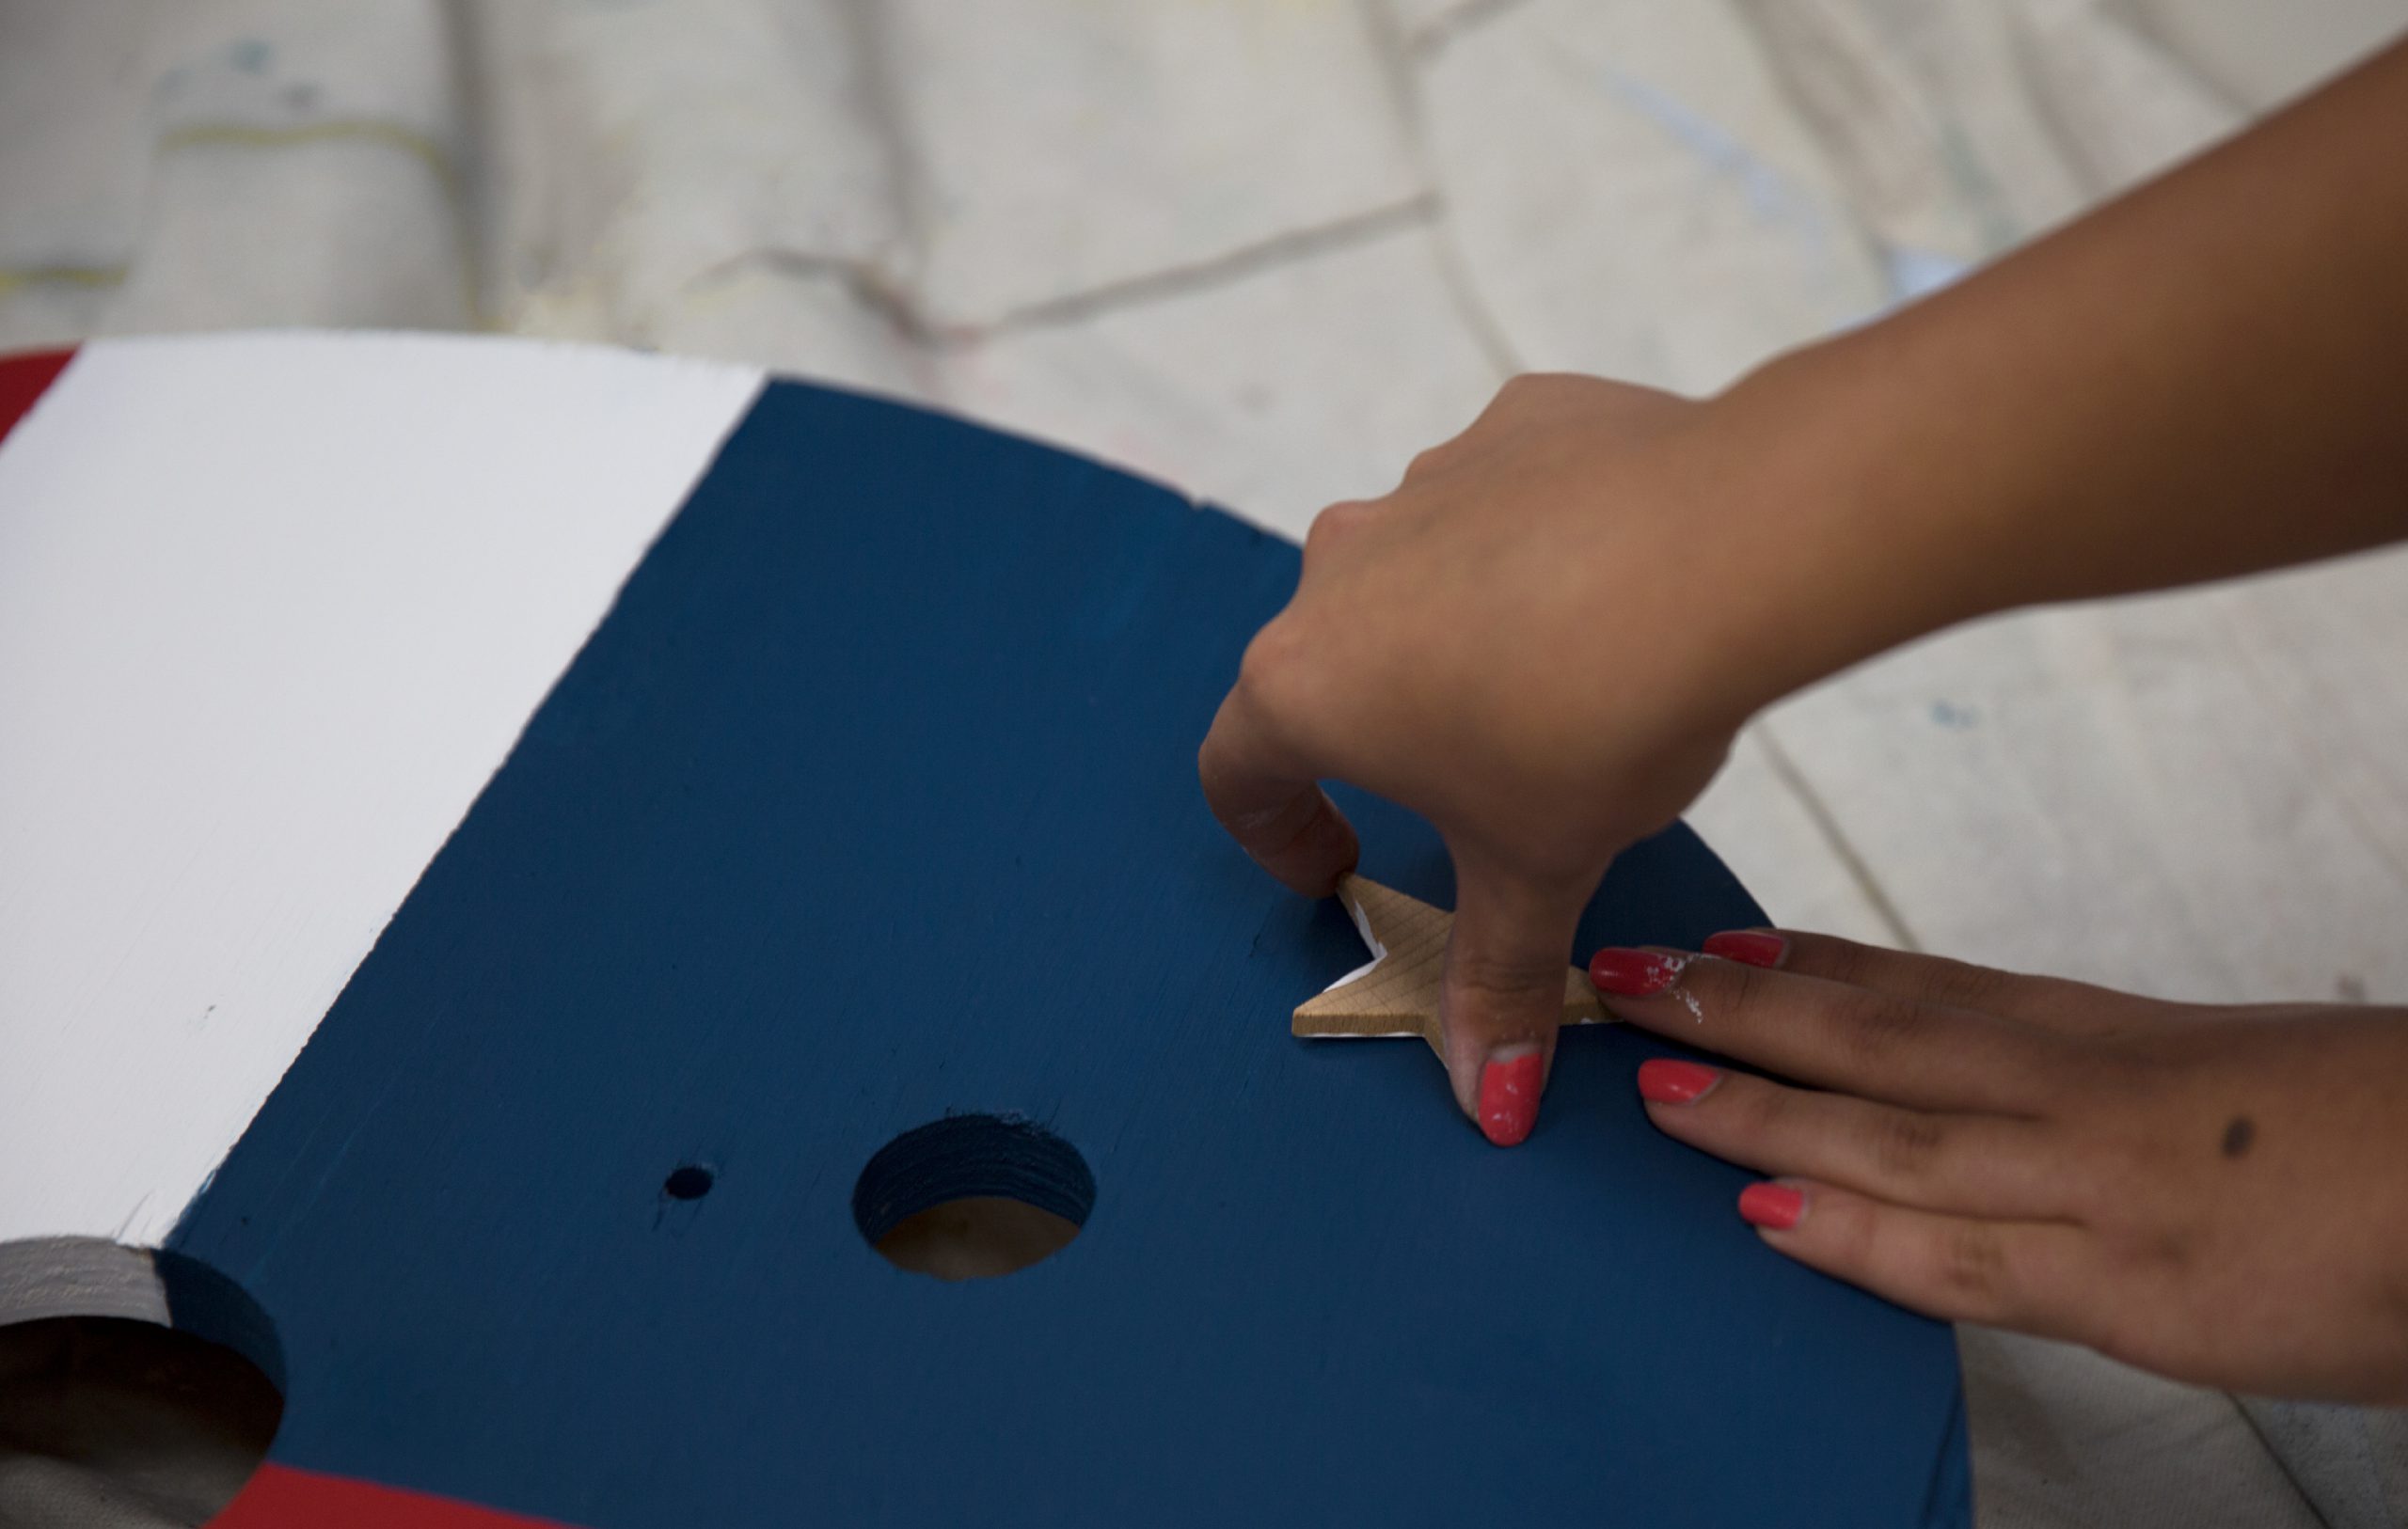
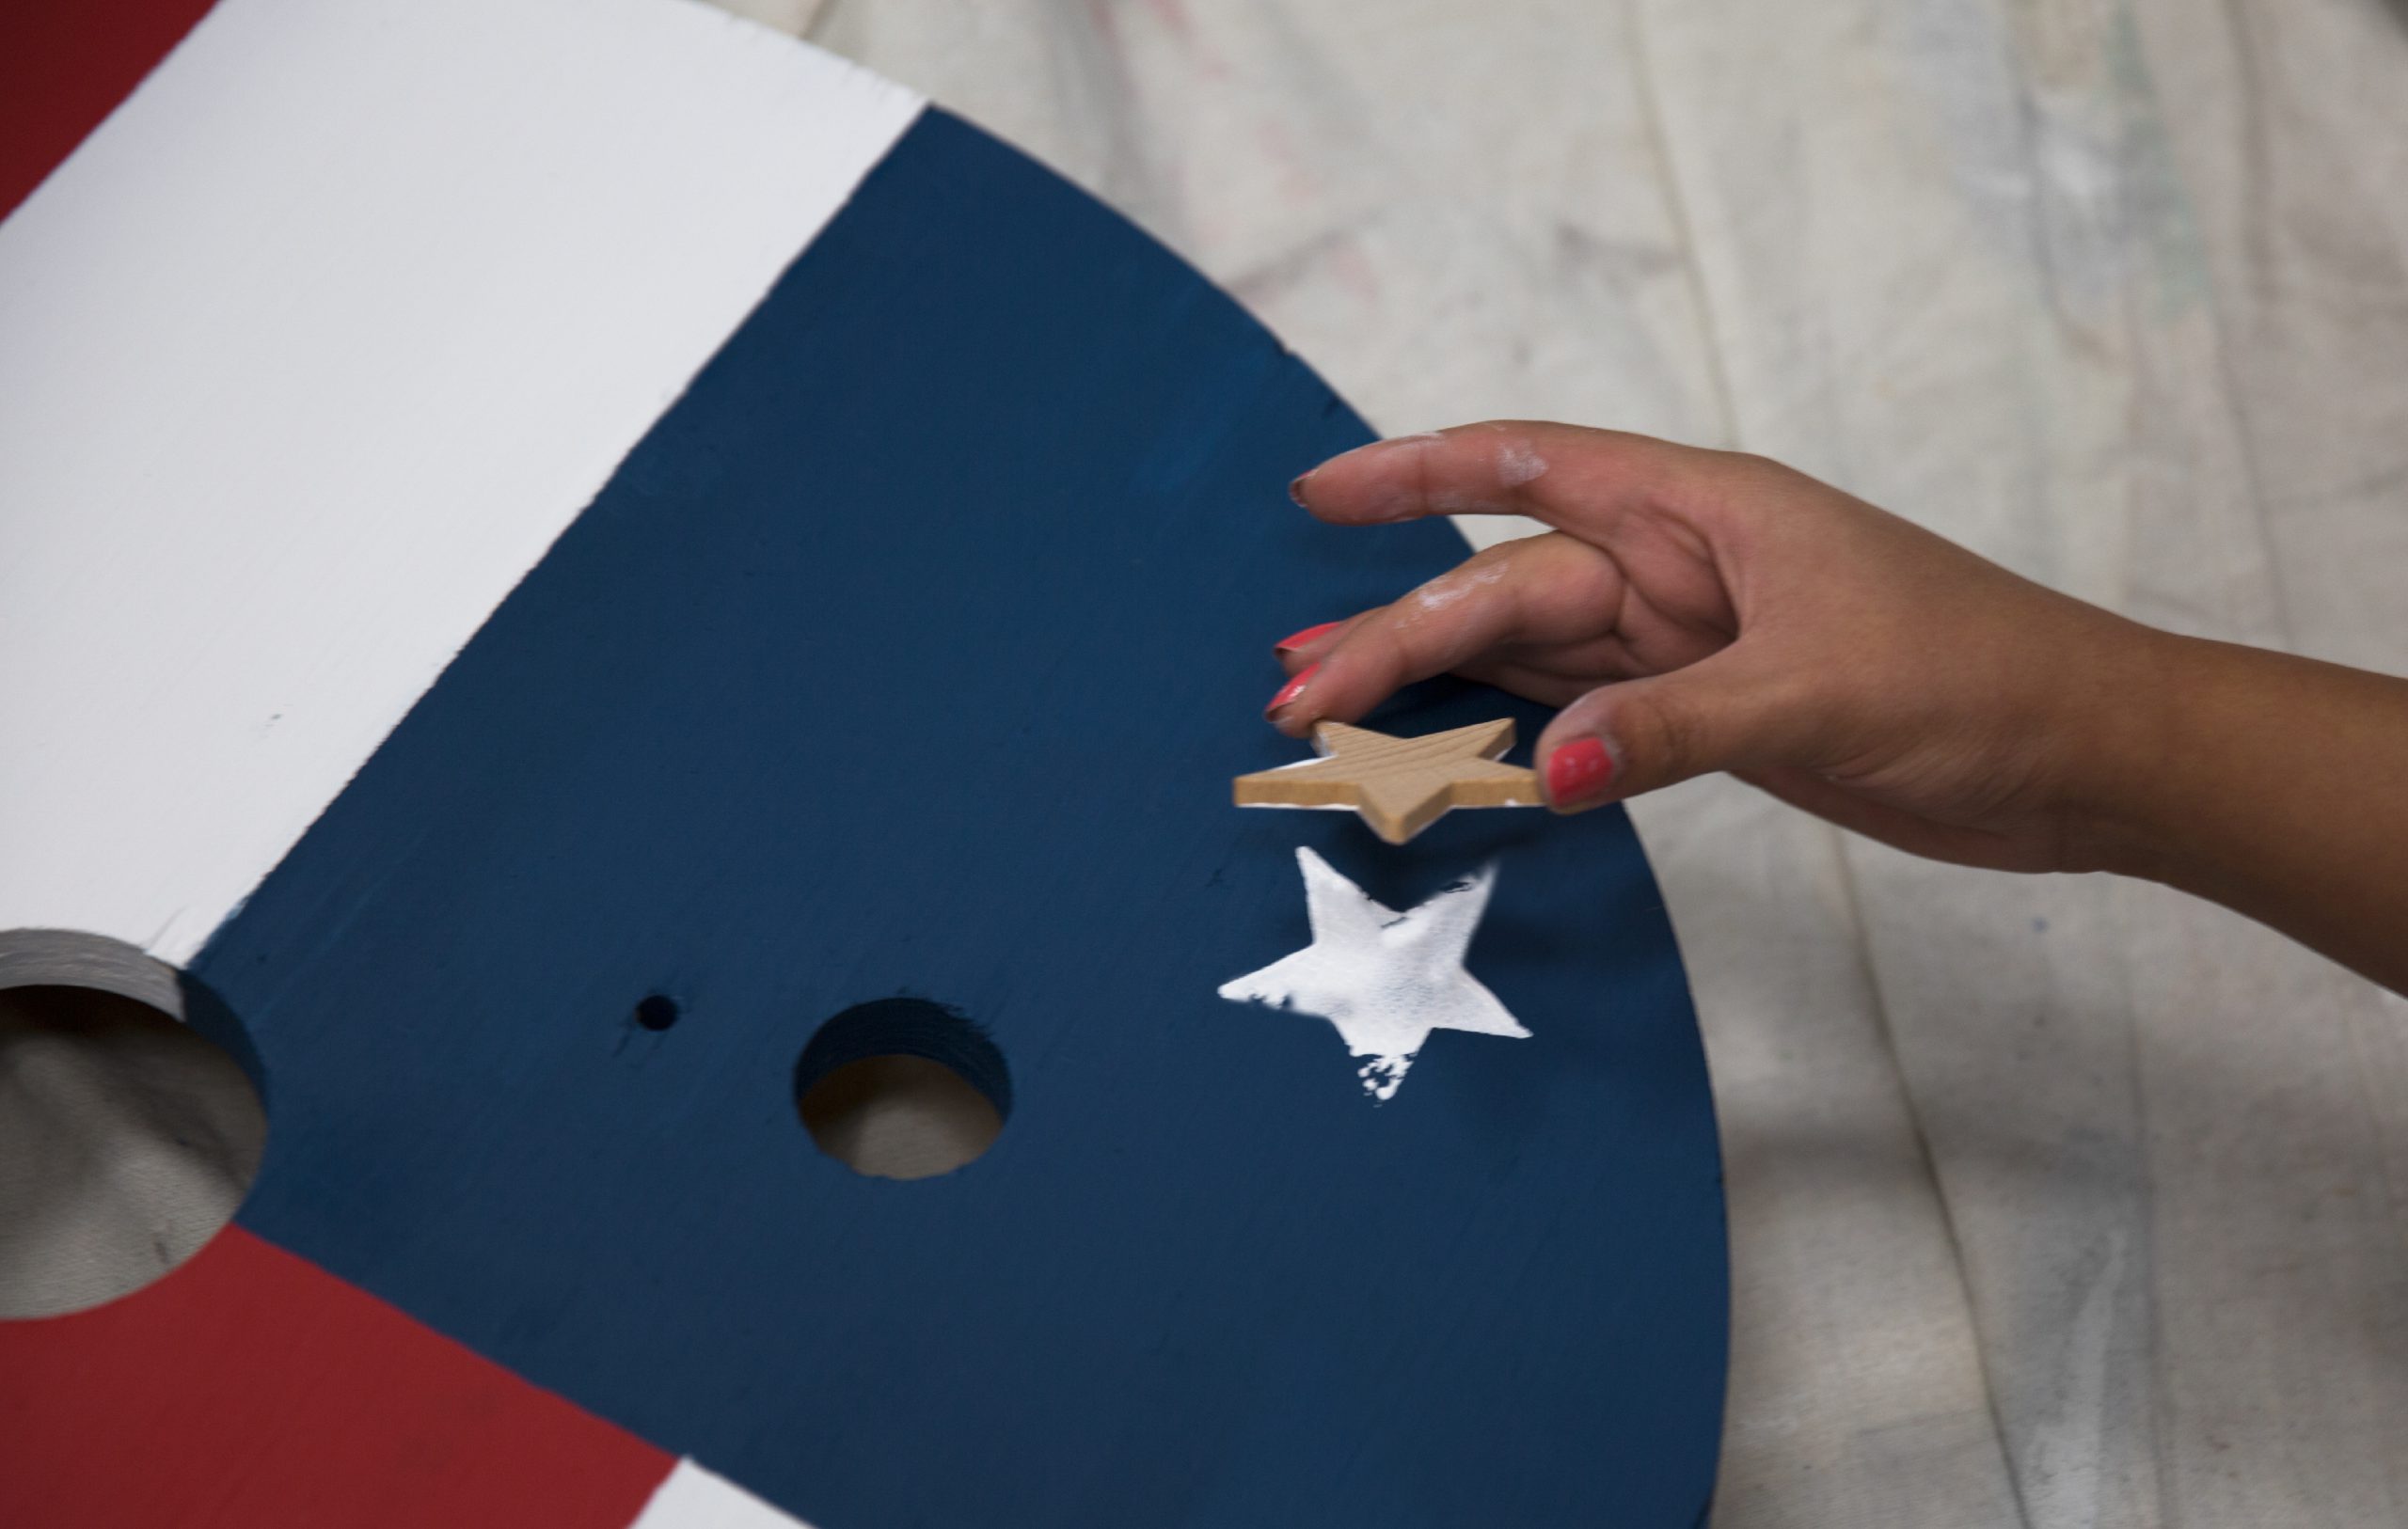
Step 5: Stamp the Stars on
Once the paint has dried, paint a wooden star and place carefully on the blue part. Press down evenly on the star, with care not to shift the star out of place. Gently remove the star and repeat the step until the section is satisfactorily starred. 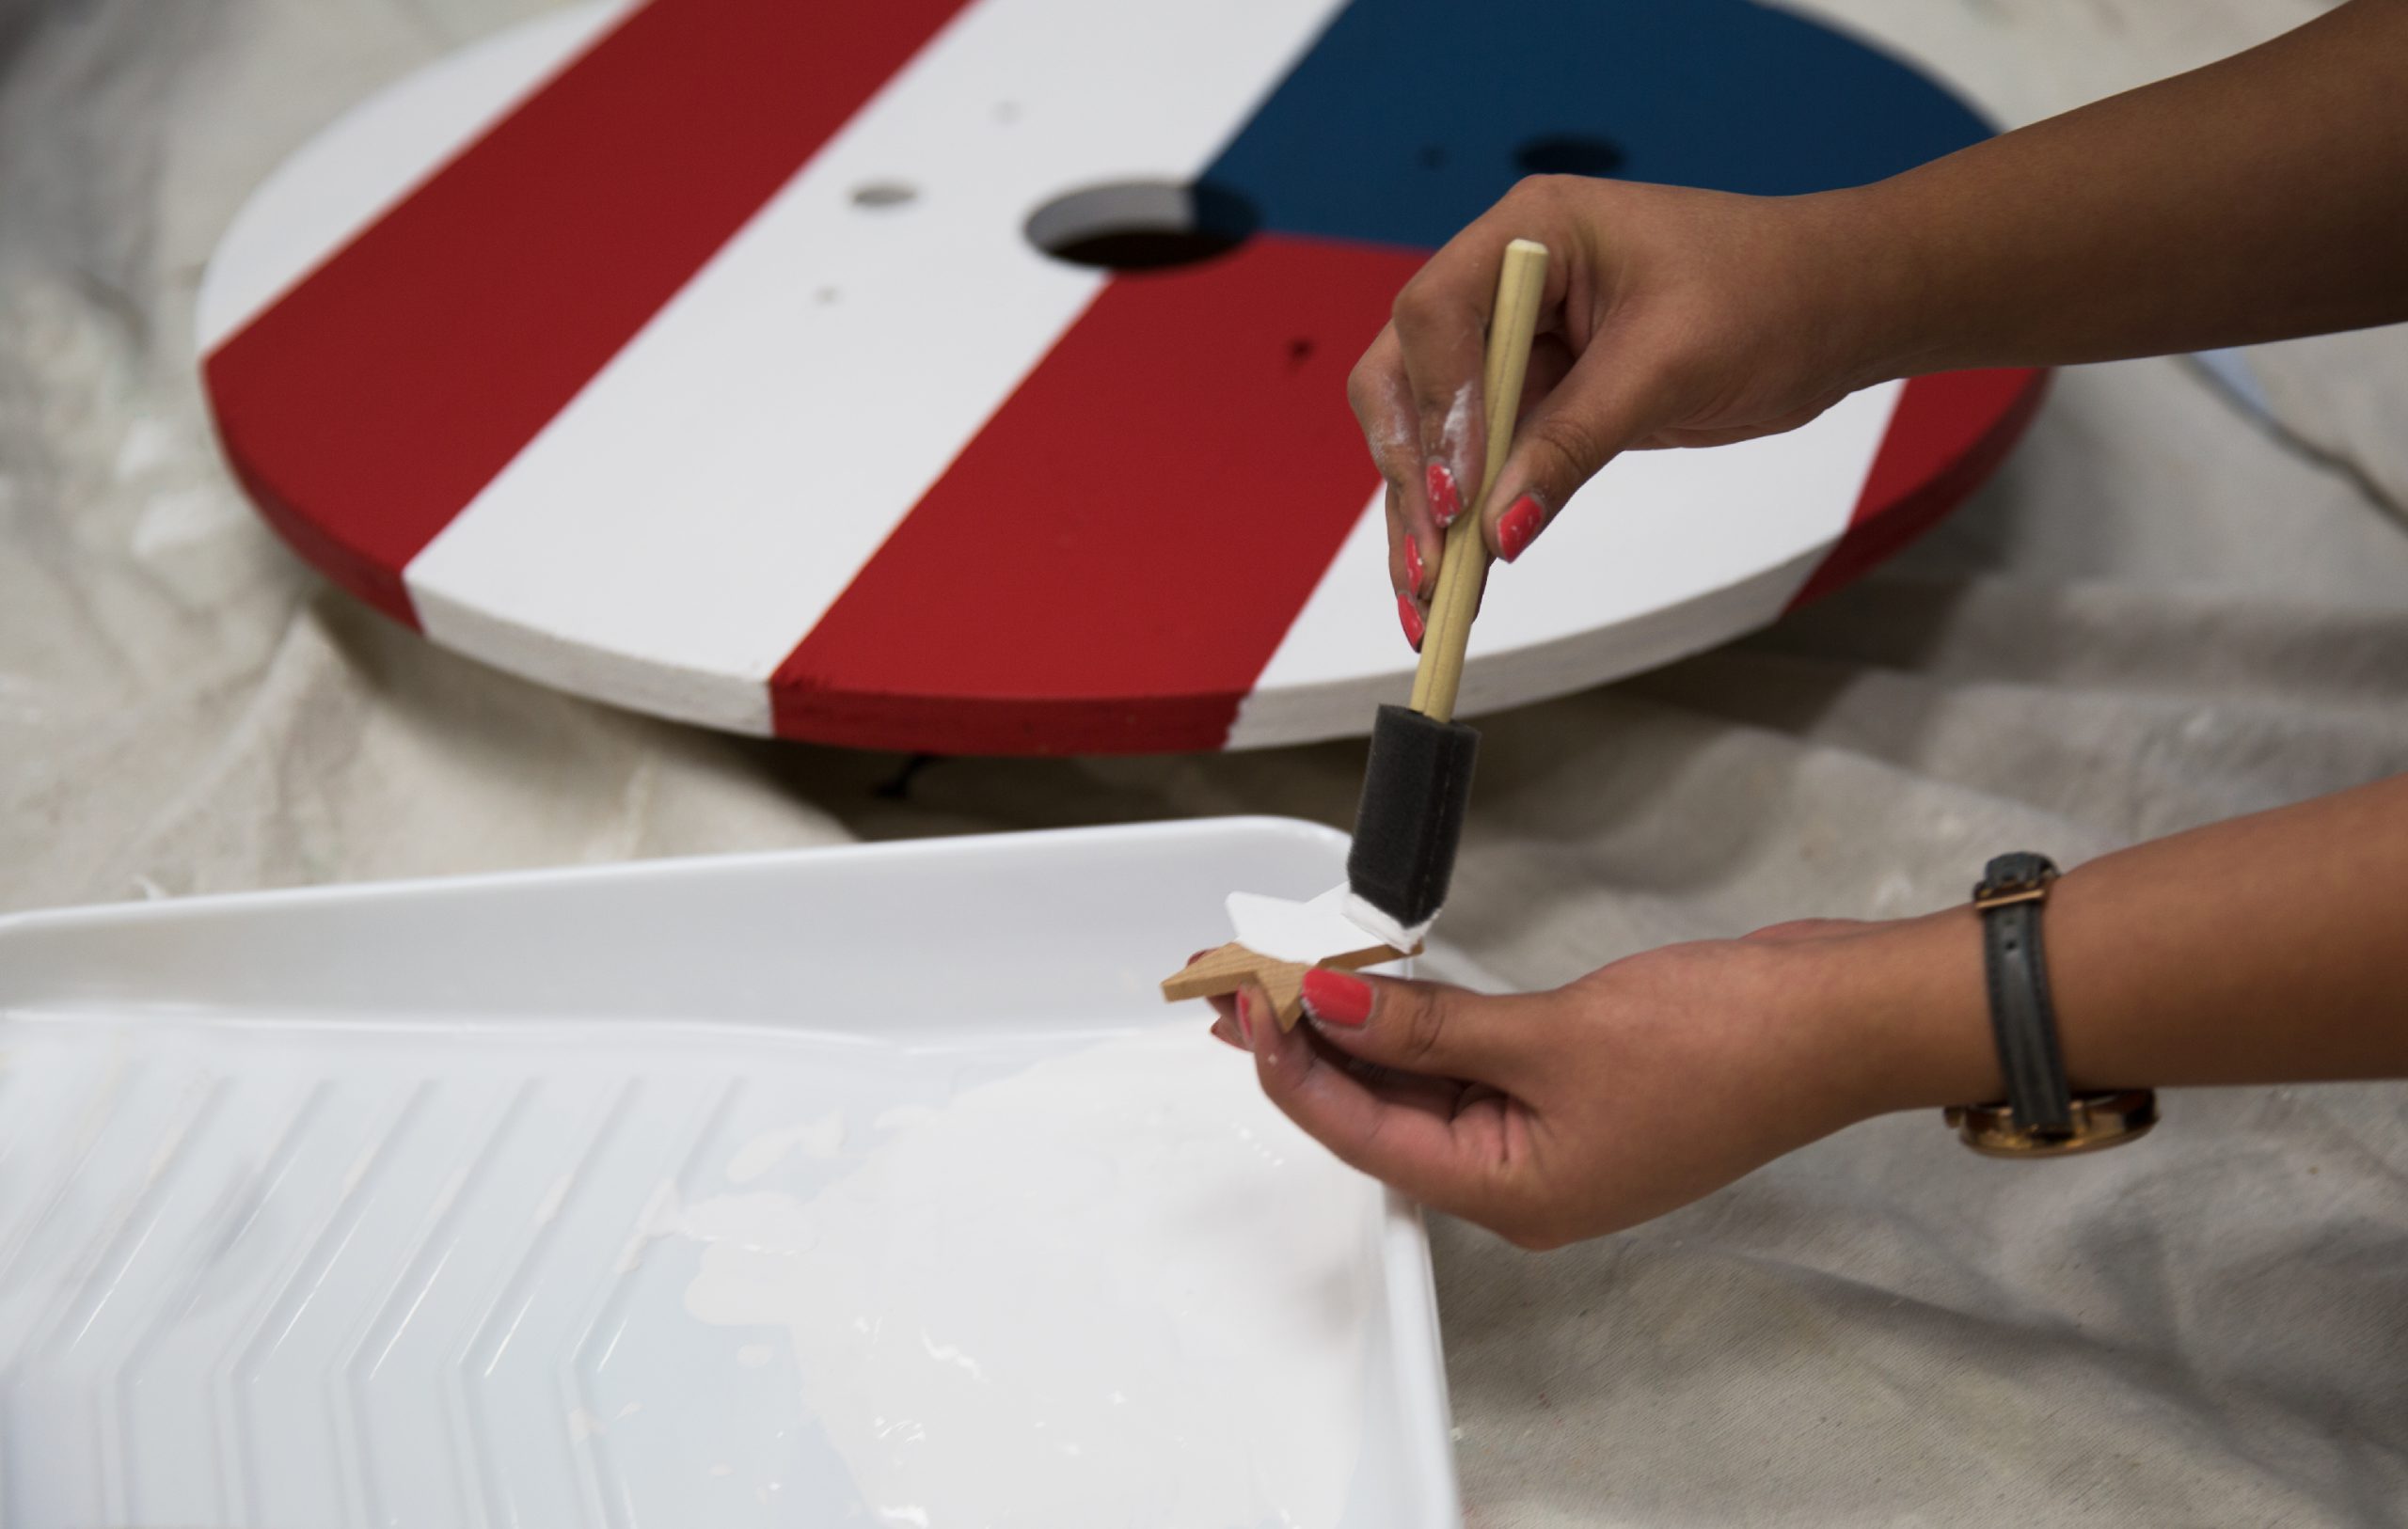
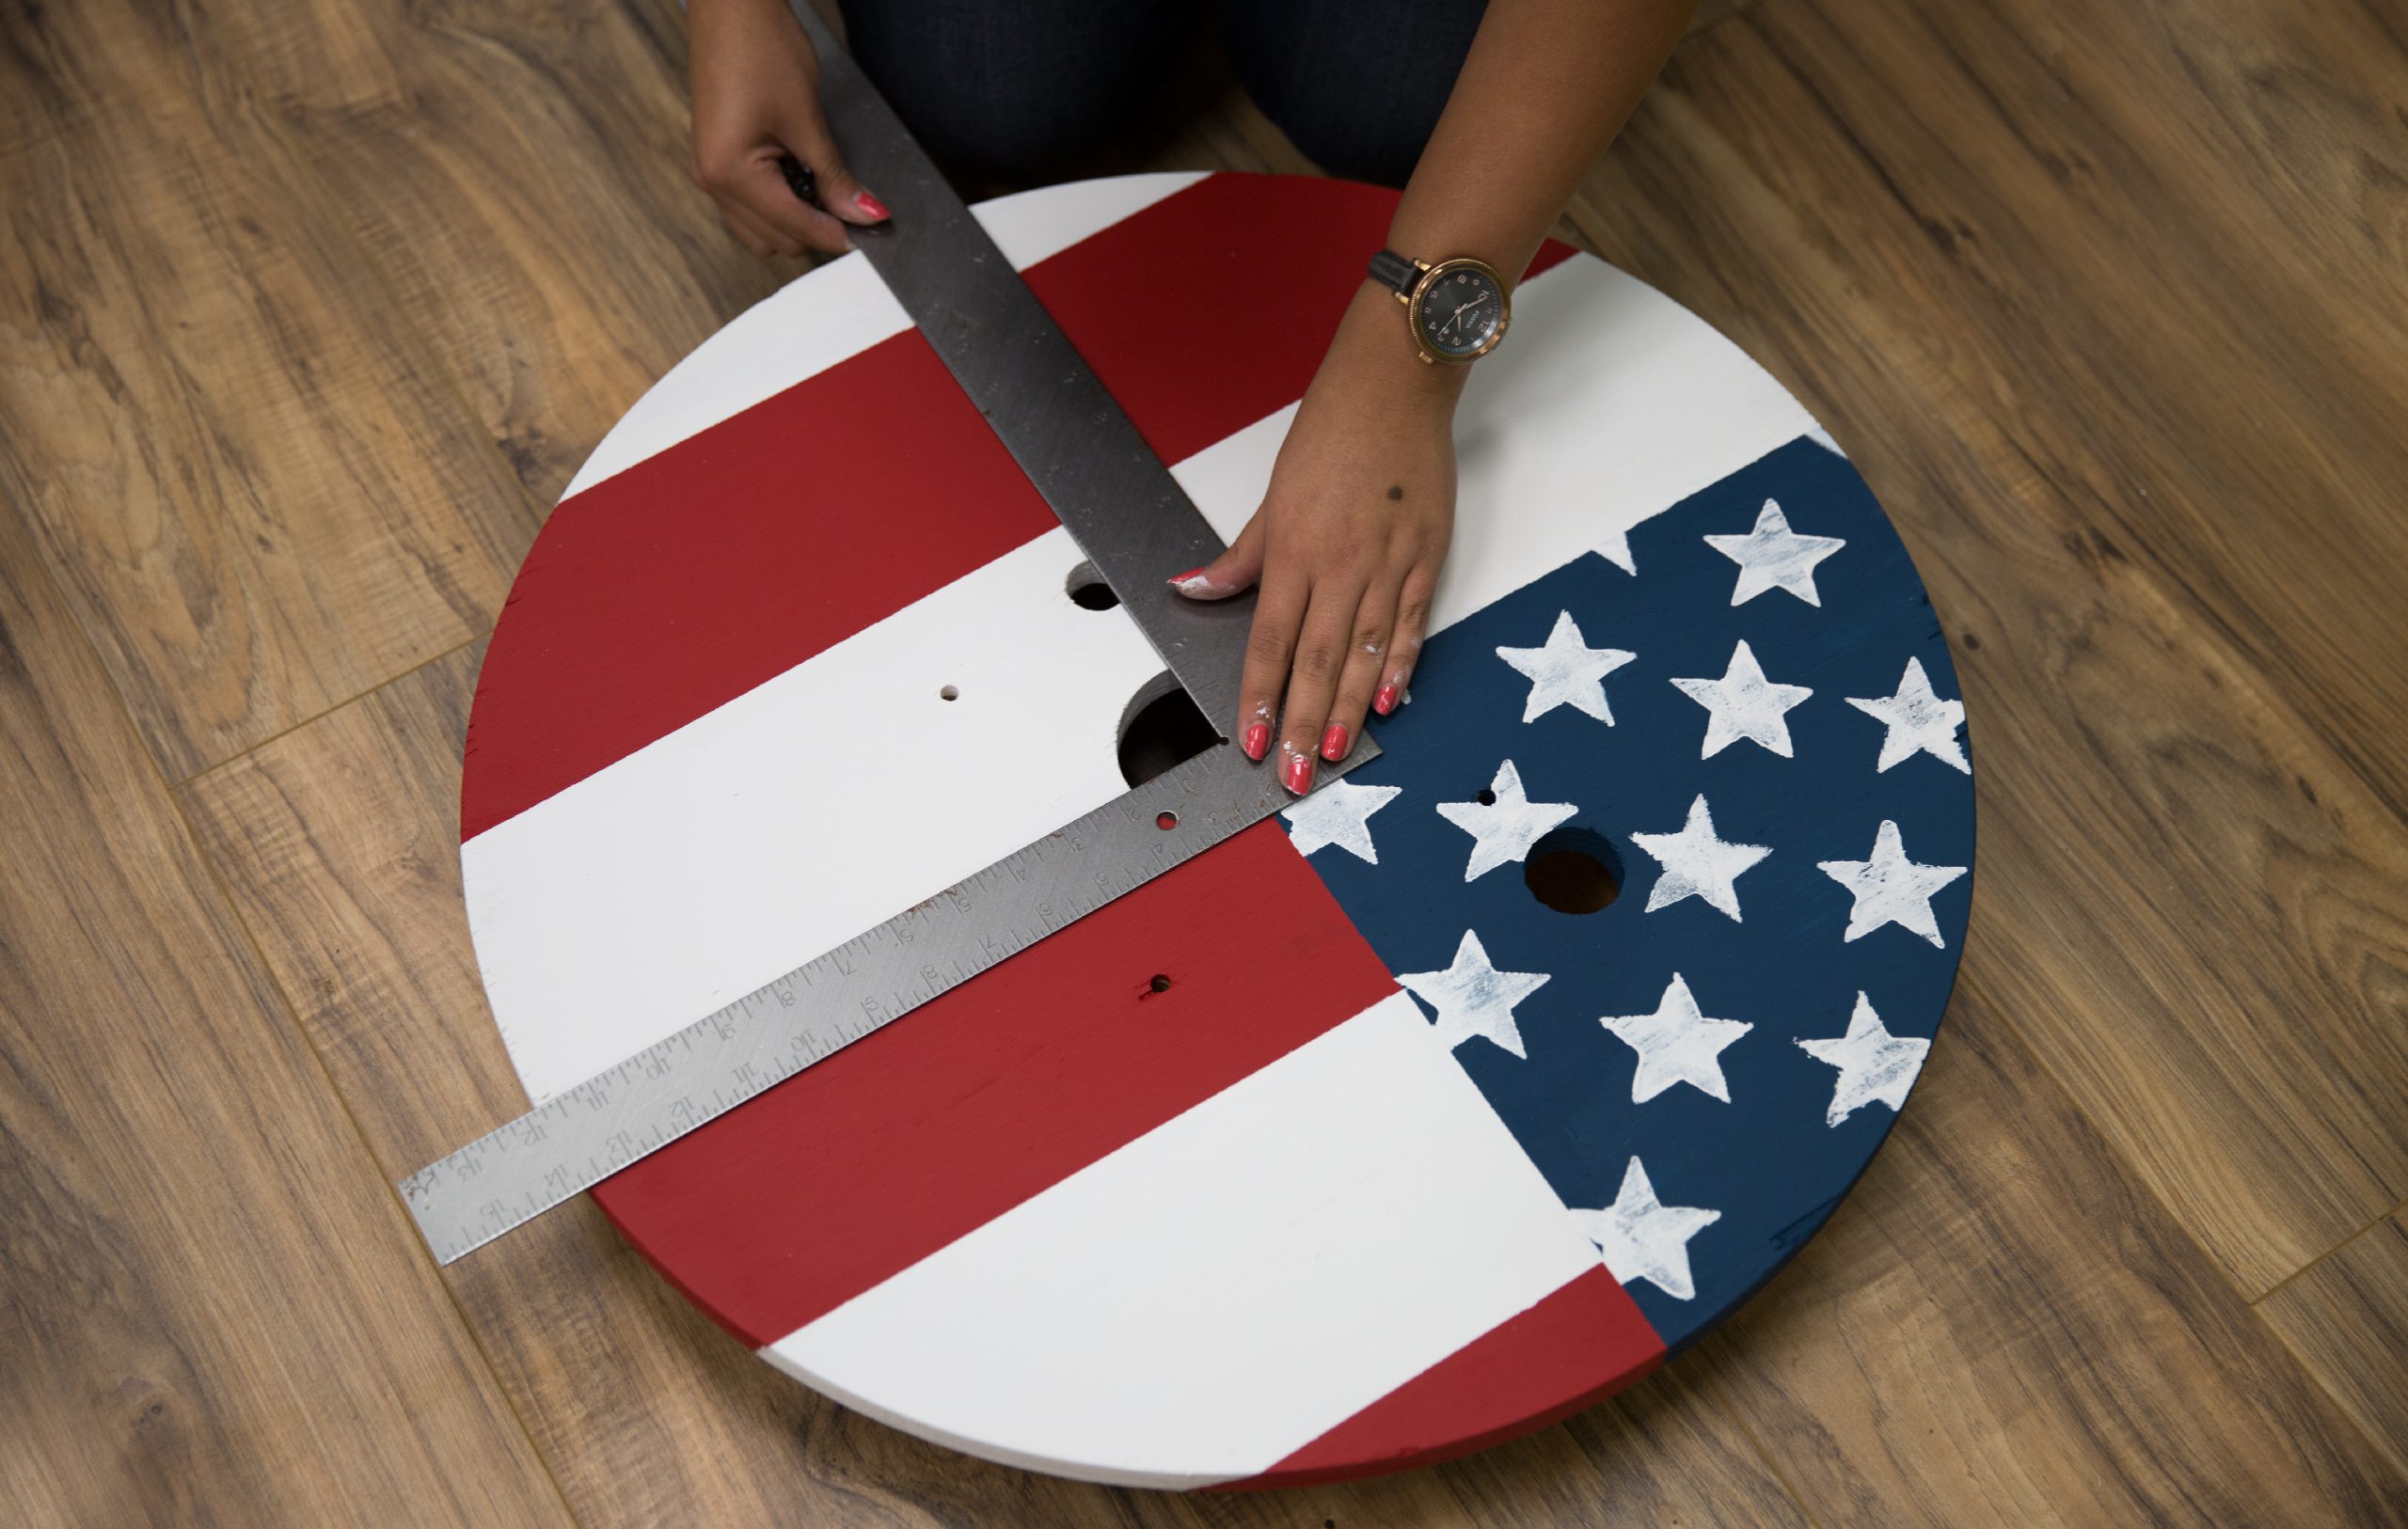
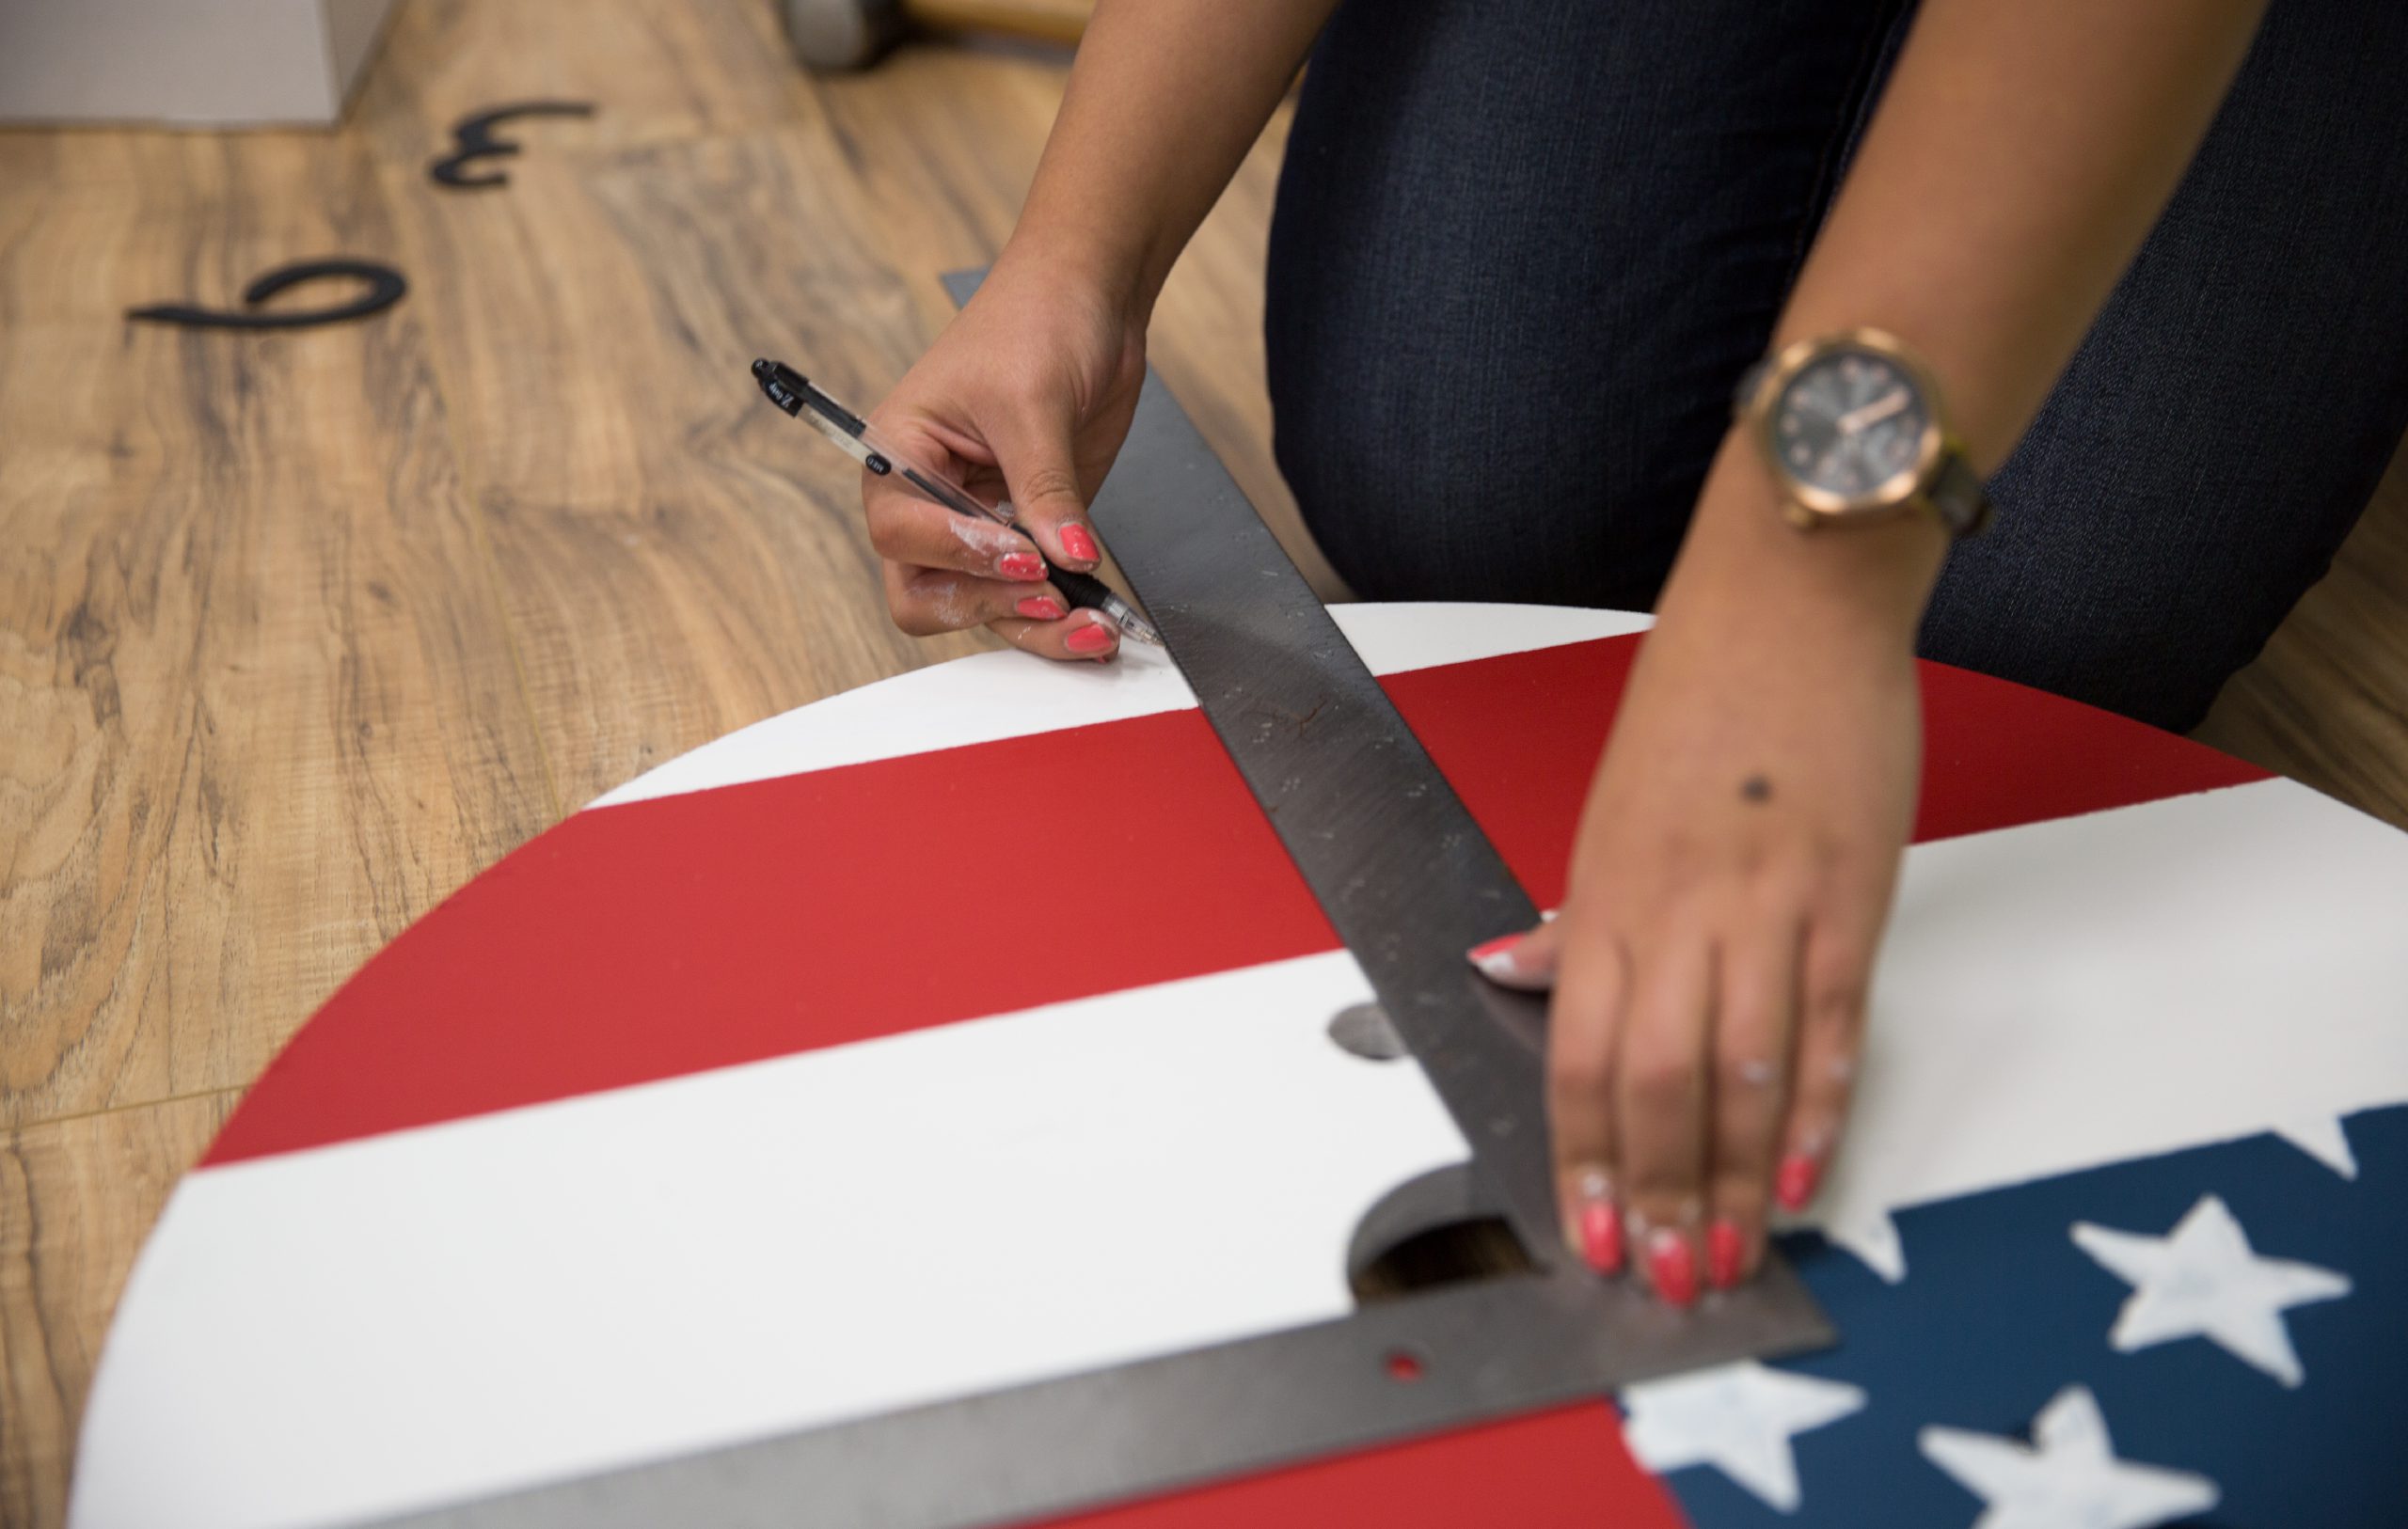
Step 6: Mark placement for numbers 3, 6, 9, and 12
Using a ruler, find the four center points on your circle where the numbers 3, 6, 9, and 12 should be attached. These numbers will be your guide numbers when placing the others.
Step 7: Attach the central numbers
Using a hammer, secure the four guide numbers in place.
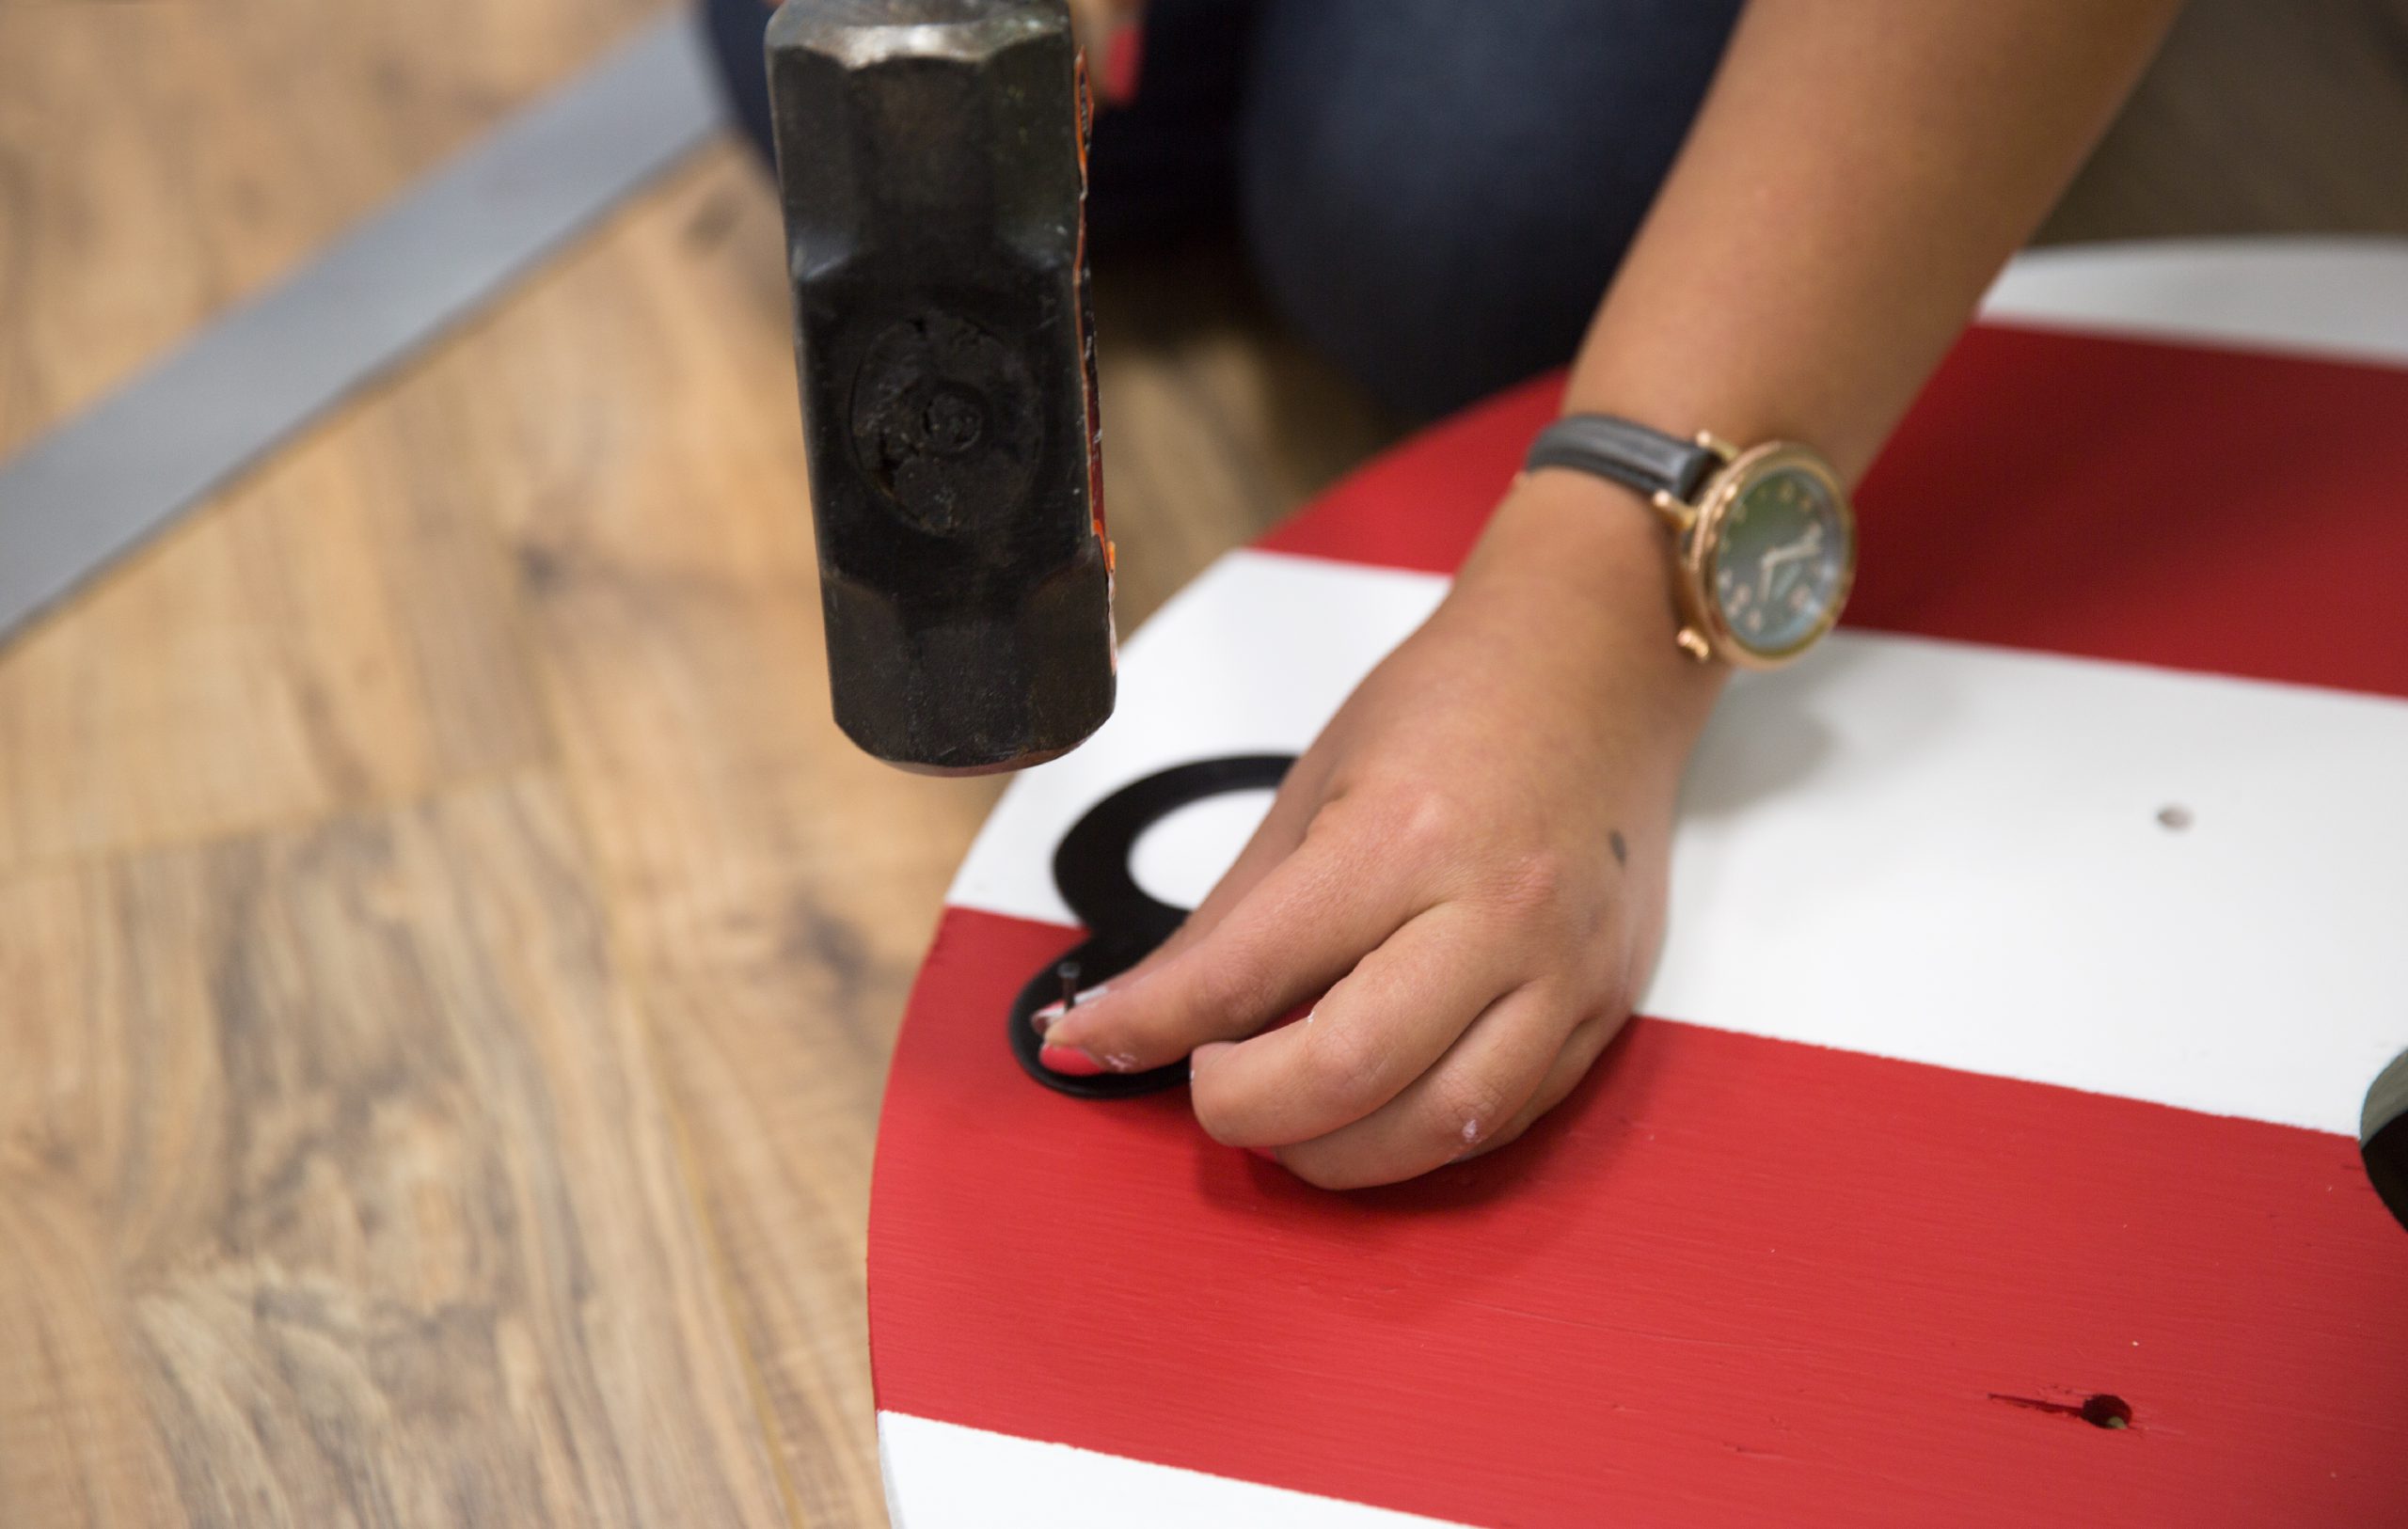
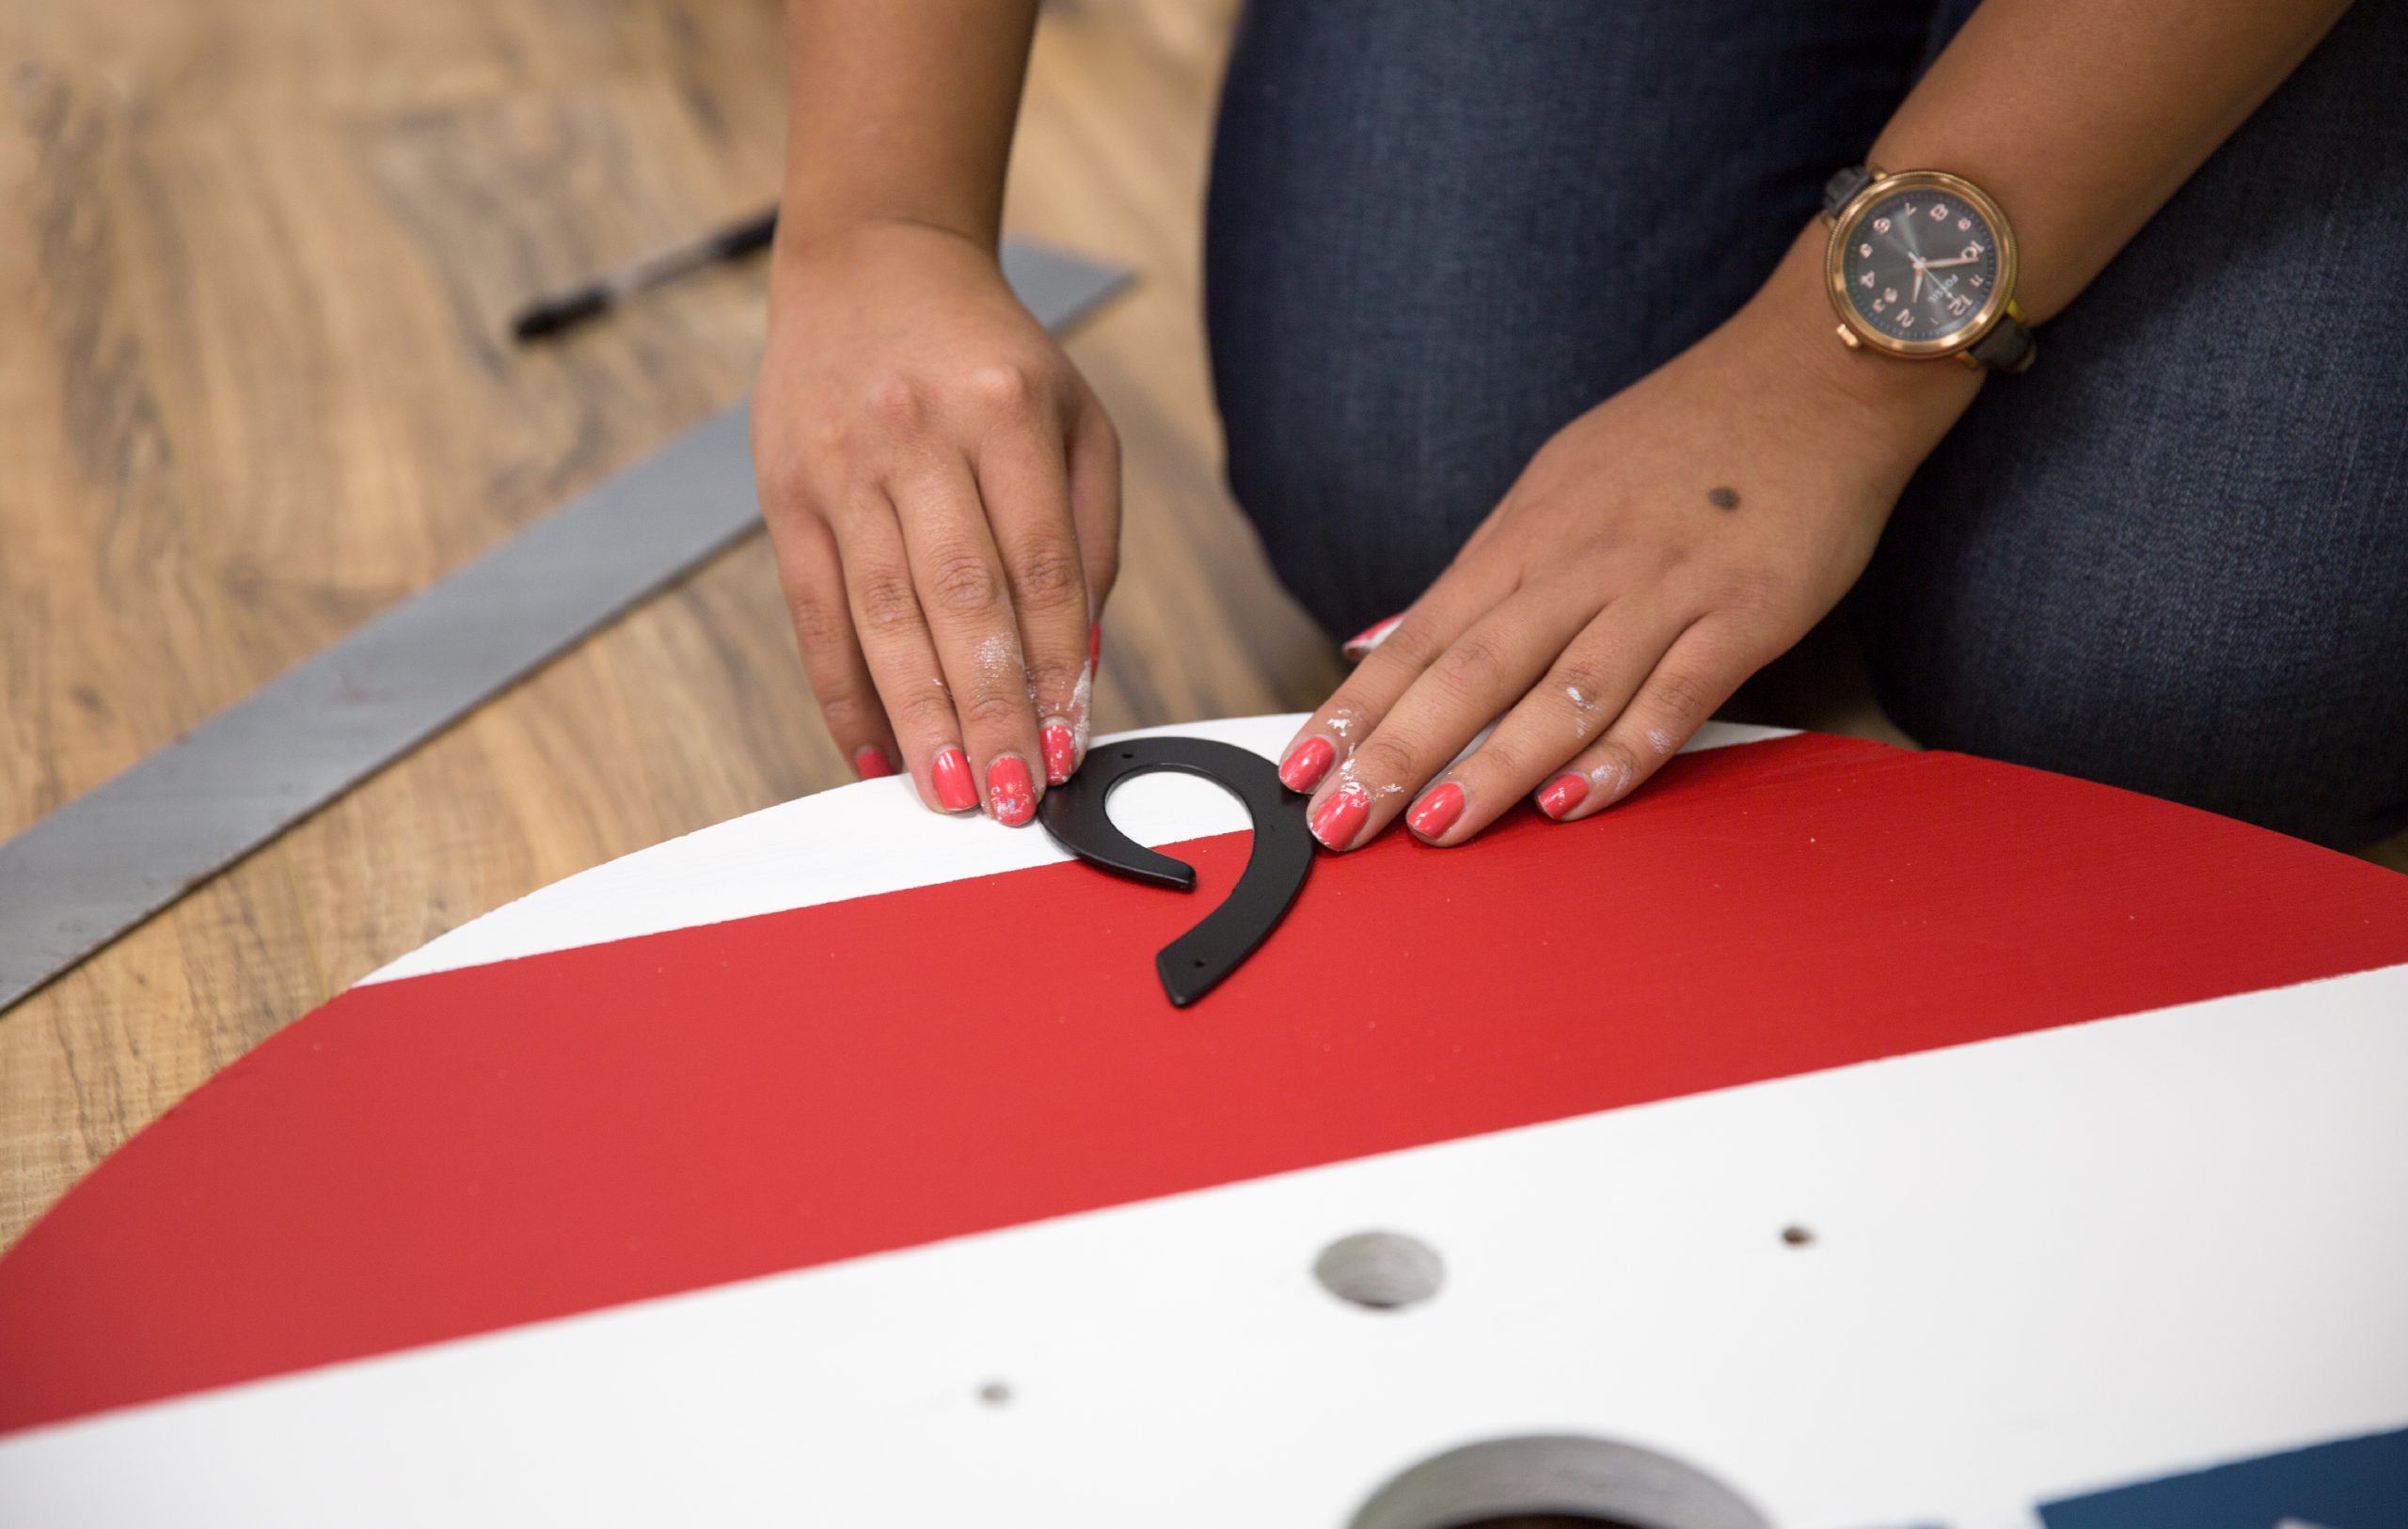
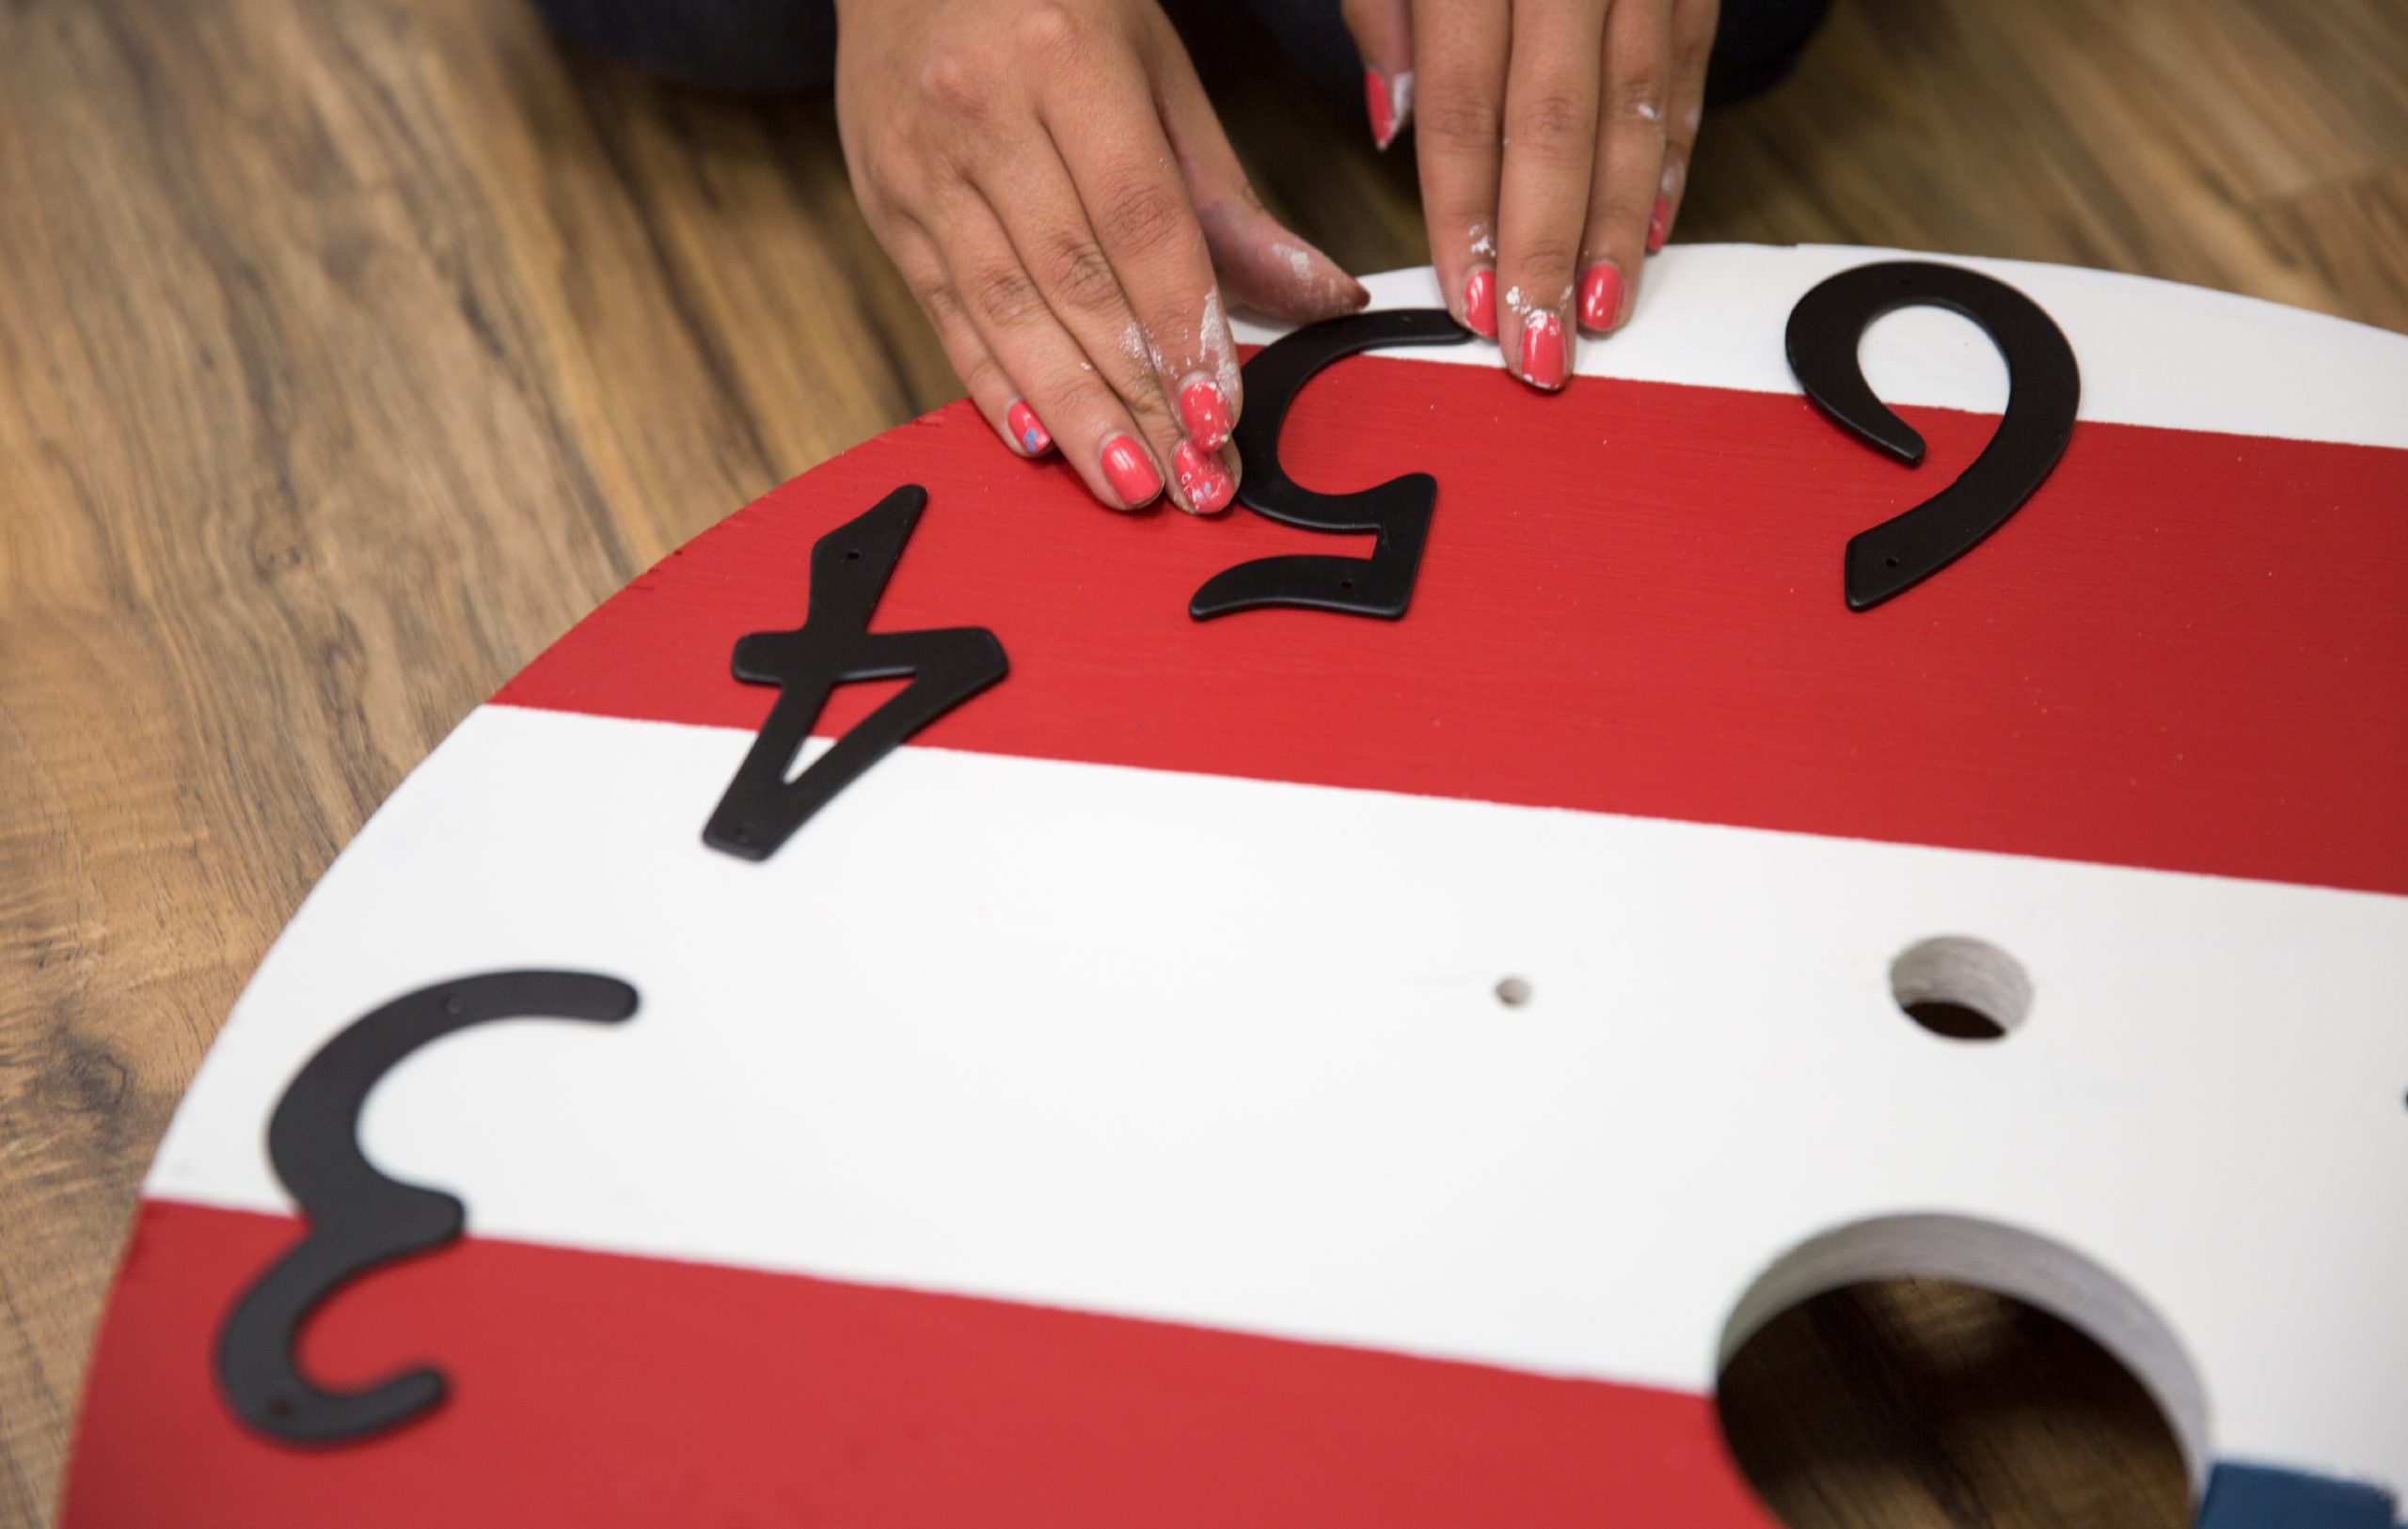
Step 8: Attach the other numbers
Divide the space between guide numbers into equal parts and position the other numbers accordingly. Secure each with hammer and nails.
Step 9: Measure the center hole
By placing the movement kit in the center hole, you can see if the size is correct, or you need an additional circle for the center to cover the hole. In our case, the hole was bigger than the movement kit.
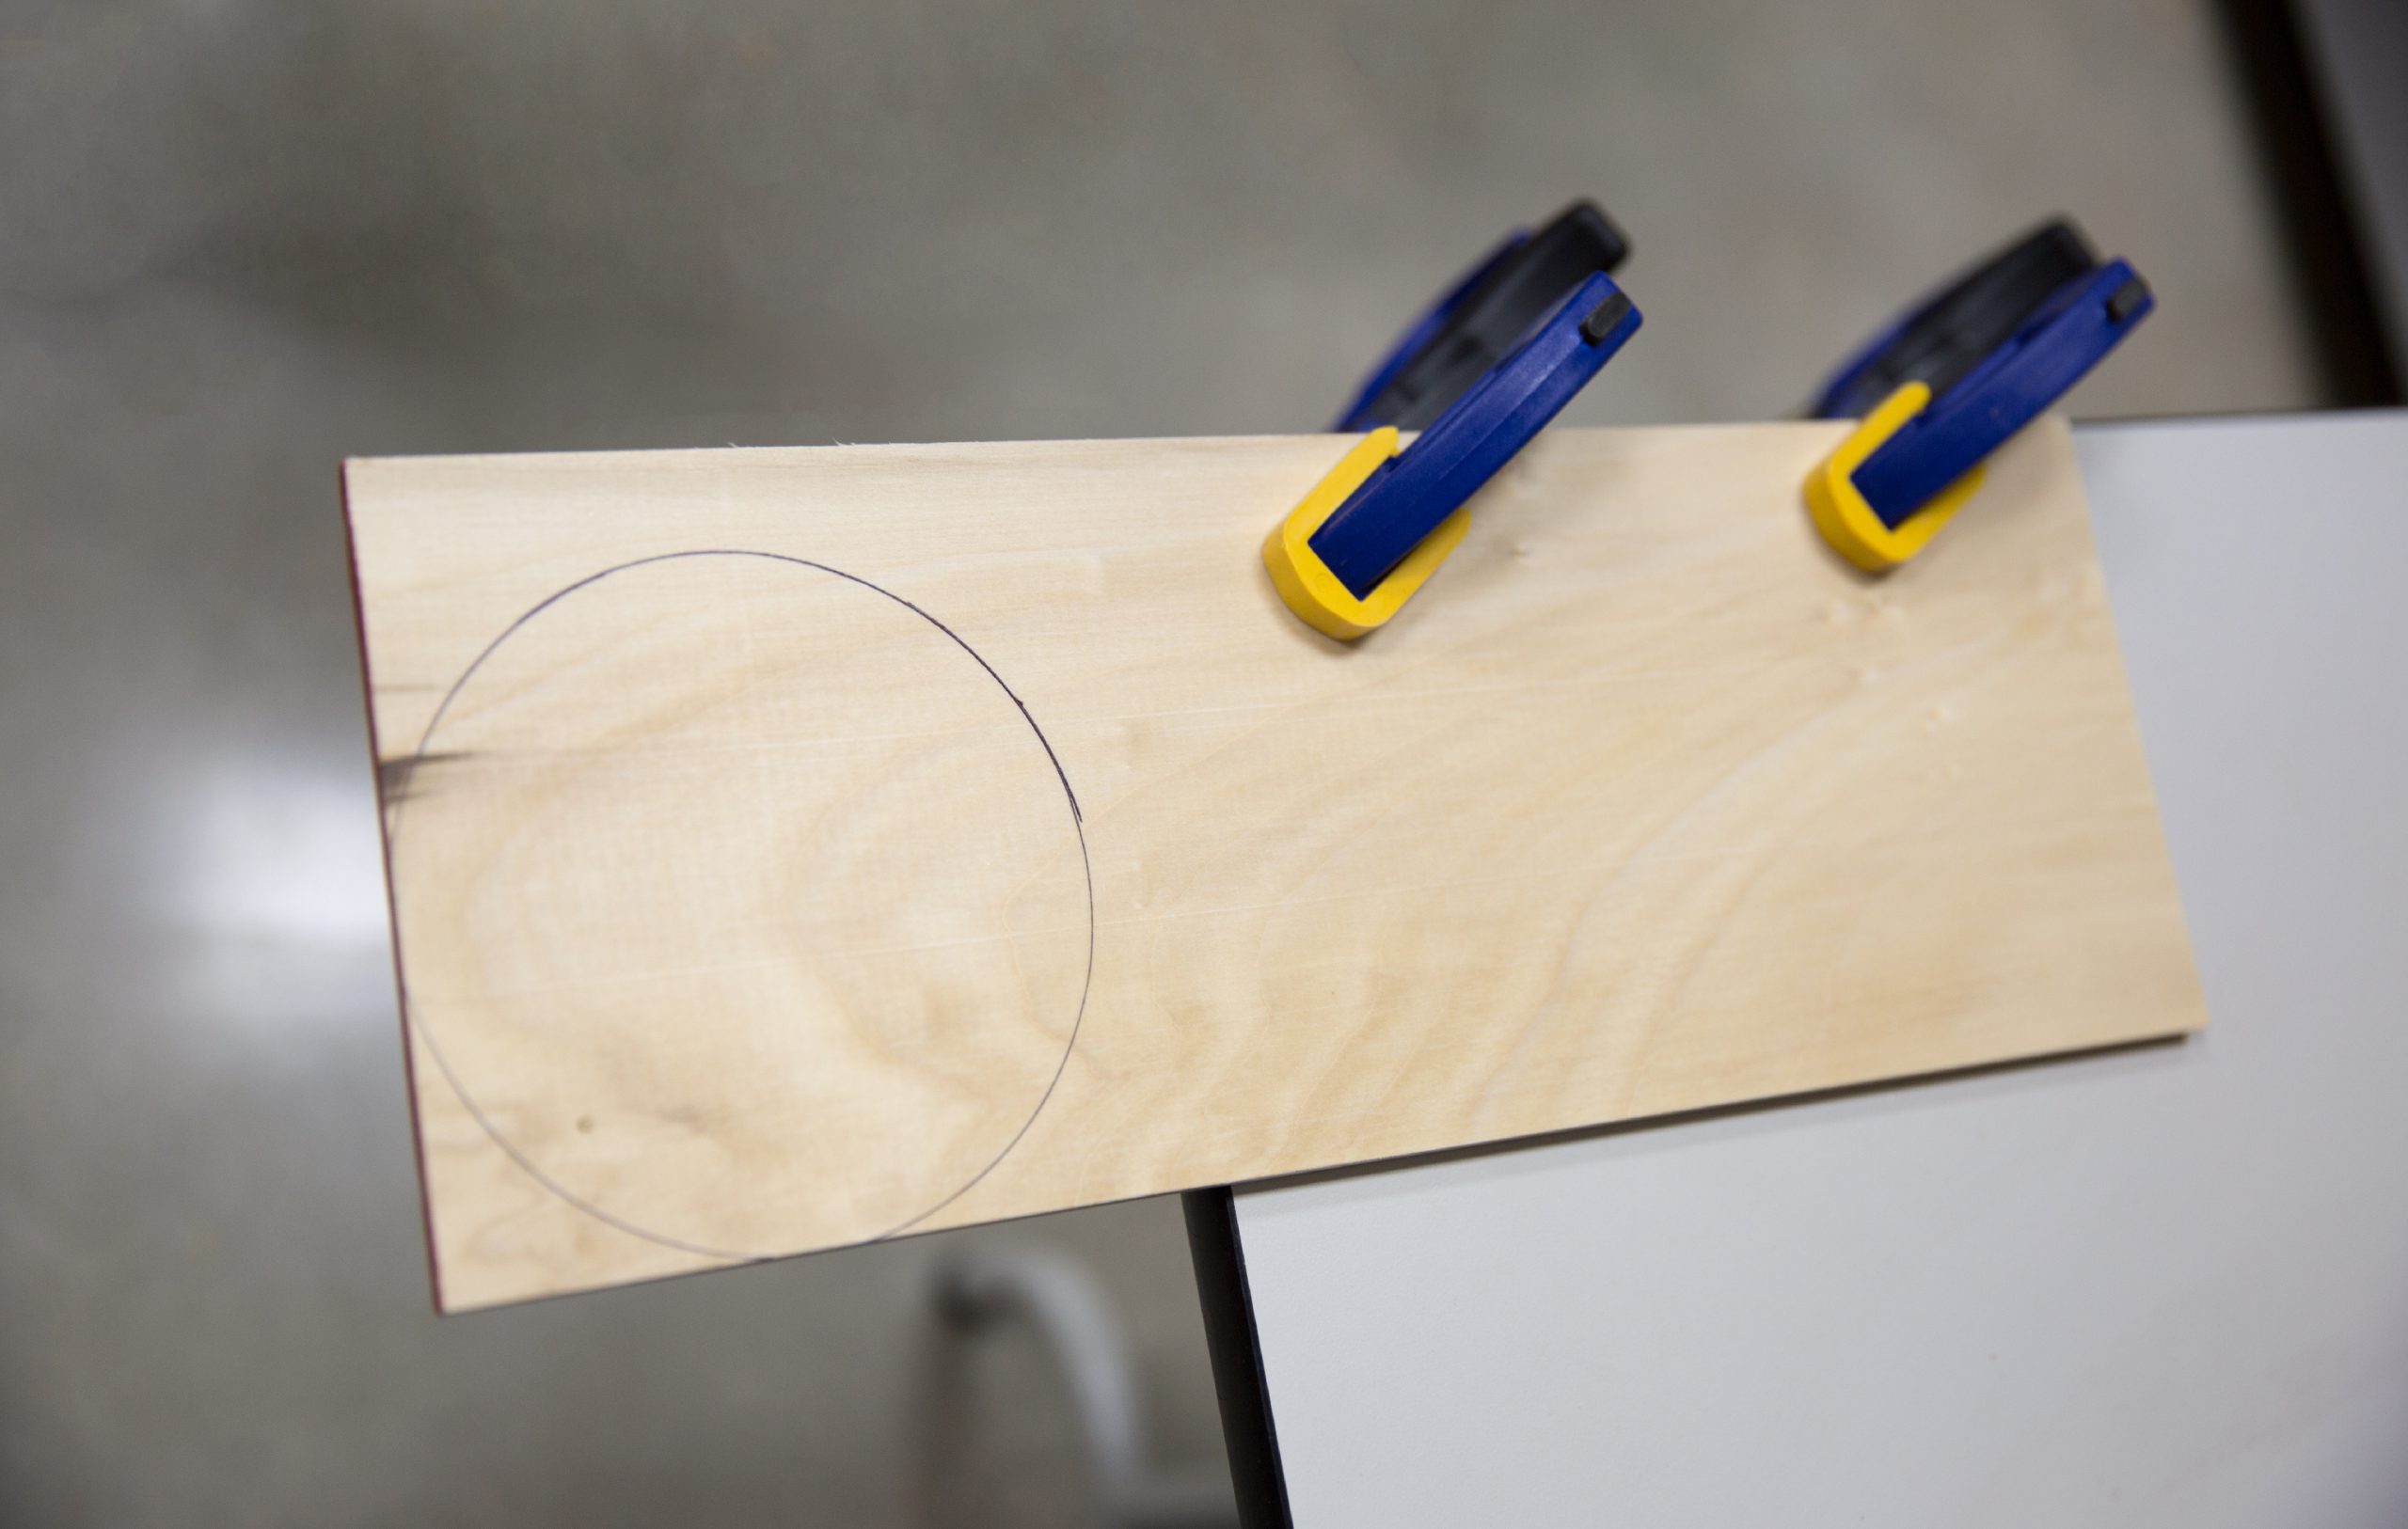
Step 10: Cut out a circle
Trace and cut out a circle bigger than the central hole to attach to the movement kit.
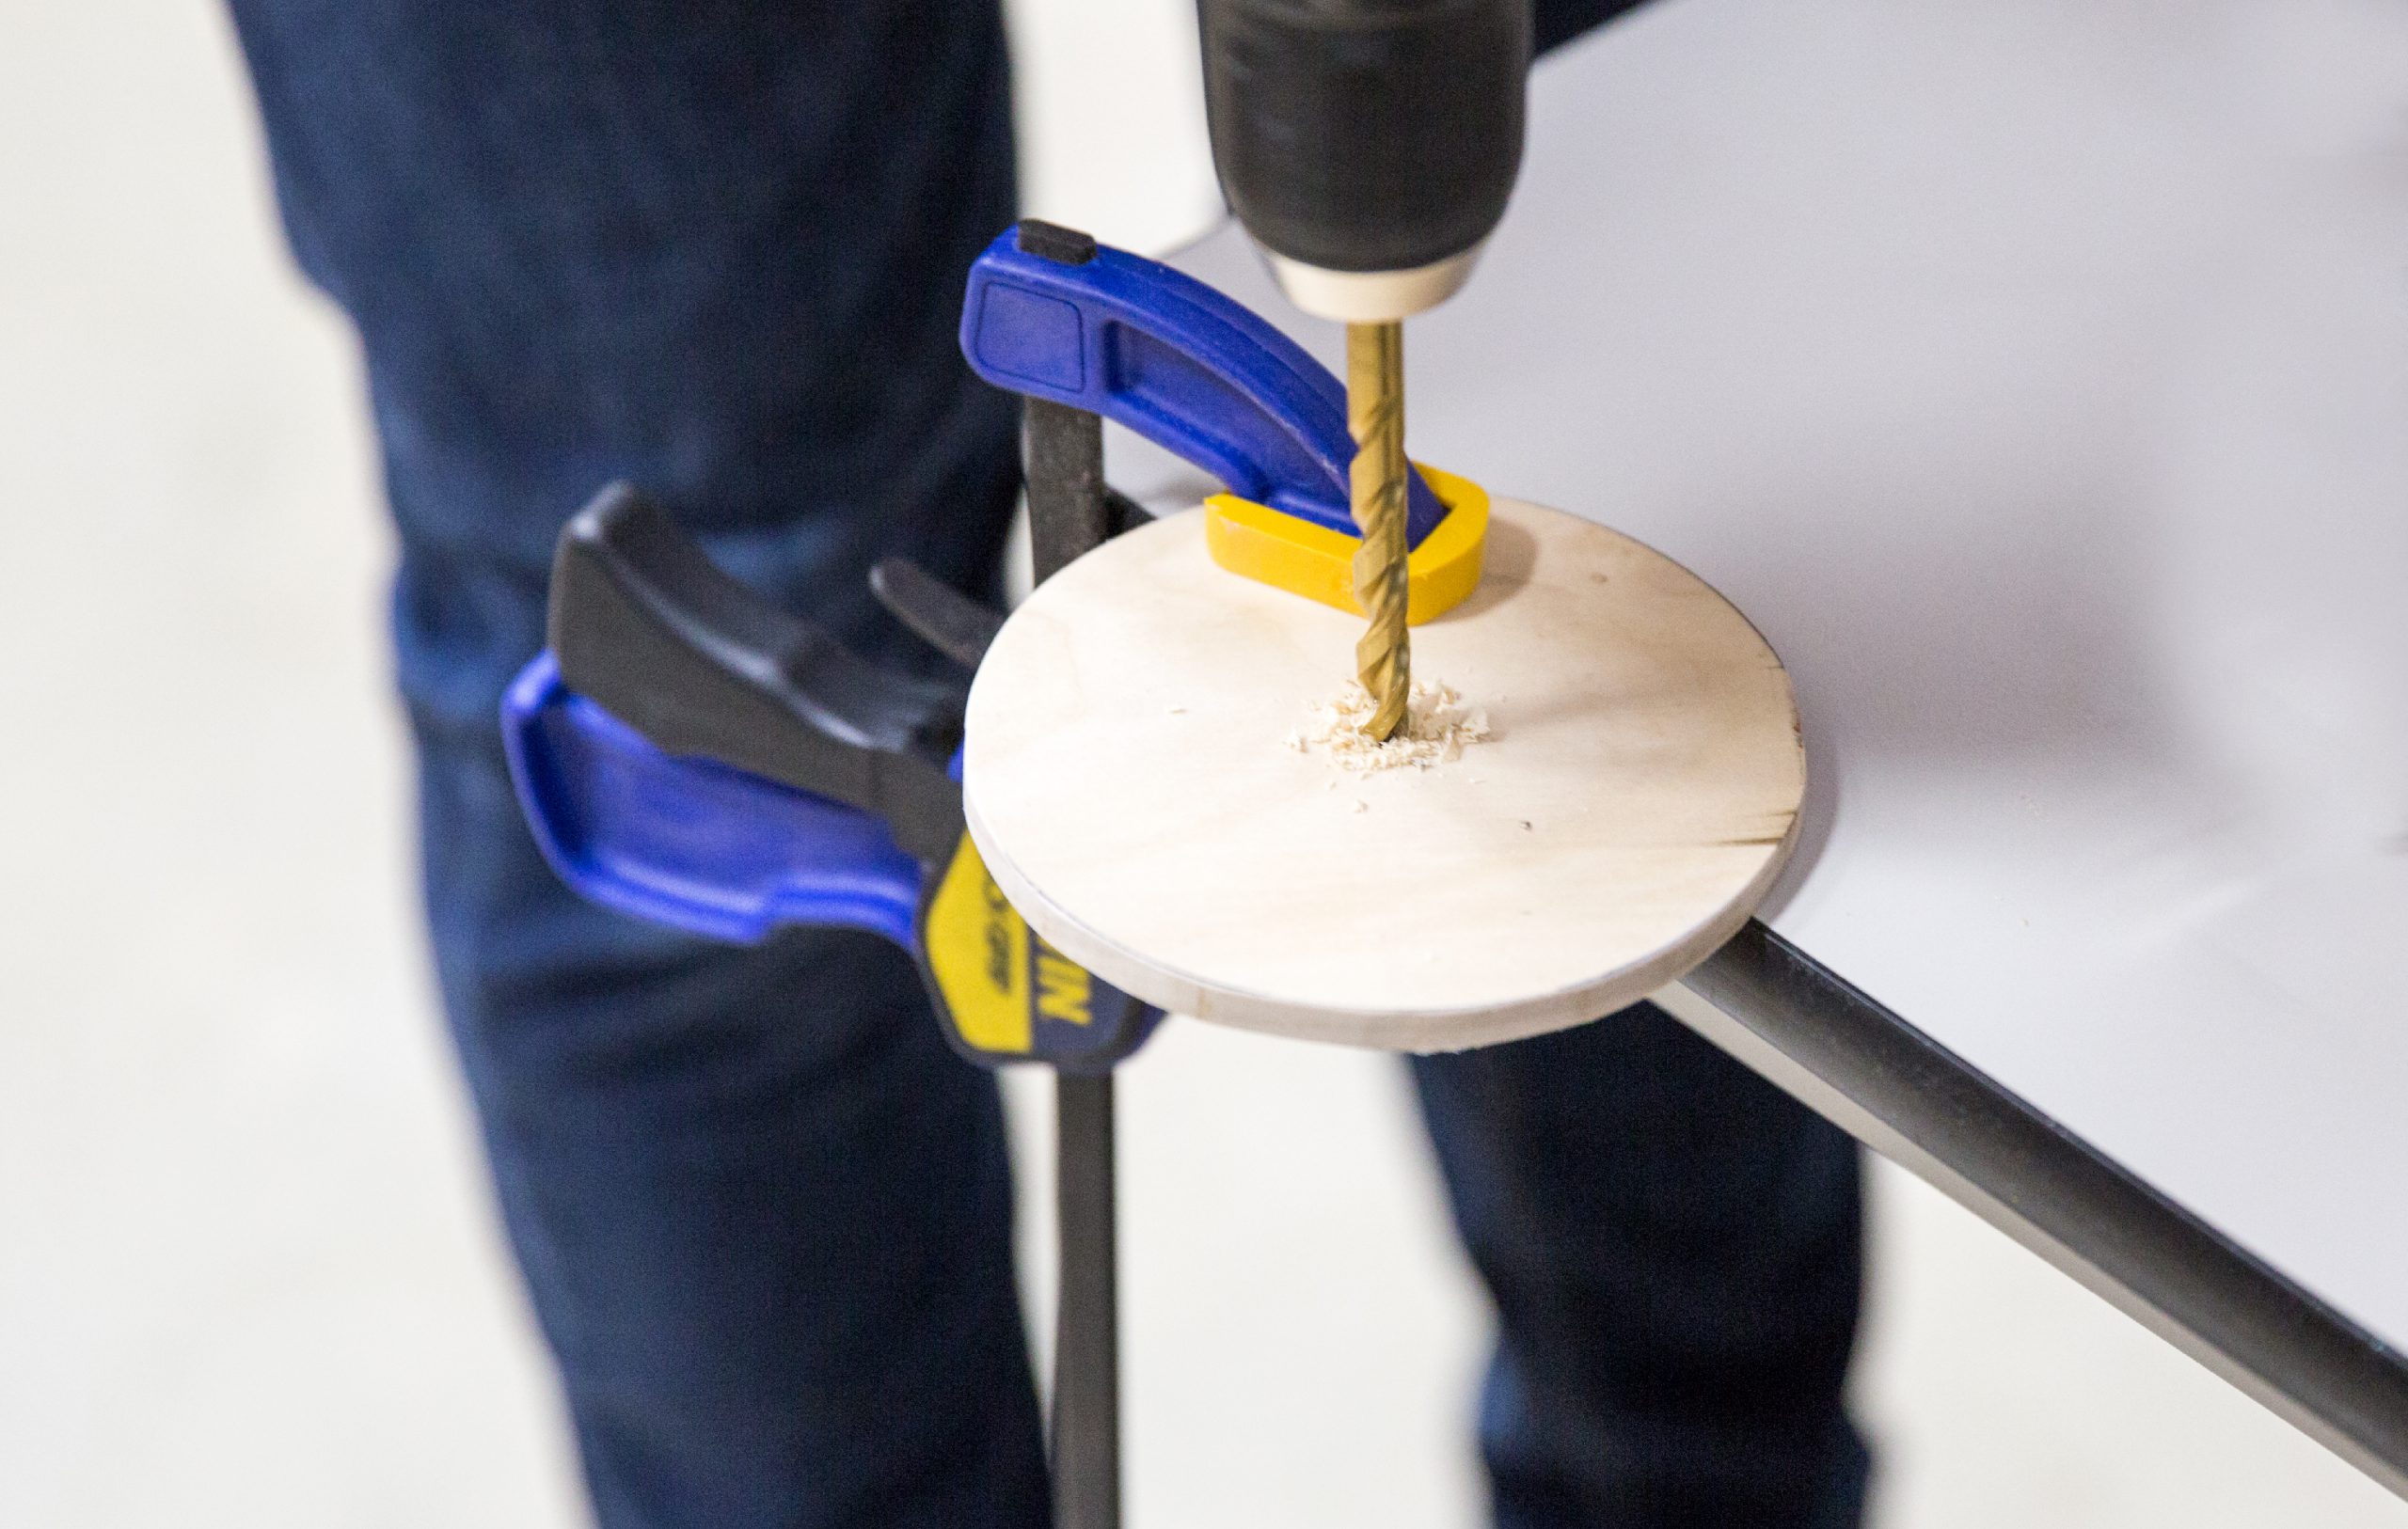
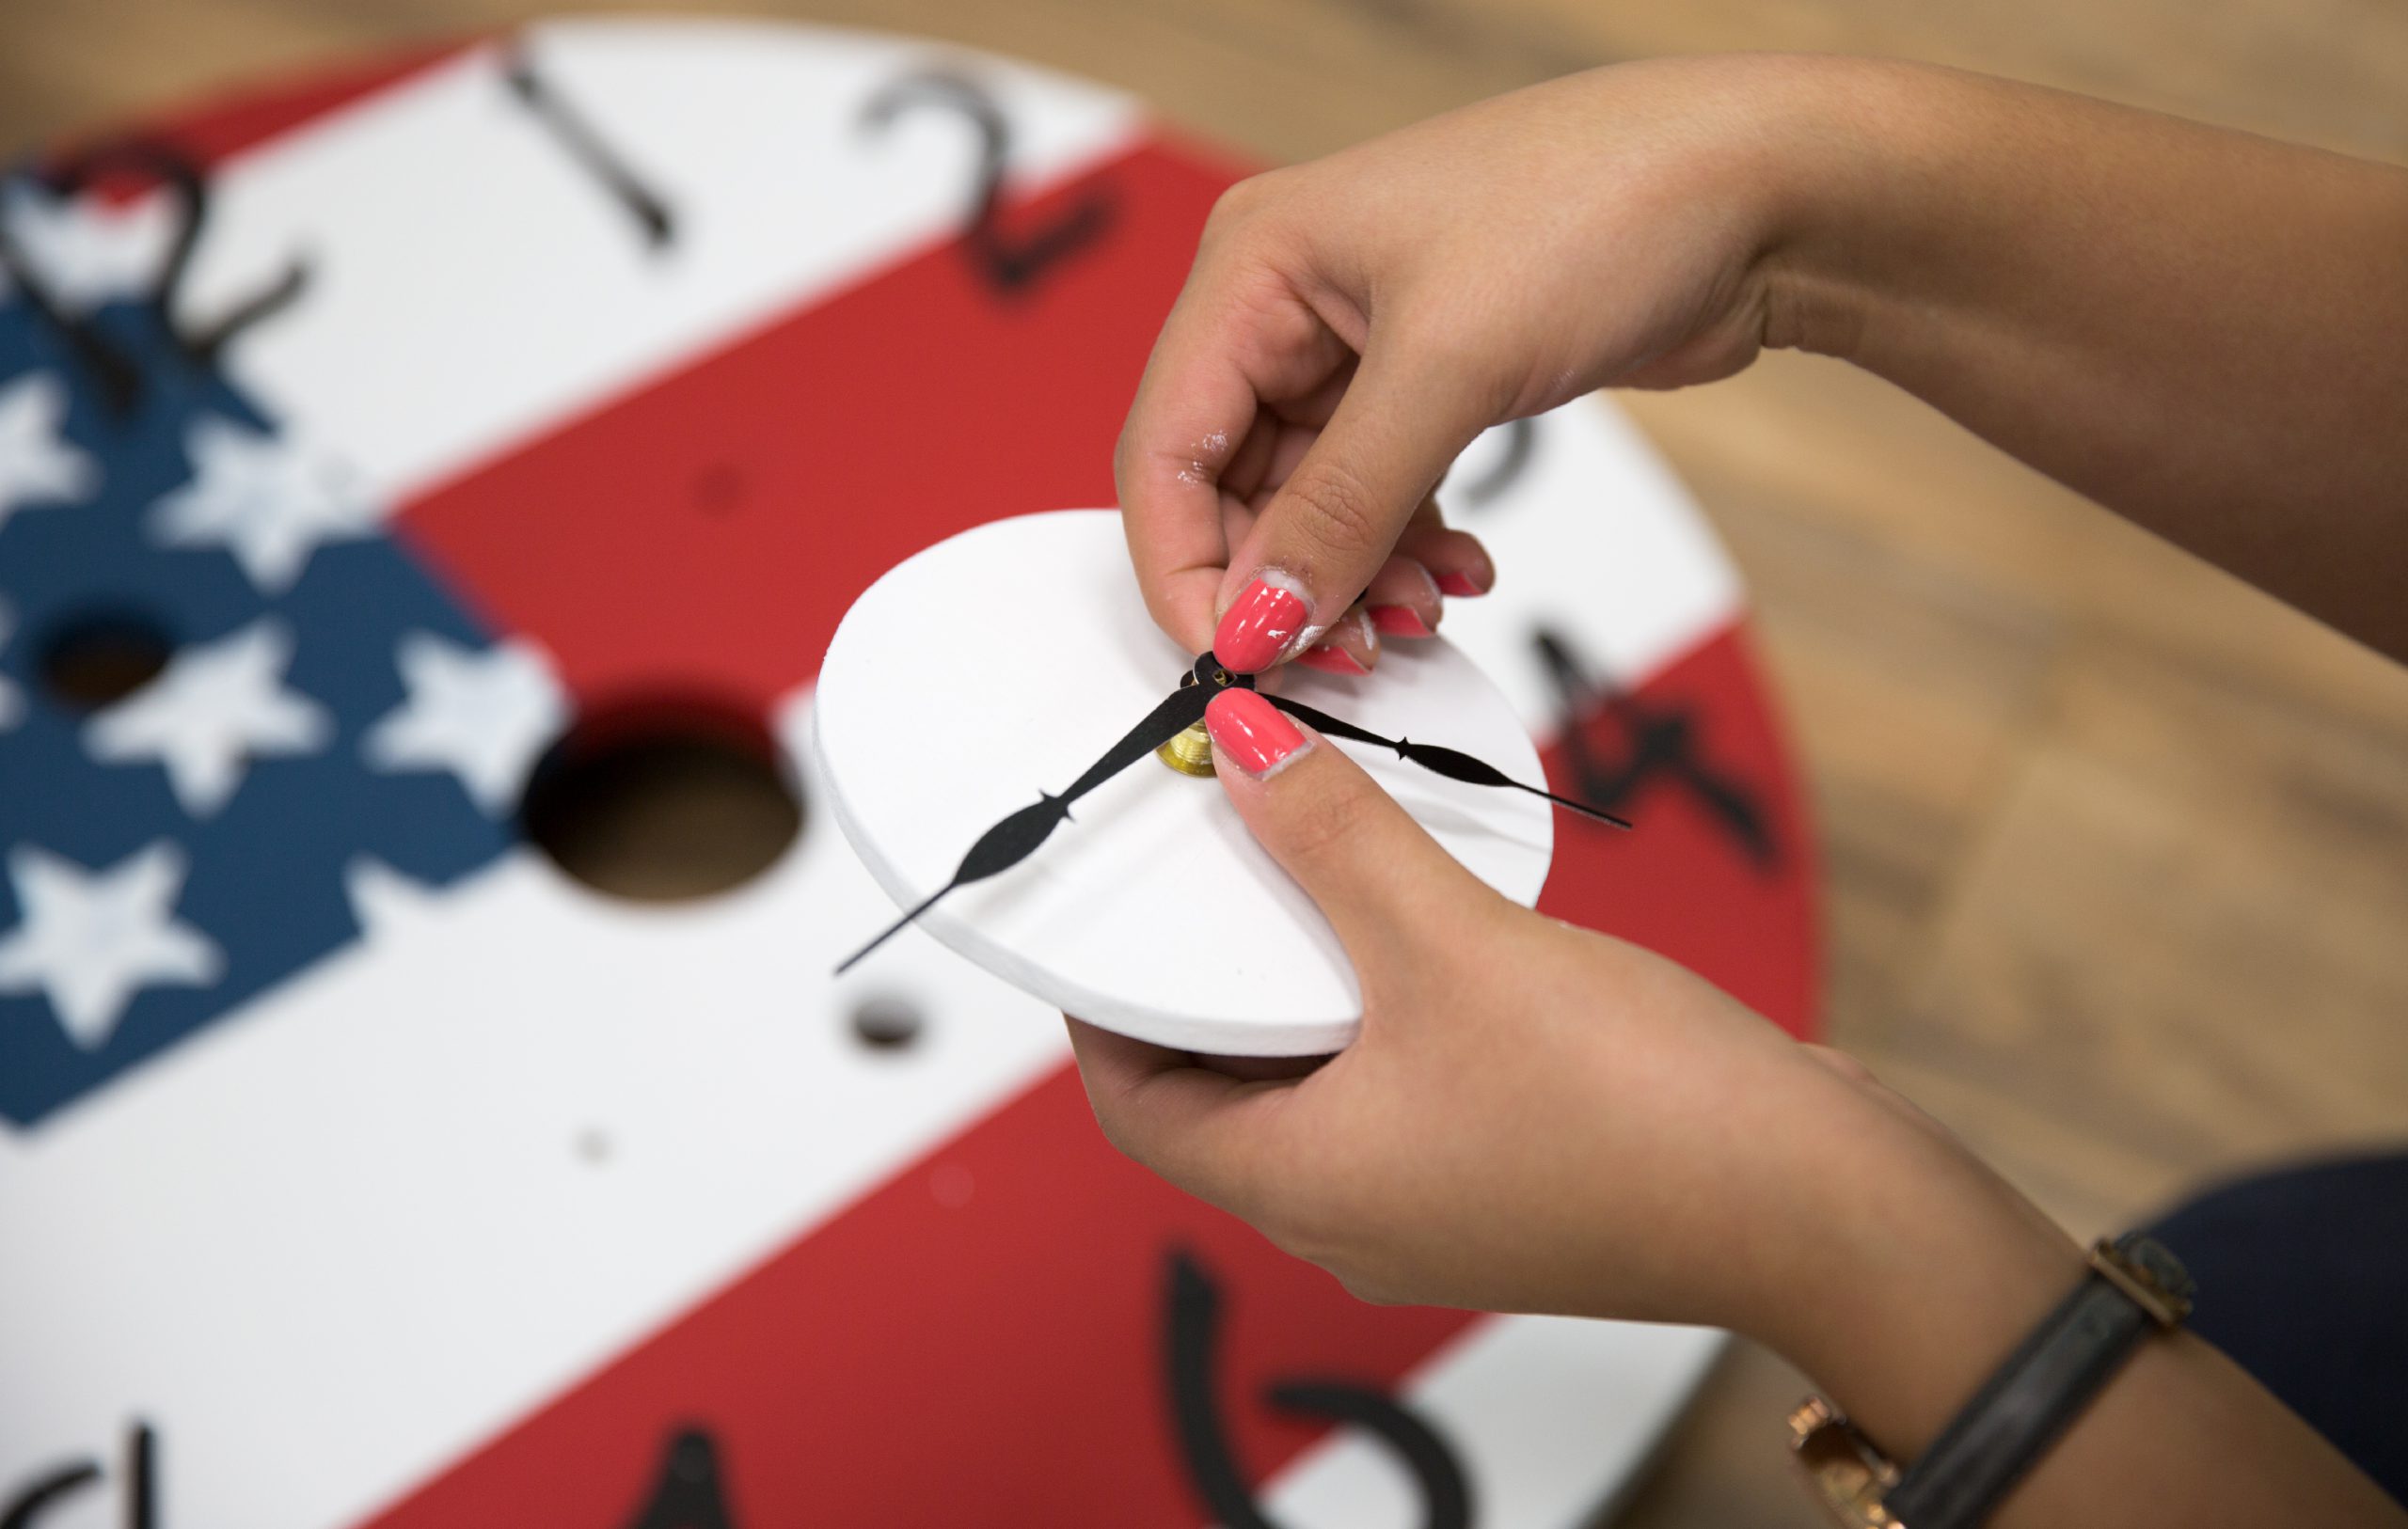
Step 11: Drill a hole
Drill a hole in the center of your wood circle. Make sure the hole is big enough to fit the arm mechanism through.
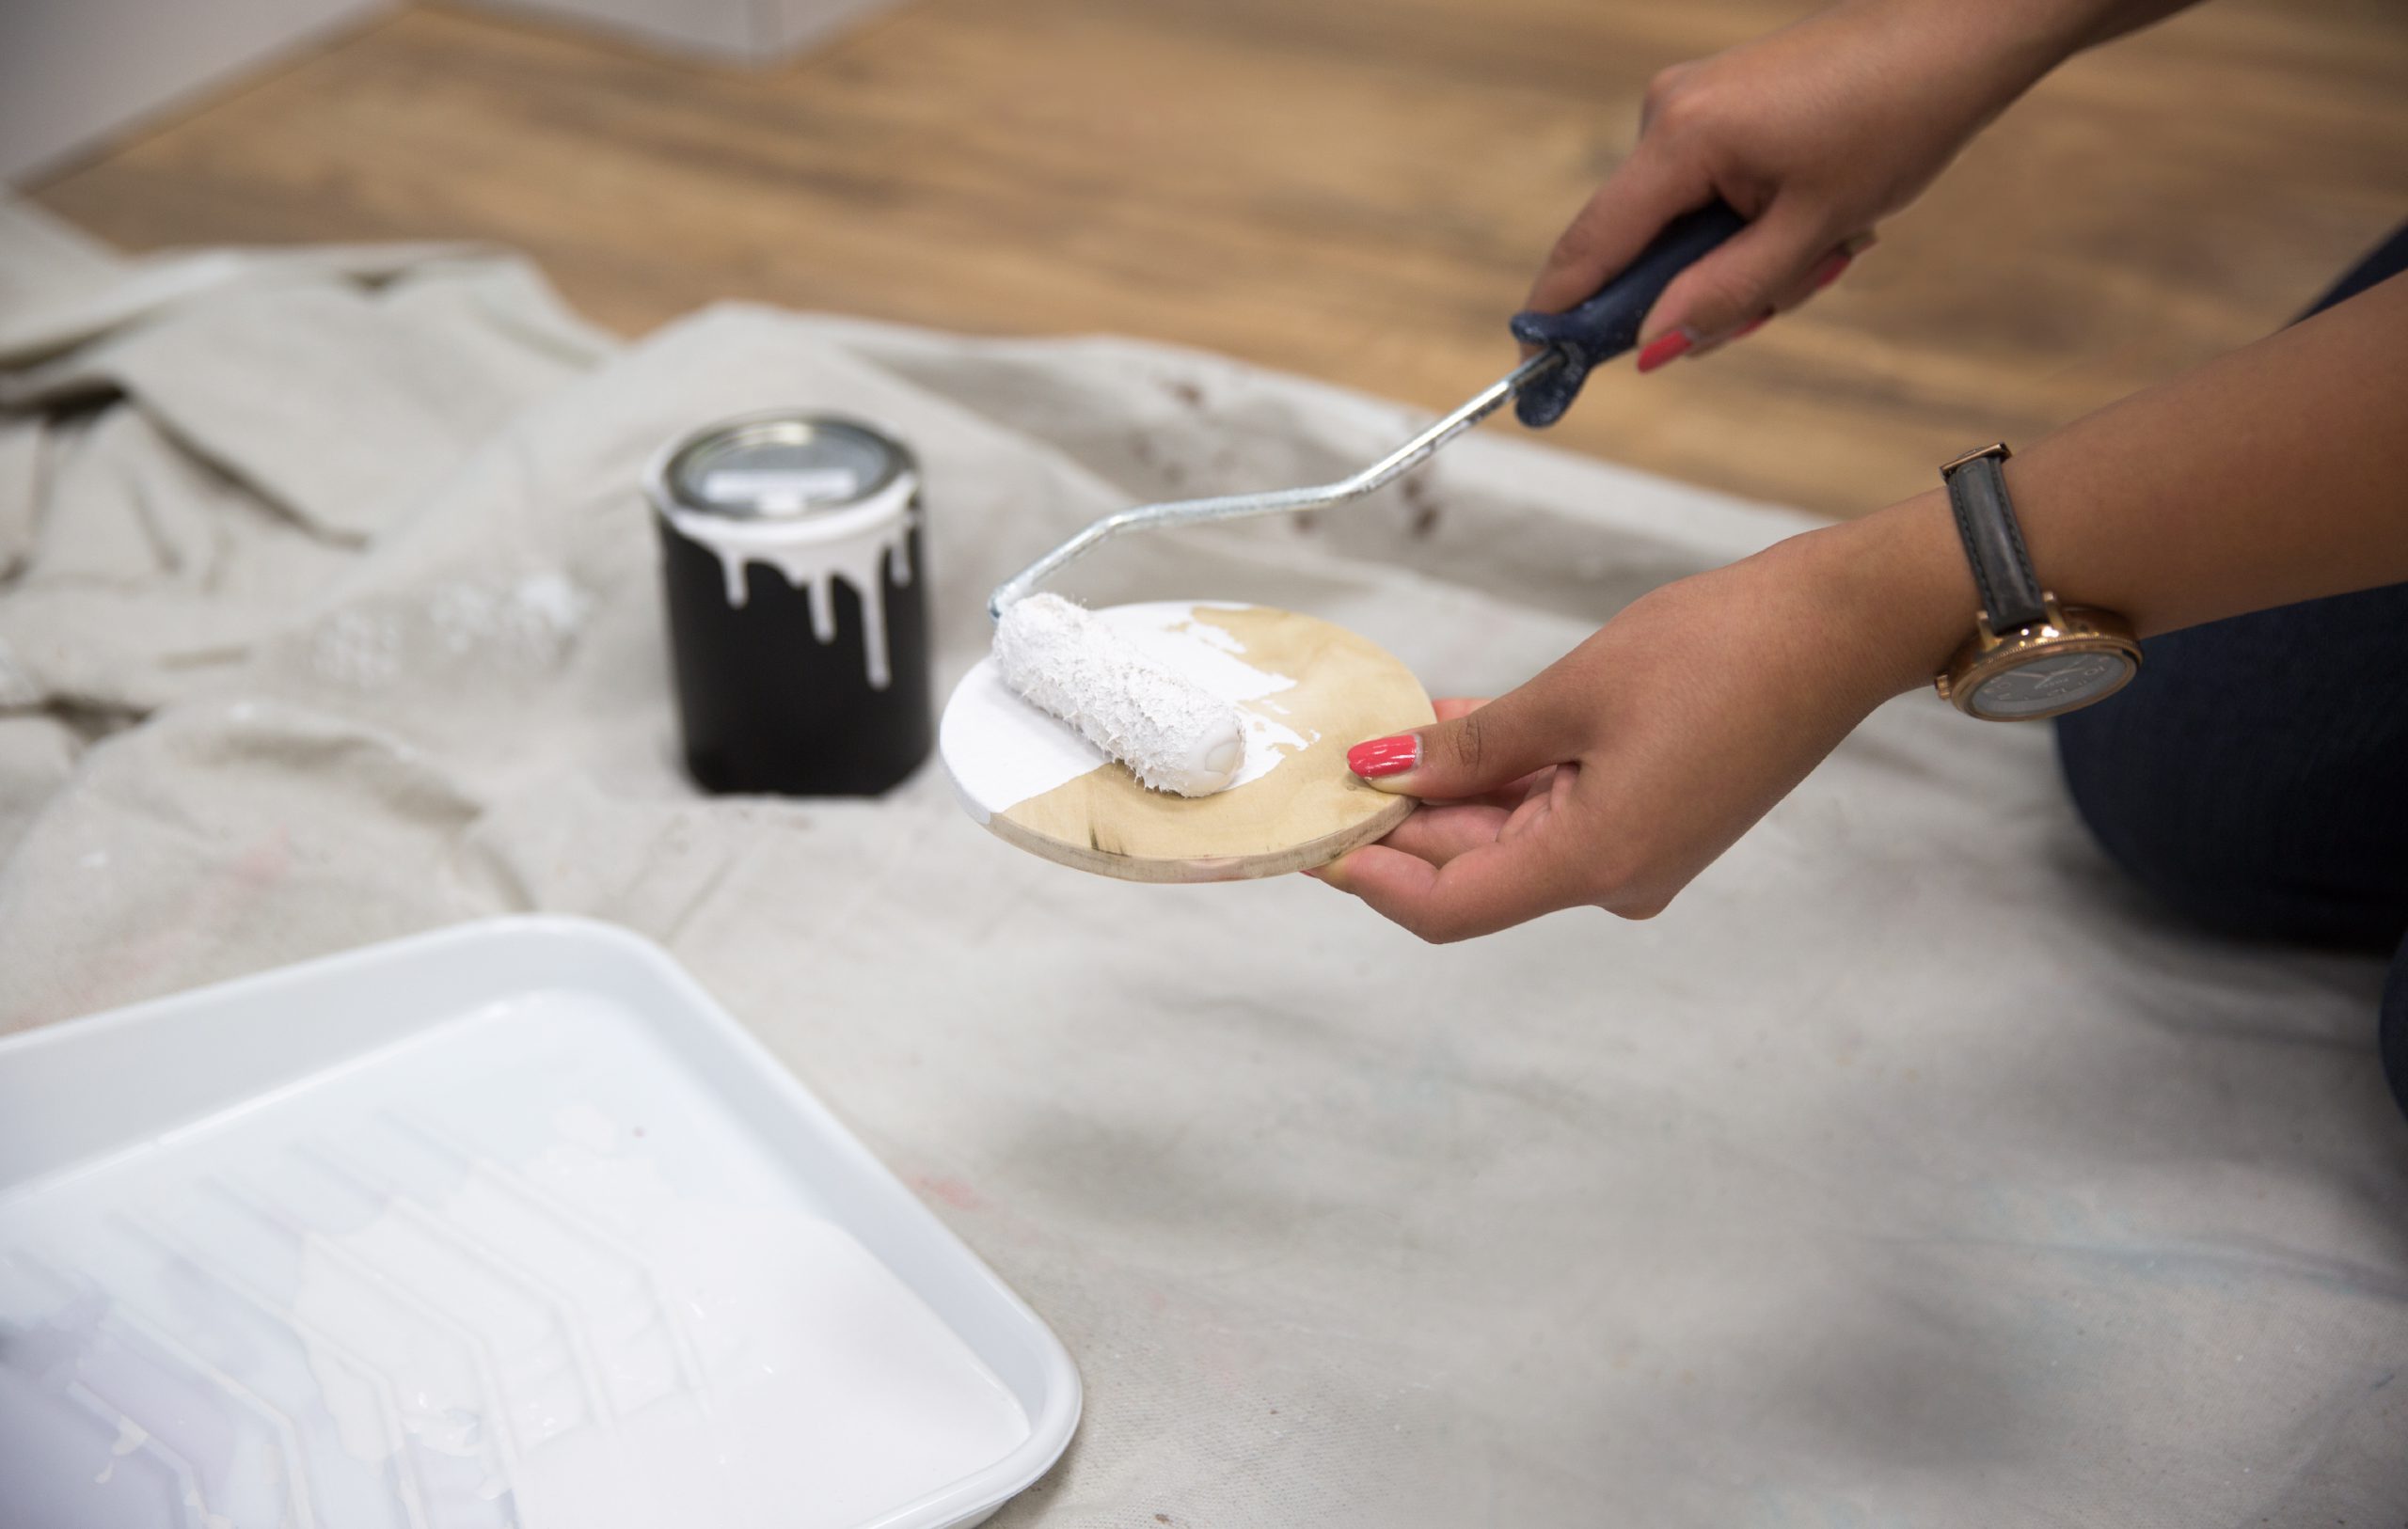
Step 12: Paint
With a Mini roller paint the wood circle. Allow to dry and apply second coat if necessary/desired.
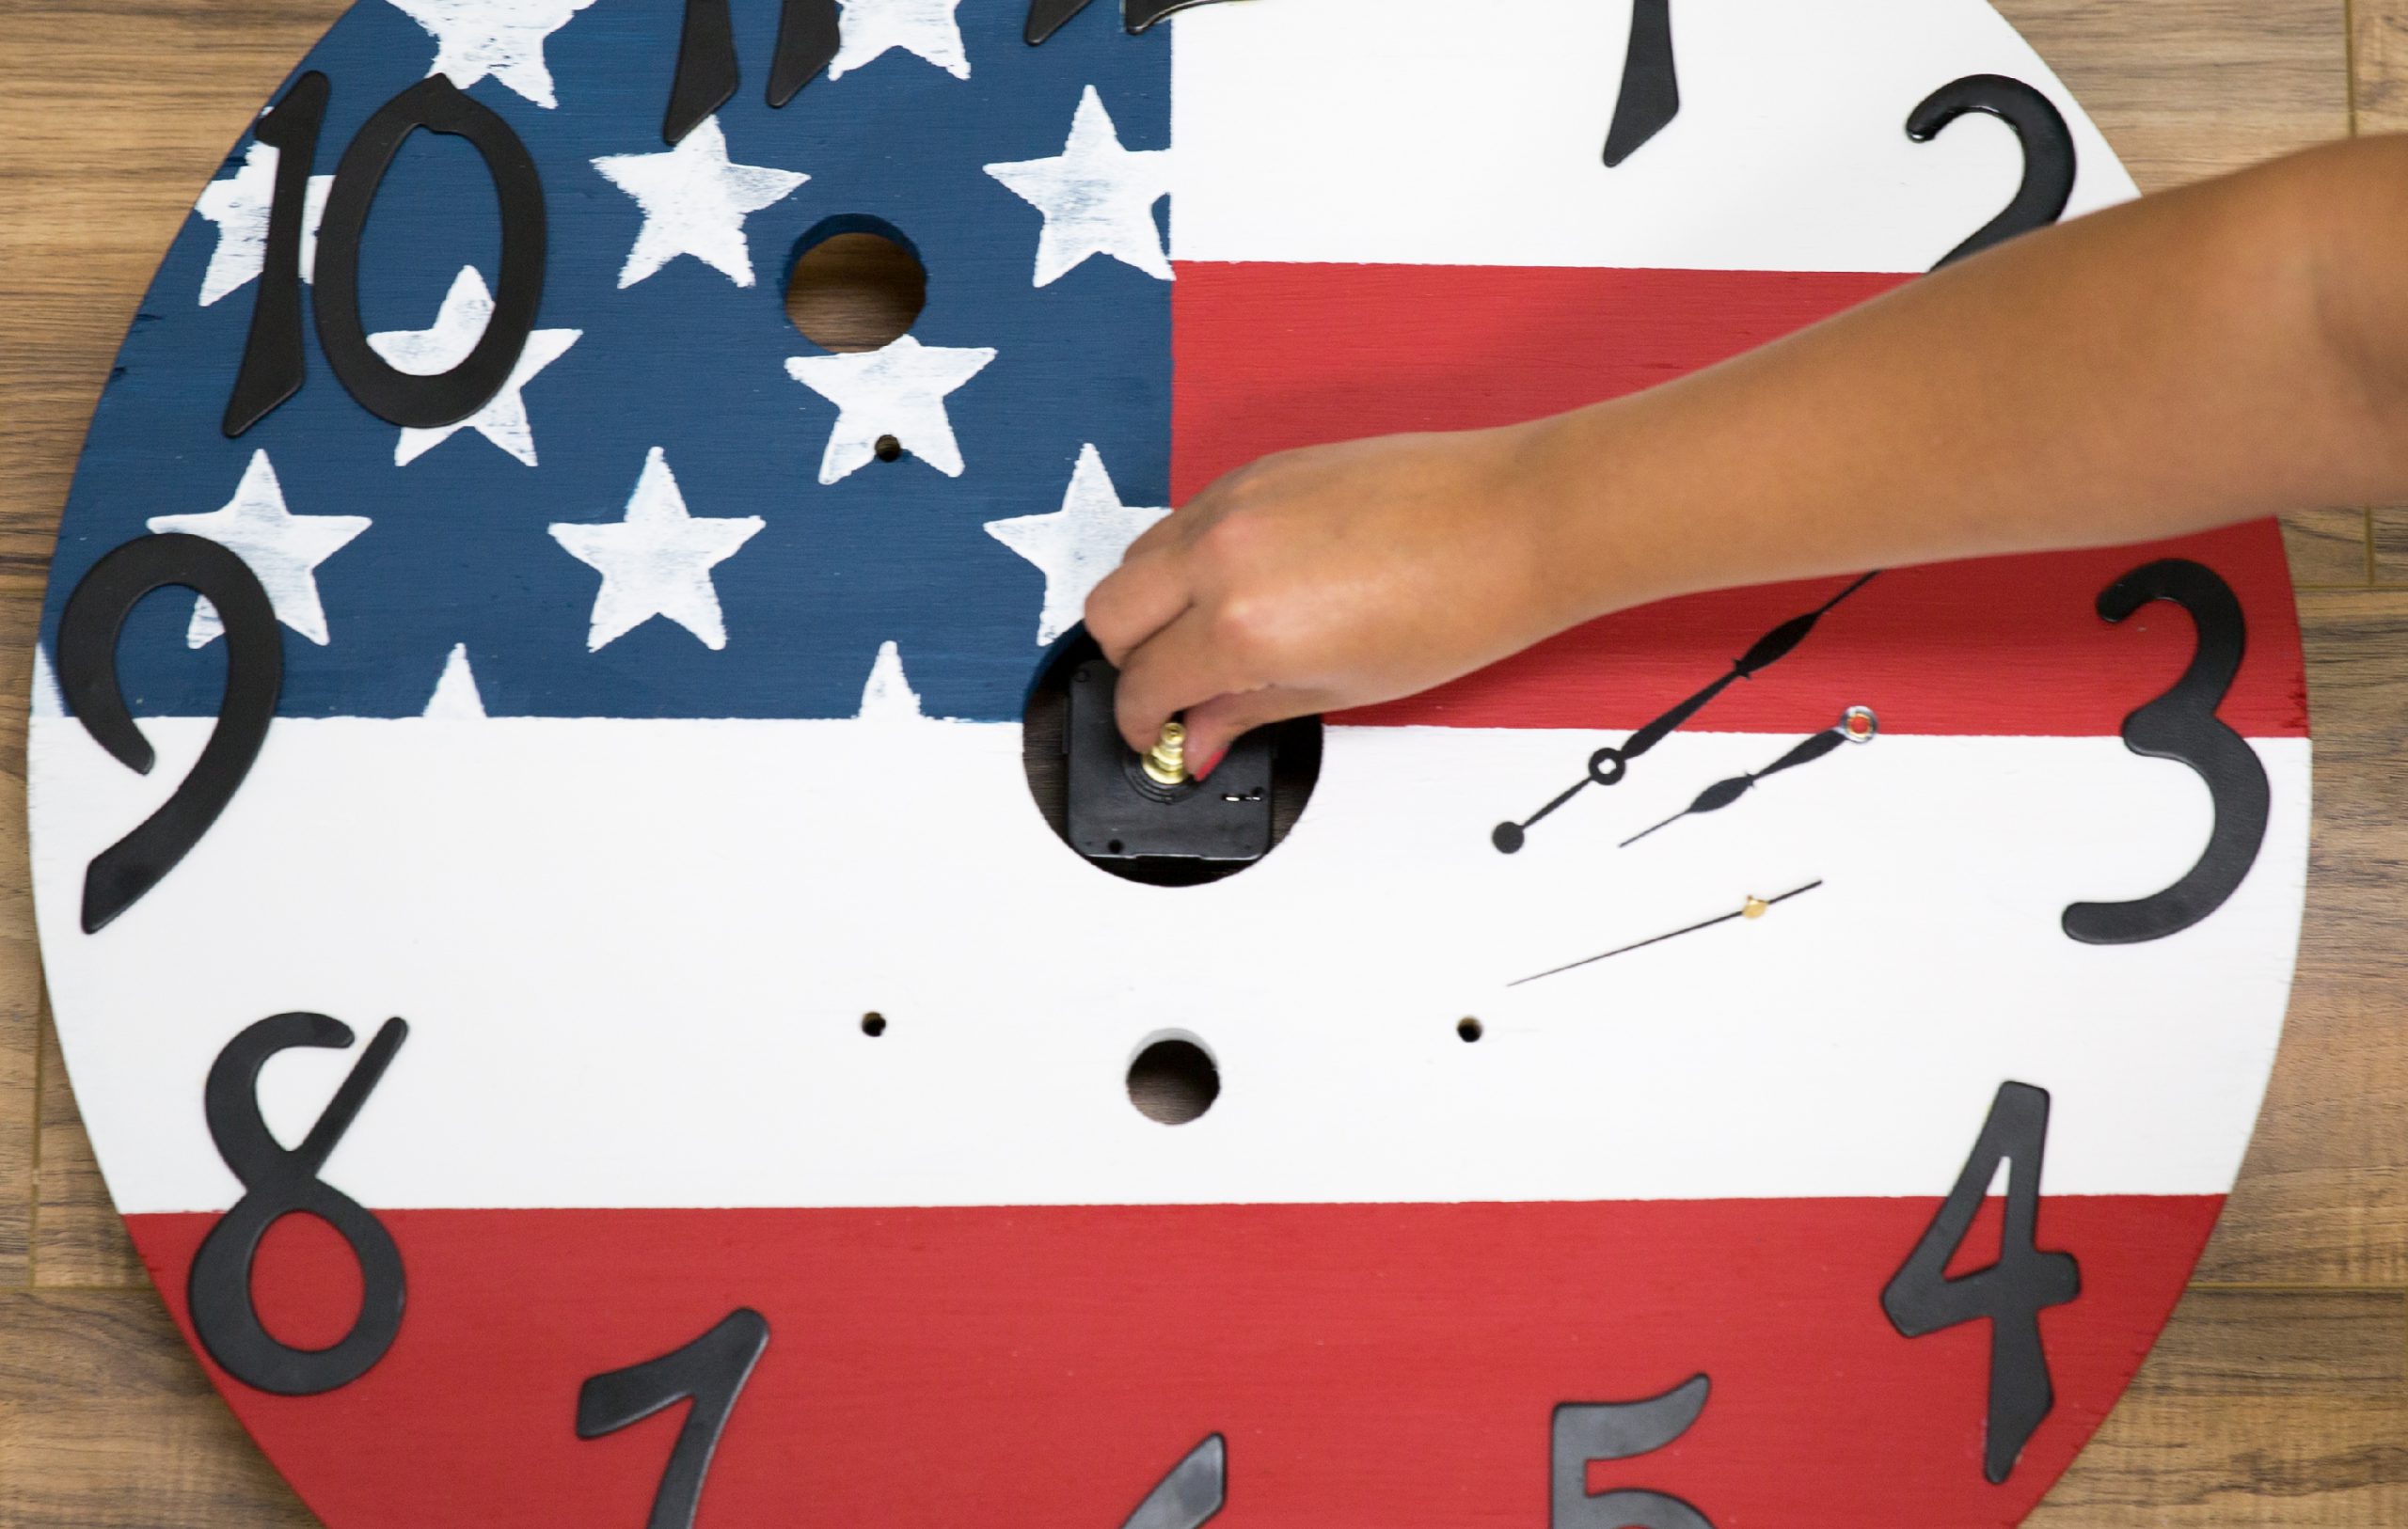
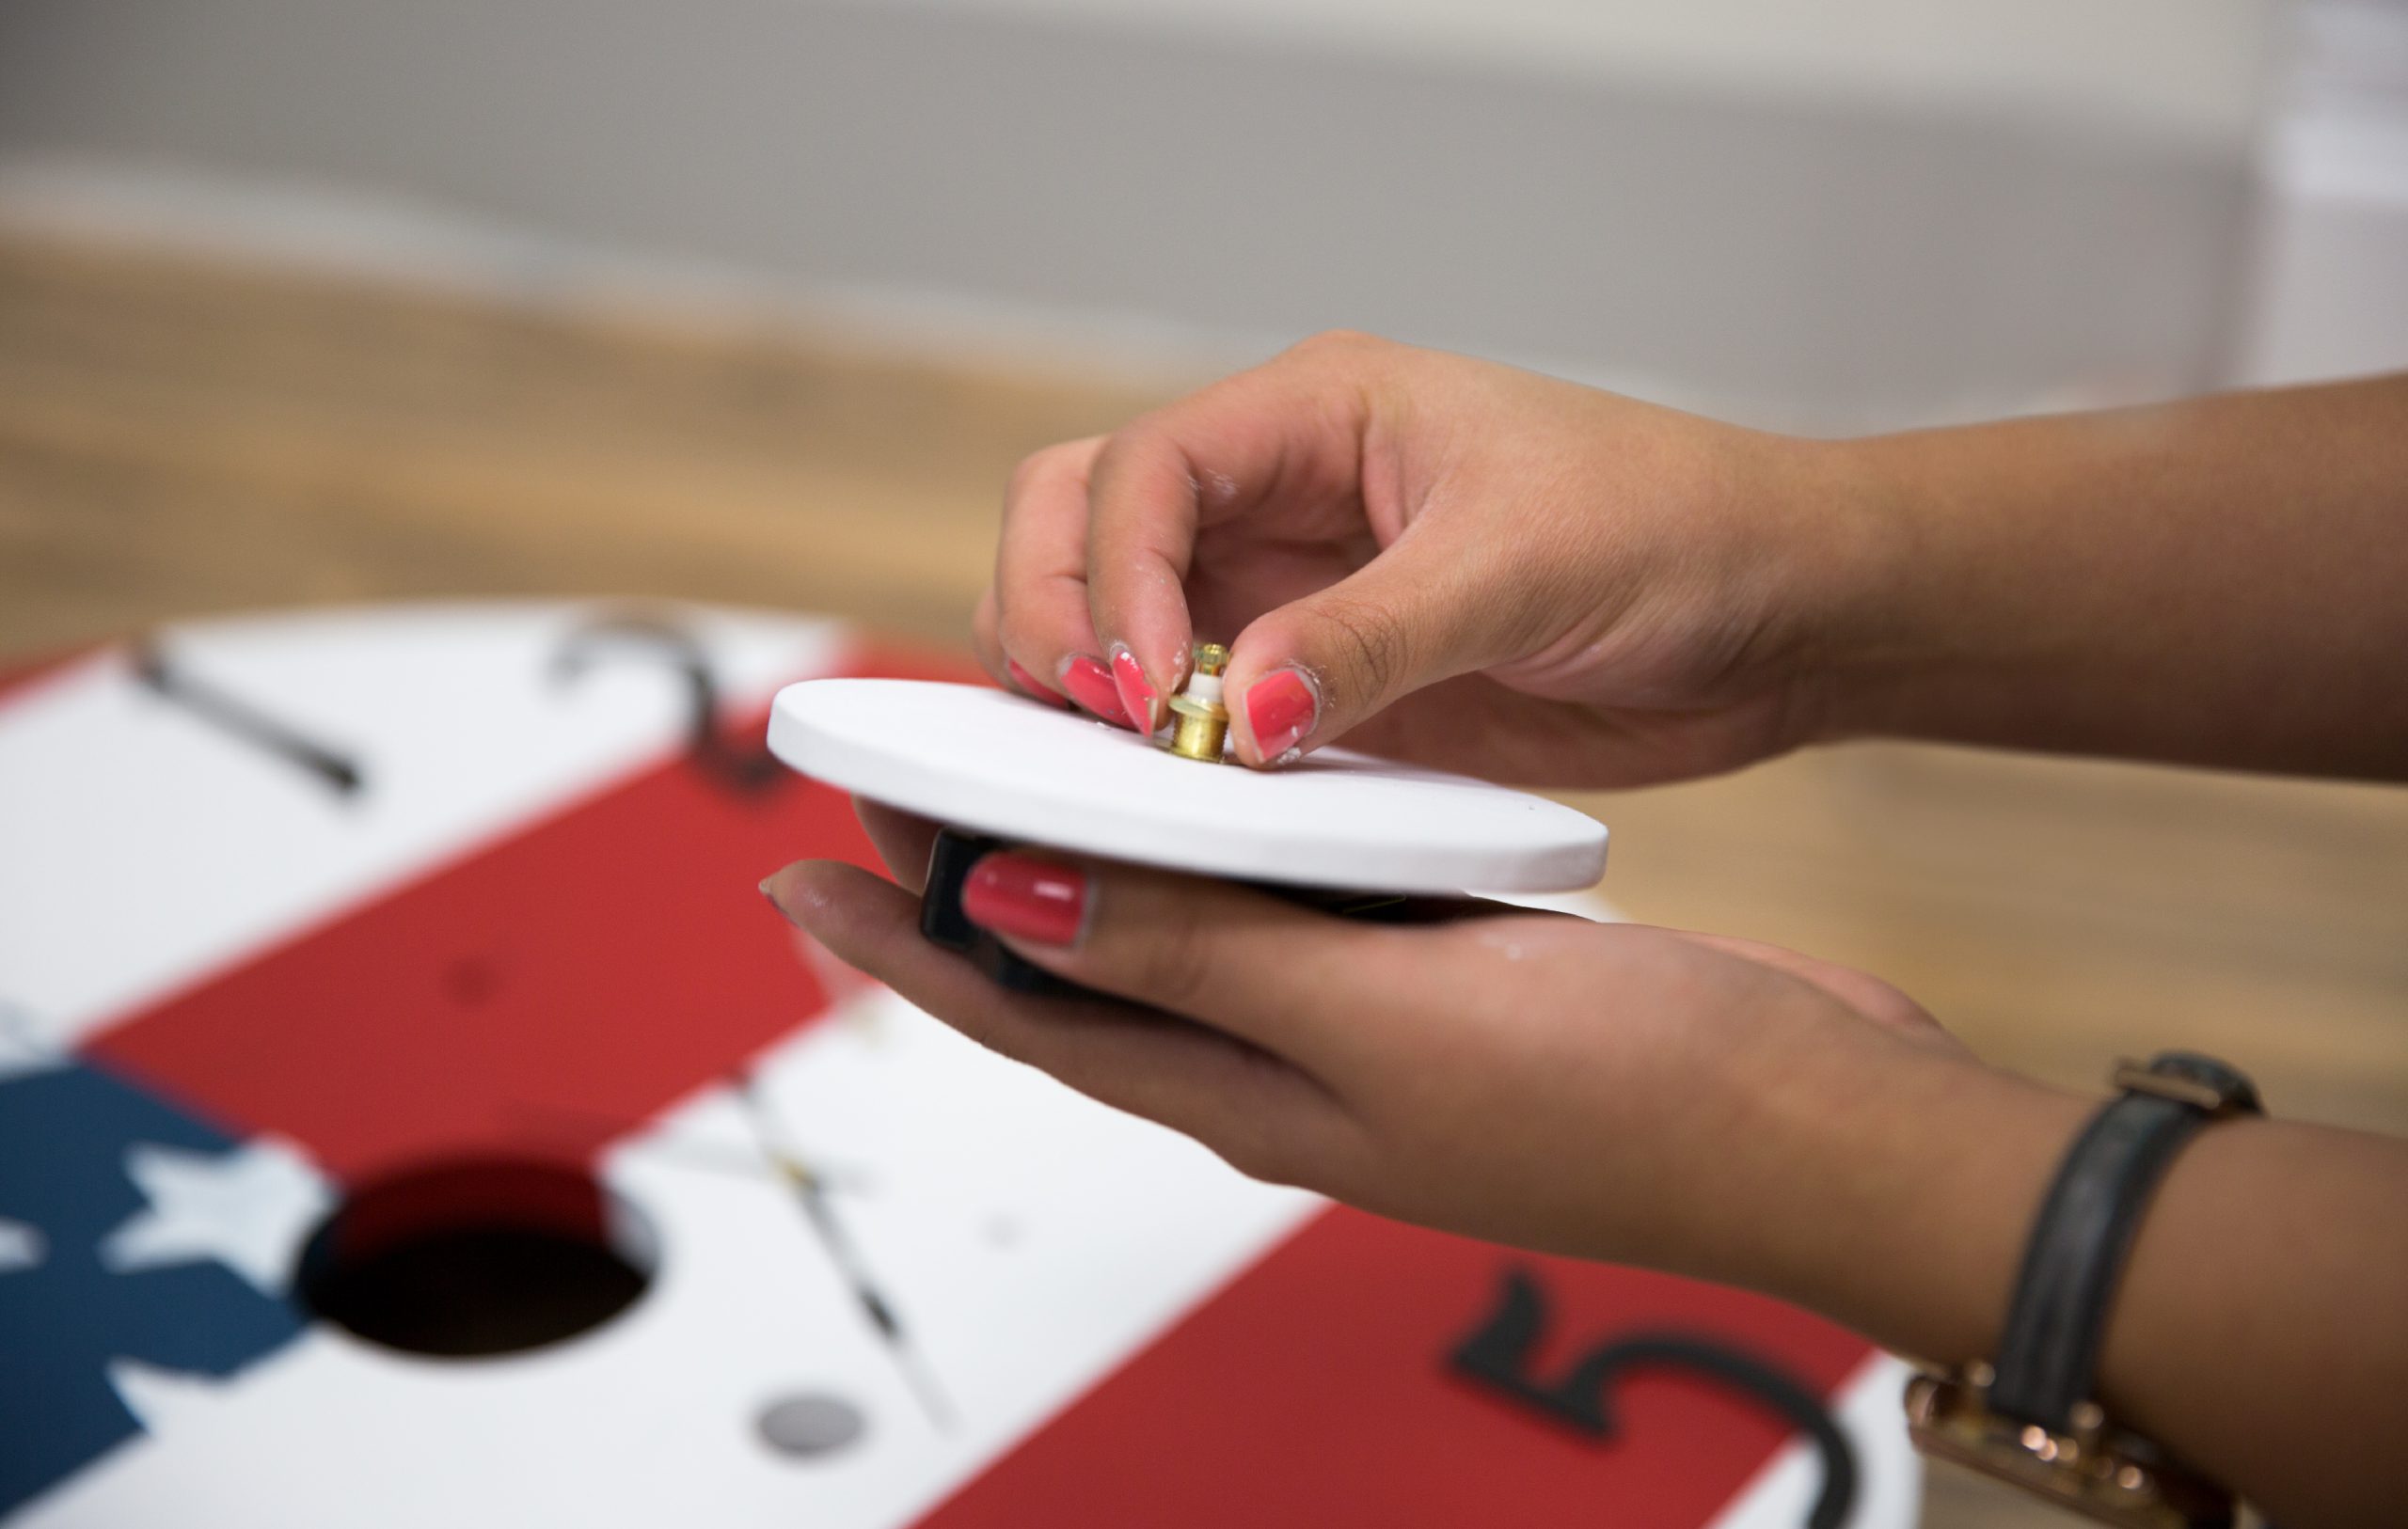
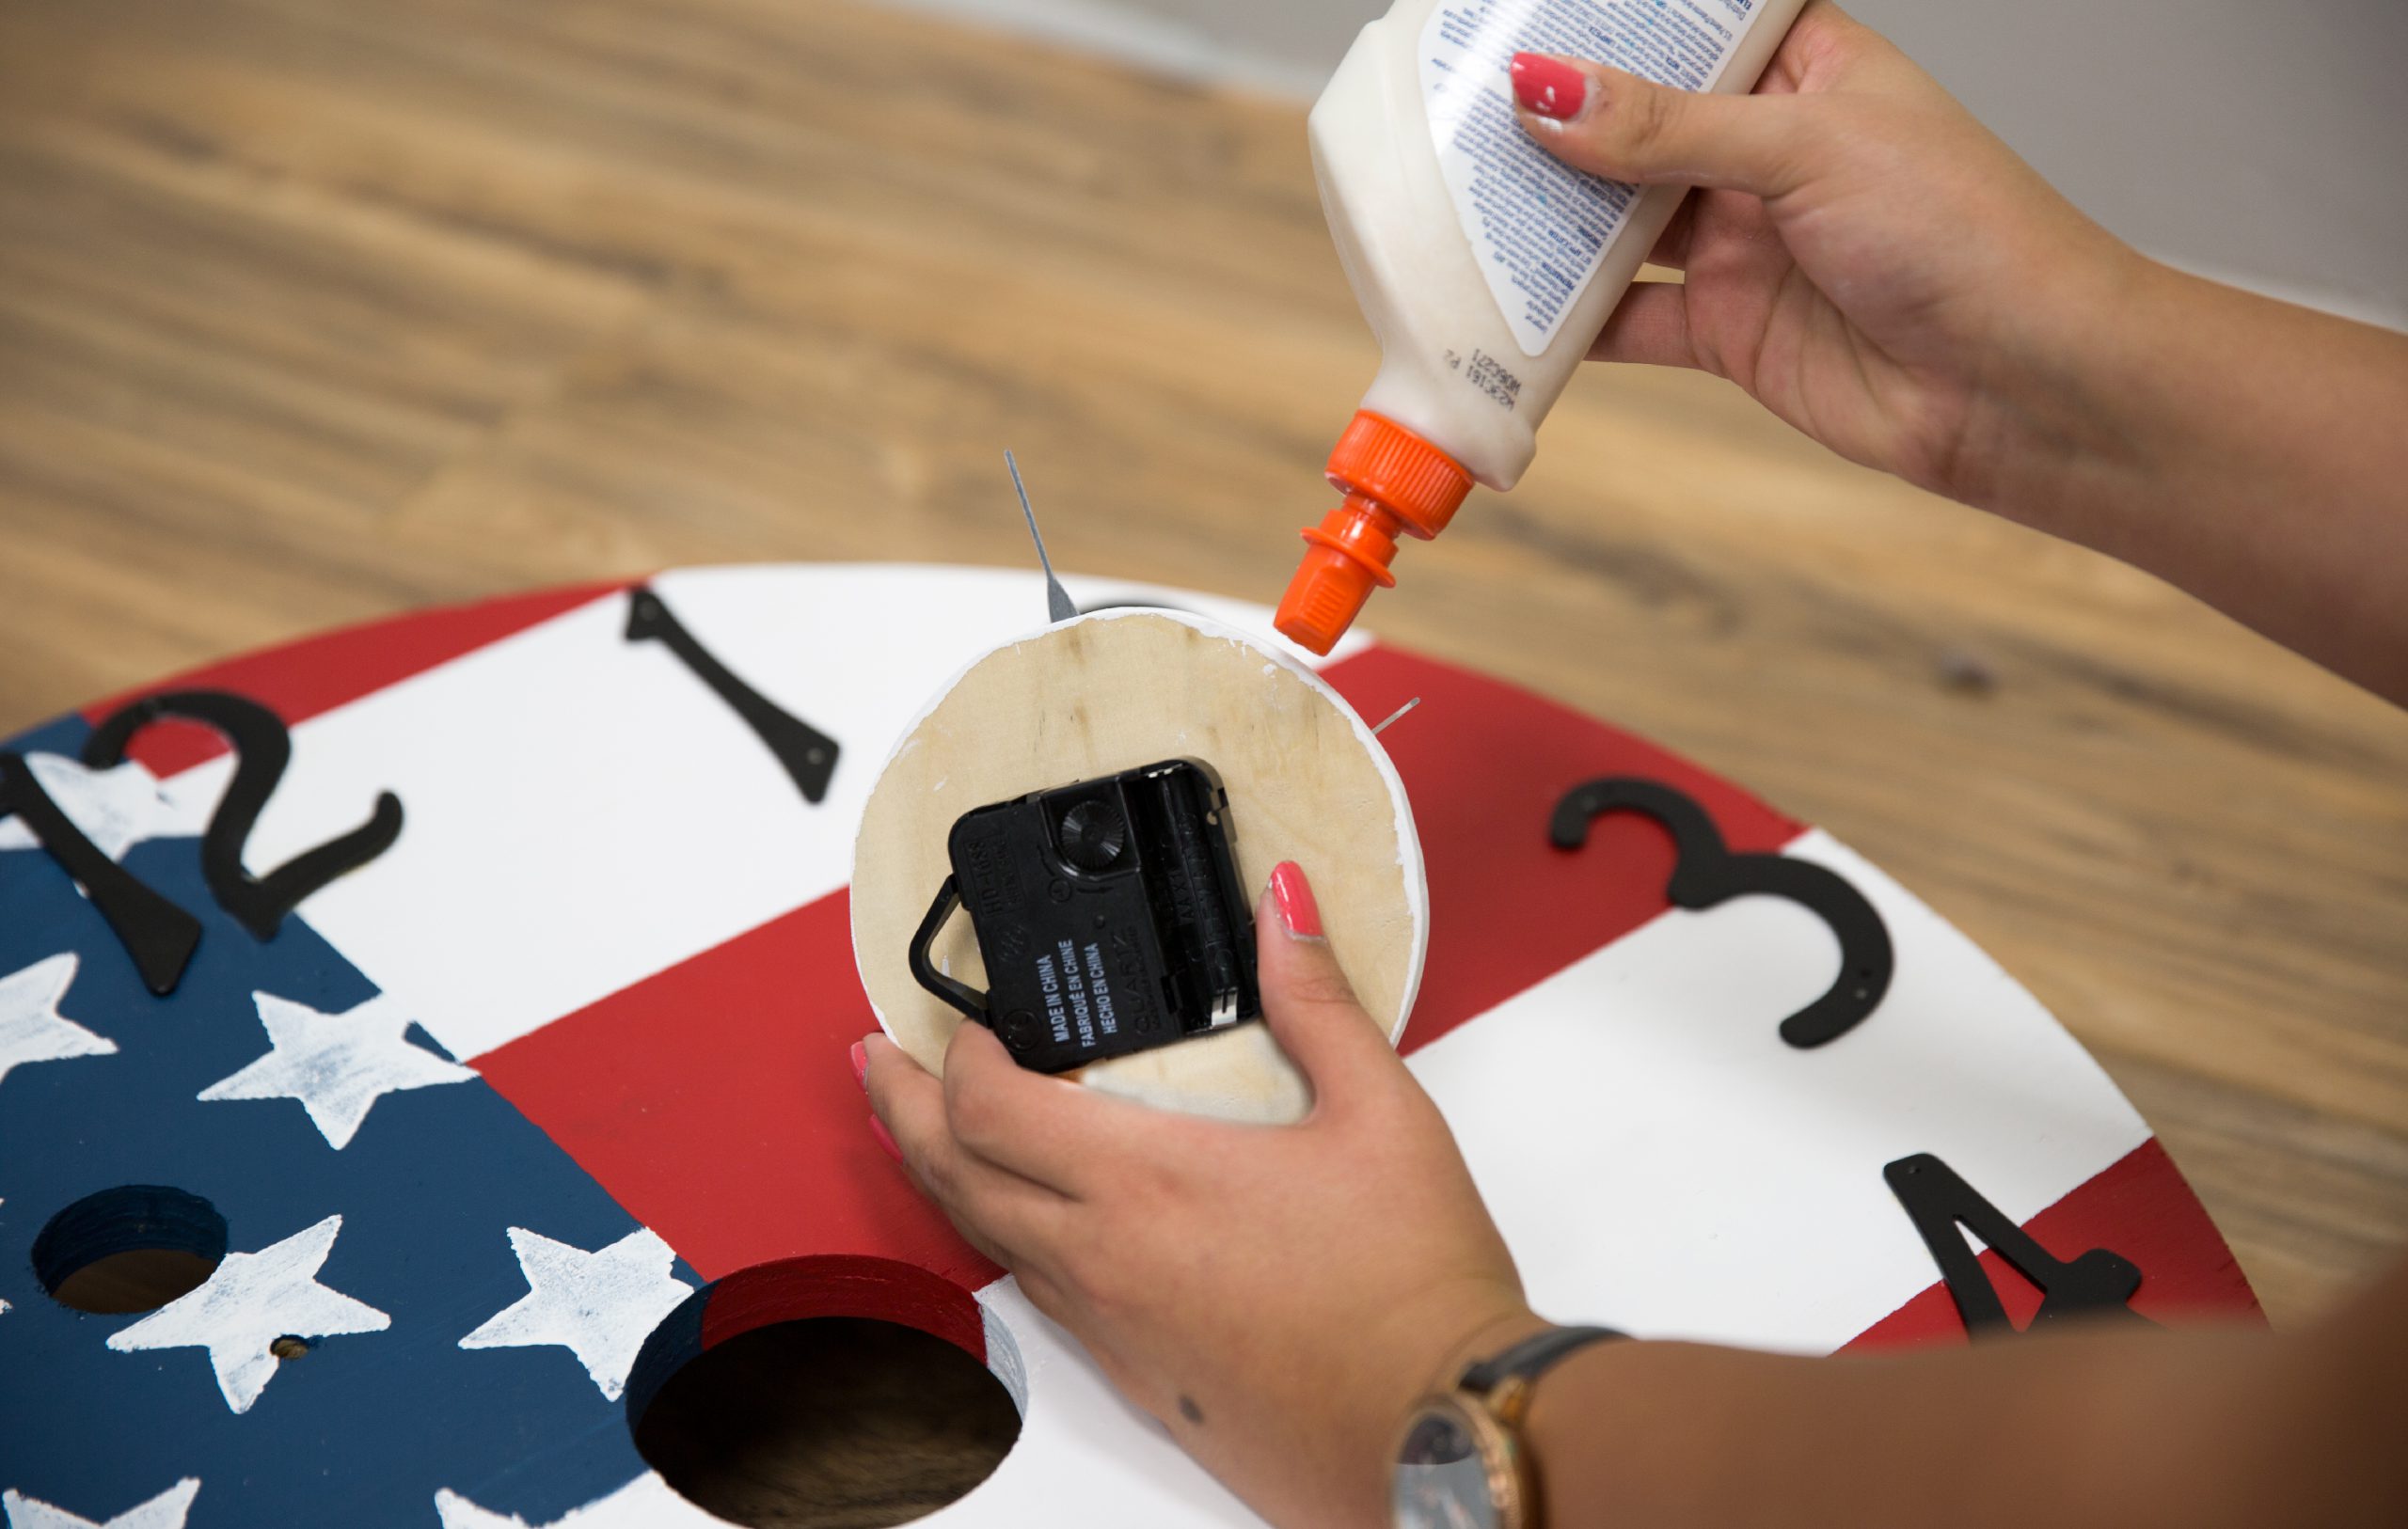
Step 13: Put all of the pieces together
Follow the instruction on the movement kit package, and attach the clock pieces through the center of the wooden circle.
Step 14: Glue
Glue the center wooden piece to your clock with wood glue and let dry.
Step 15: Hang in place
Hang in place and you are ready to celebrate the 4th!
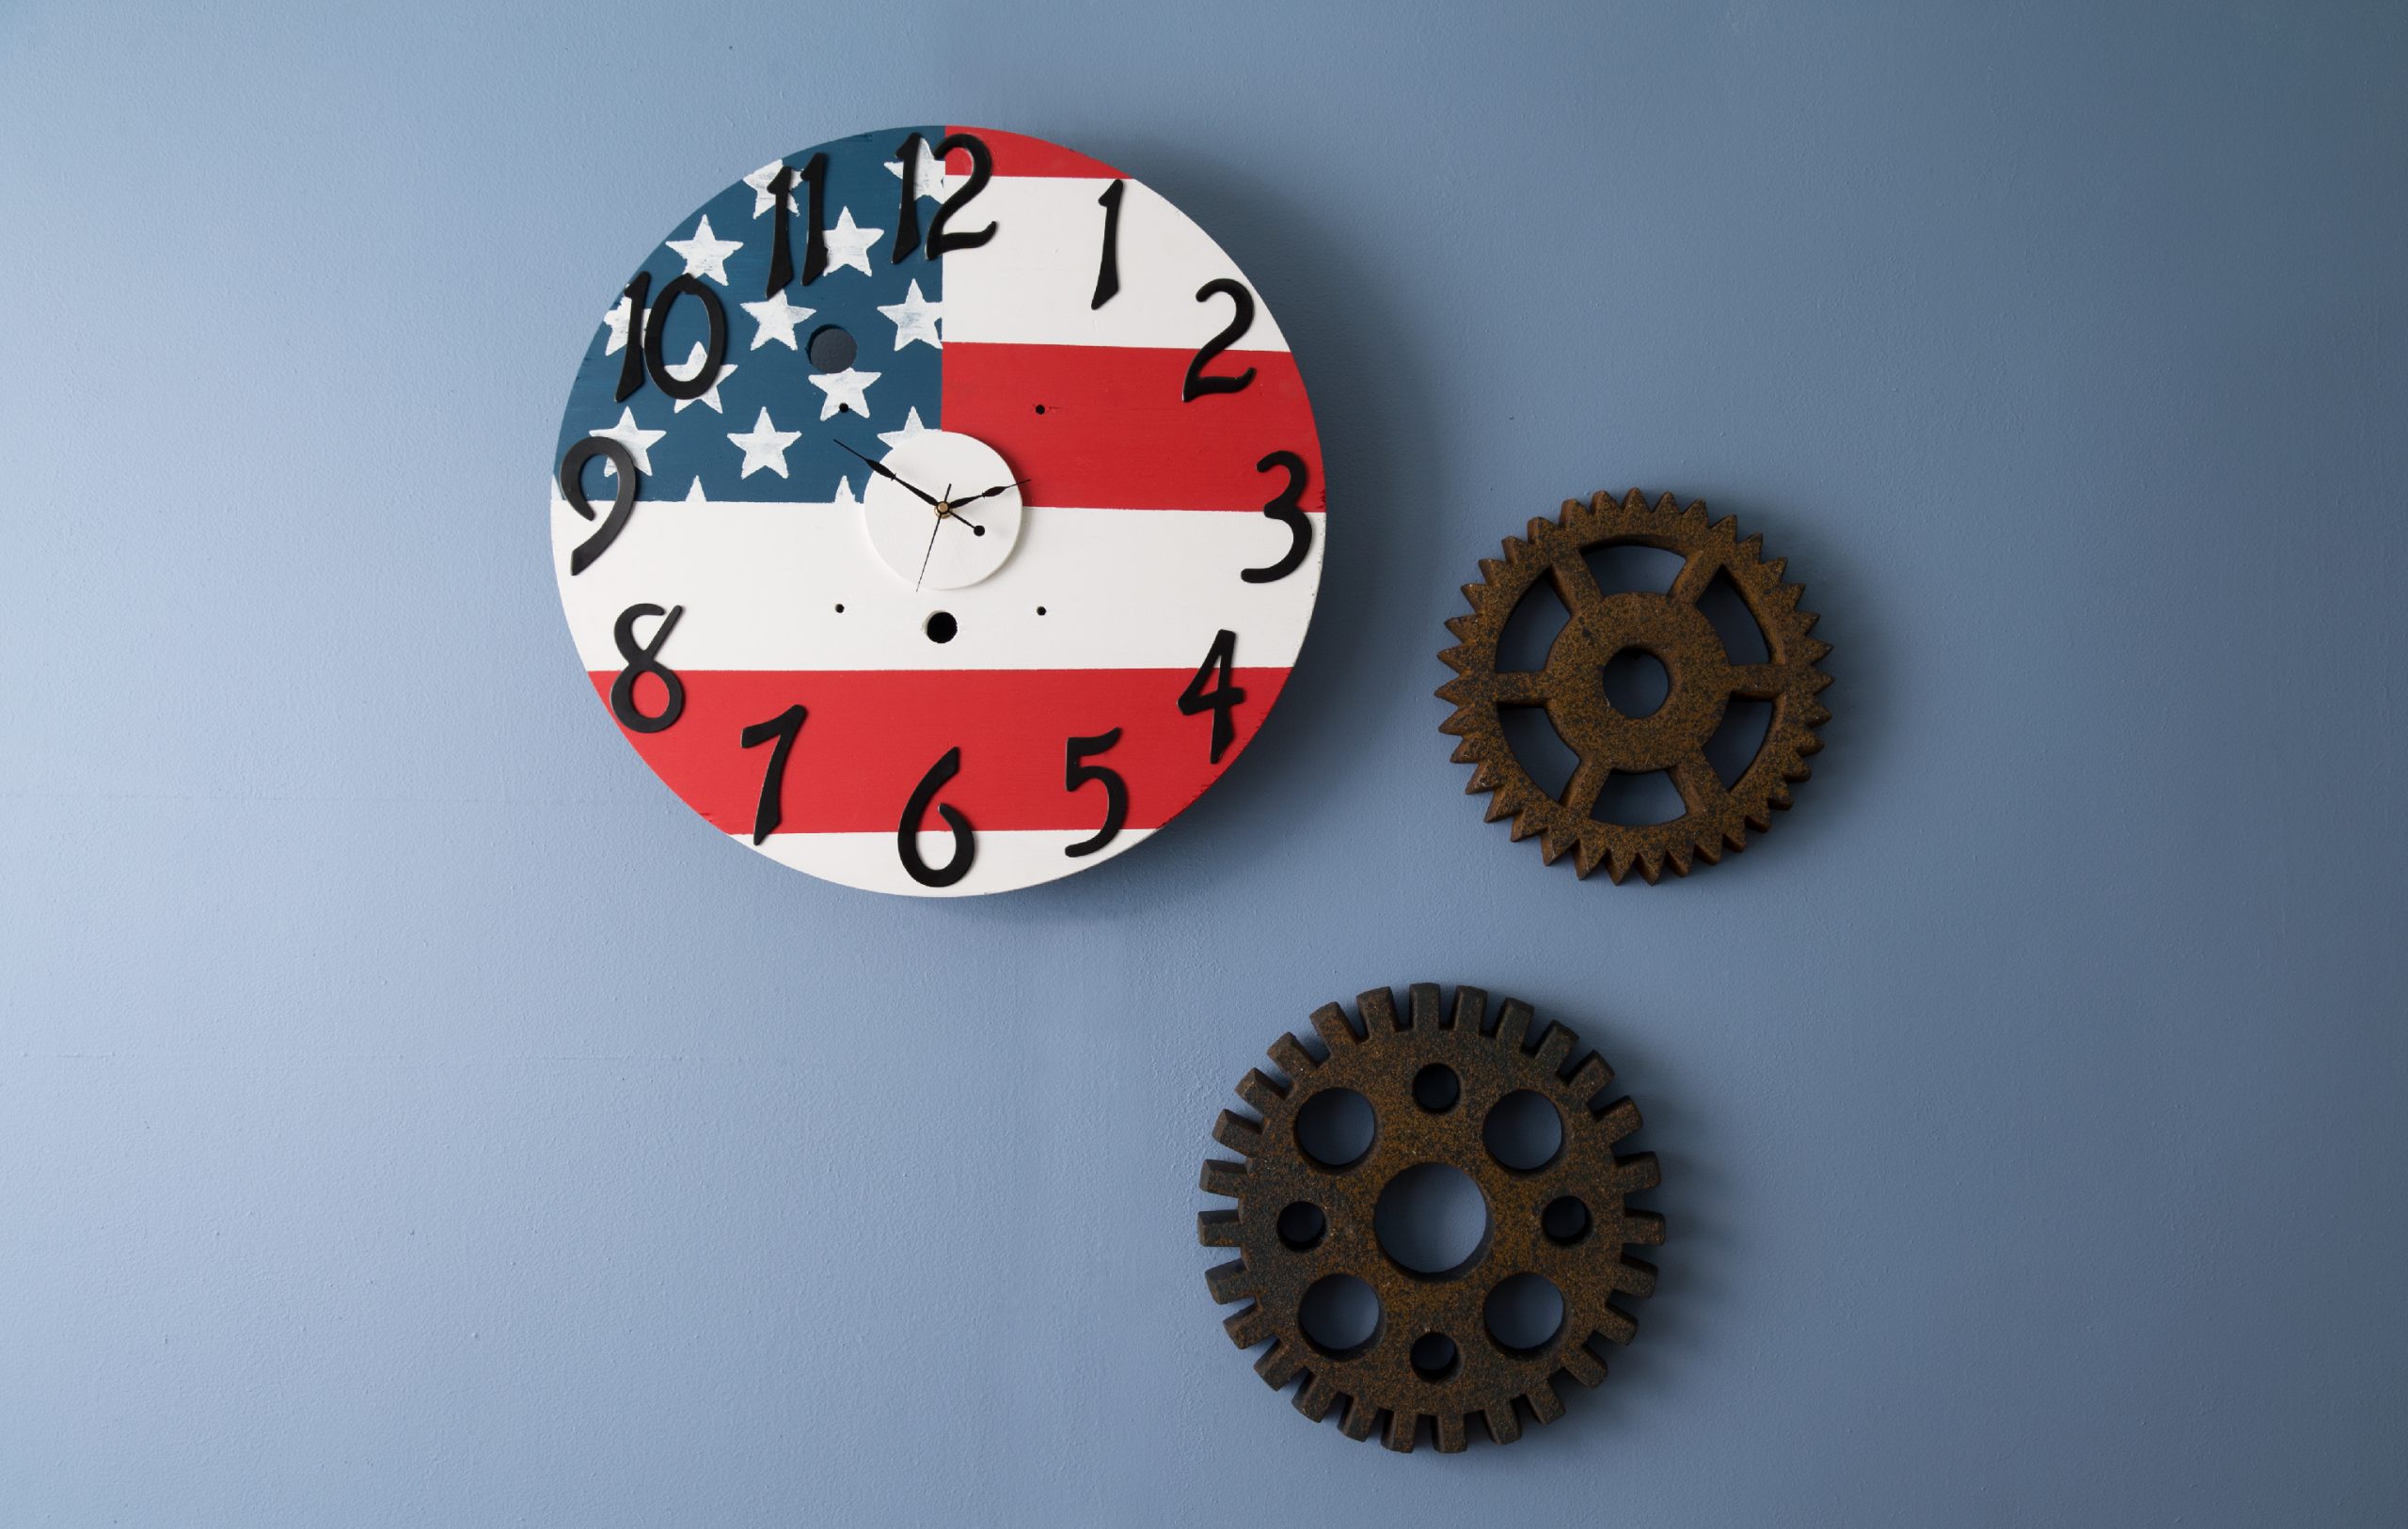
Wall color featured: Jean Jacket Blue S510-4
Colorfully yours,
-Sha Khezri