If you are dog owner, or if you know a dog lover, it’s time to get creative and make this fun DIY dog leash holder.
To complete this project you will need the following:
Materials:
Wood board – Cut to size: 24” x 12”
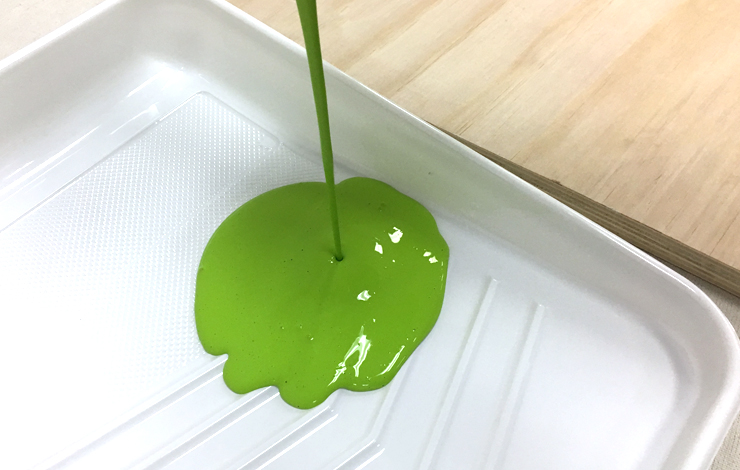
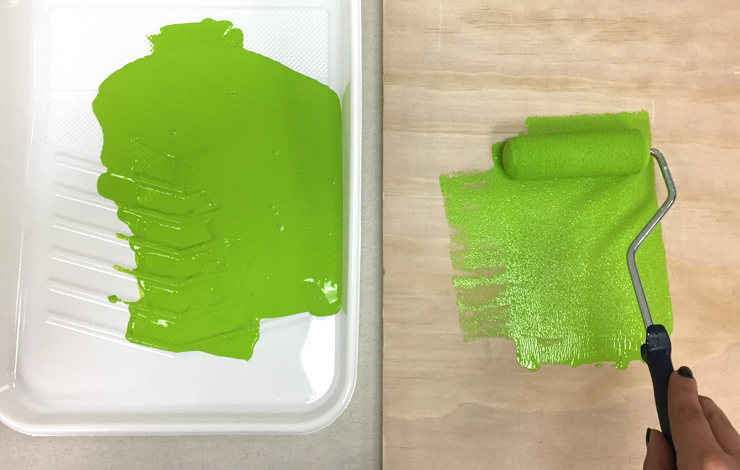
Paint – We used Fresh Apple P360-6
Chalkboard paint
Painters tape
Paint tray
Small paint rollers
3 single hooks in the style of your choice
Wood screws
Small Mason jar
Colored yarn or string
Paper
Small paint roller and cover or paint brush
Paint tray
Tools:
Power drill or screwdriver
Ruler
Pencil
Scissors
Step 1: Paint your board
With a small roller, paint your board in your selected color. Allow to dry. Apply the second coat if necessary/desired.
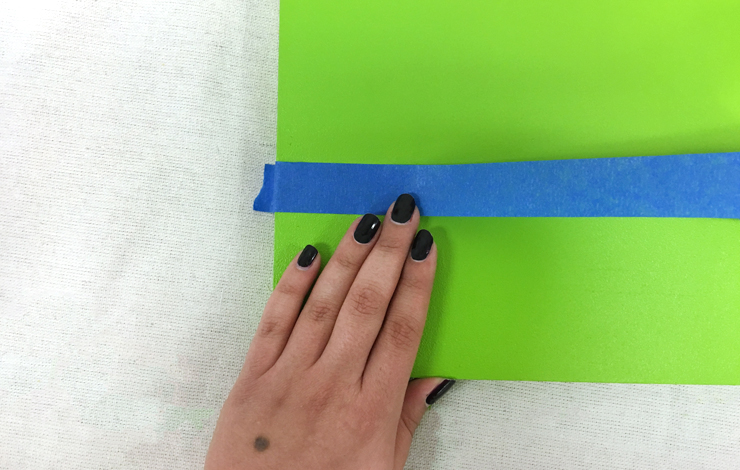
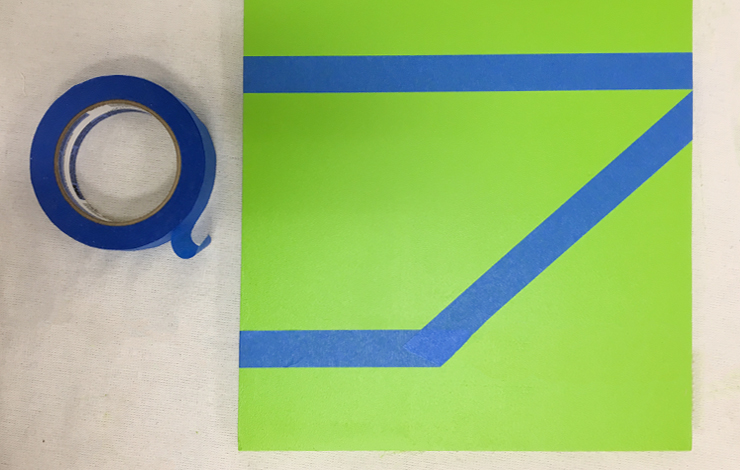
Step 2: Tape a design
Once the paint has dried, mask out a design with painters tape.
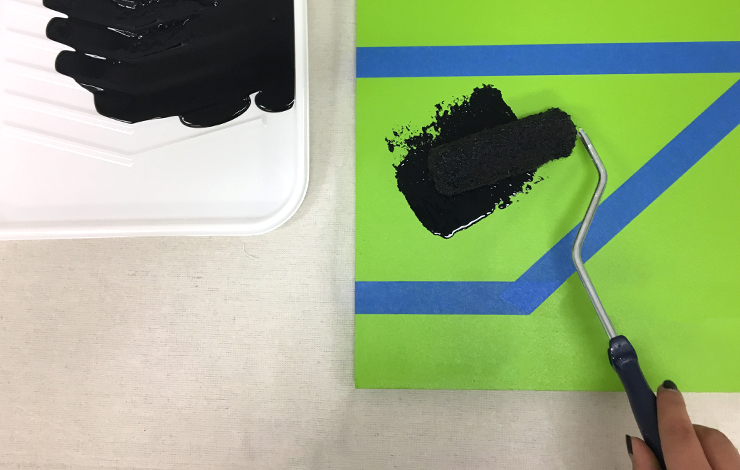
Step 3: Paint design
Paint your design in with chalkboard paint. Let dry and apply the second coat. Once dry, remove painters tape.
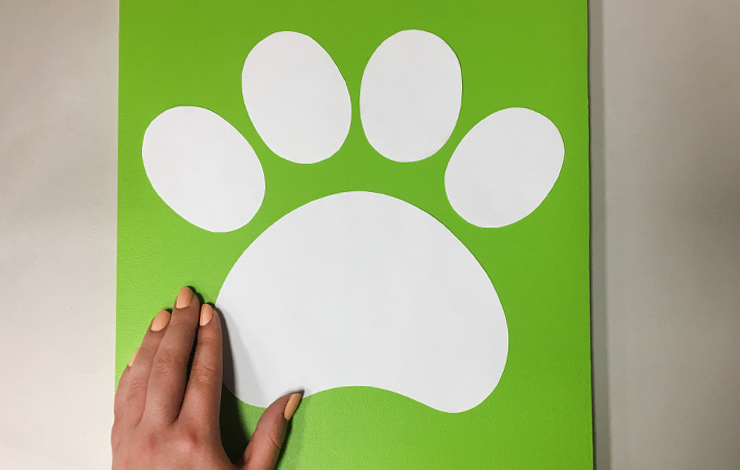
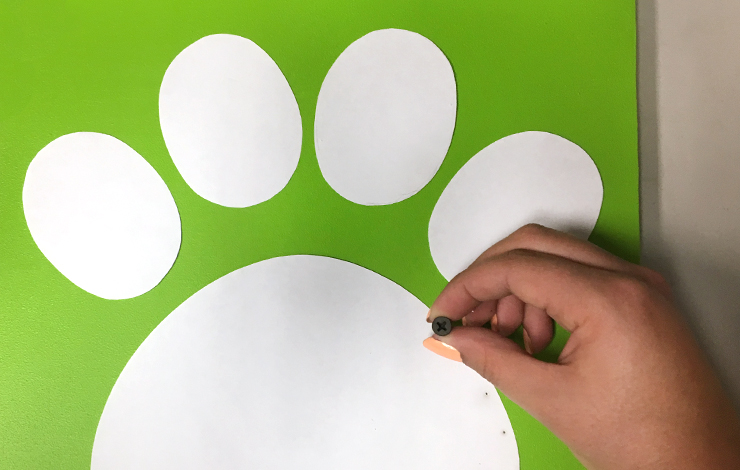
Step 4: Create a dog paw template
Draw a dog paw on a paper and cut out to use as a template.
Step 5: Mark points for screws
Position your template on wood board. Create equally spaced pattern guide points, by pushing the wood screw in lightly around edge of template.
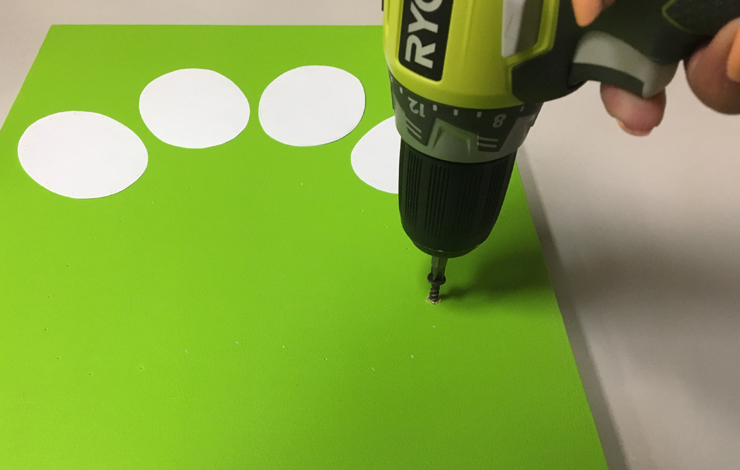
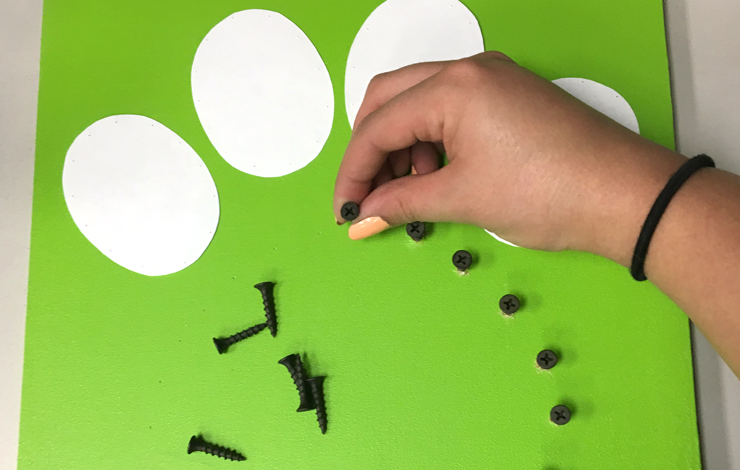
Step 6: Attach screws
Remove the paper template and drill in screws on the marked spots with power drill or screwdriver.
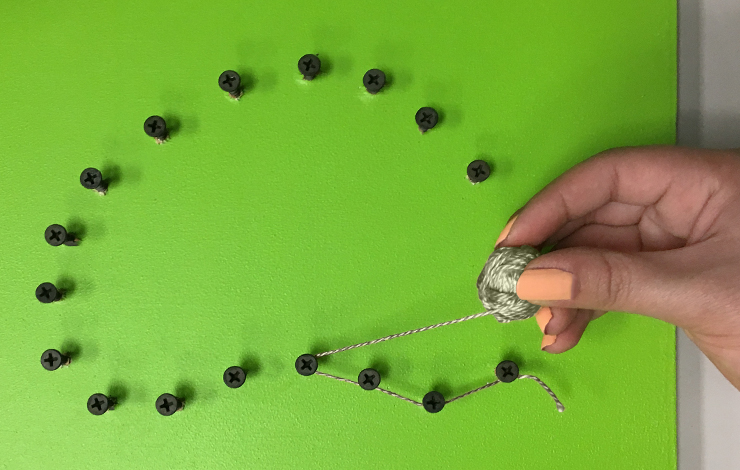
Step 7: Attach the yarn
Tie loose end of yarn to one of the screws. Weave yarn around screws to outline shape of the dog paw on your wood board.
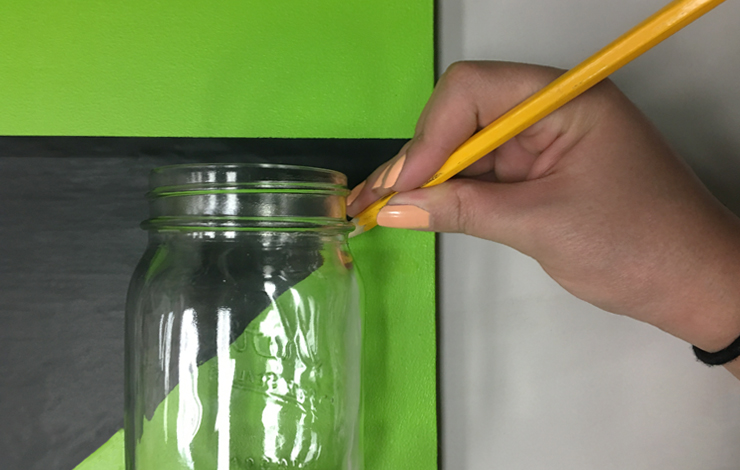
Step 8: Mark the placement for Mason jar
Position your Mason jar where you want to attach it to the wood board. With a pencil, mark a point on the each side of the Mason jar’s neck.
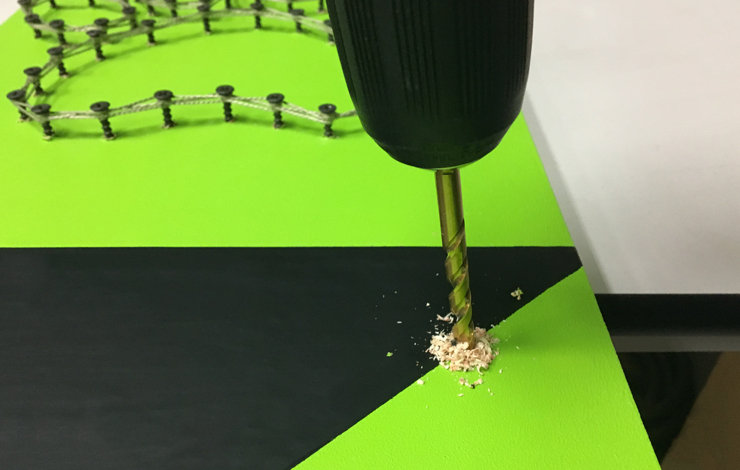
Step 9: Drill the marked points
Drill the two marked points with a power drill.
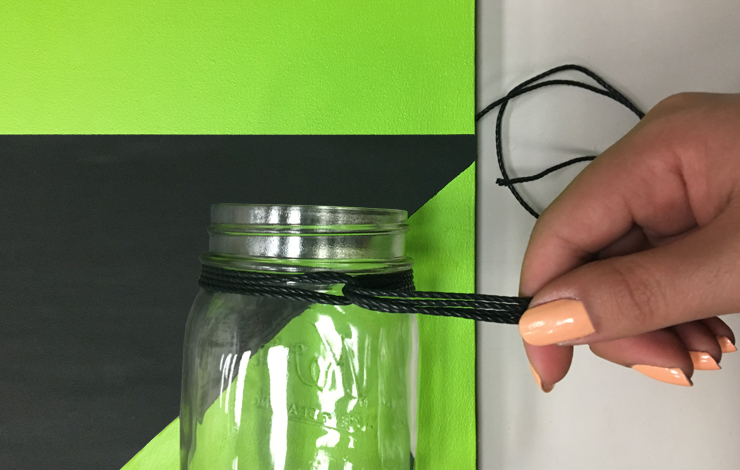
Step 10: Attach the Mason jar
Place the Mason jar’s neck between the two holes. Secure the jar to the wood board, by passing your yarn through the holes and wrapping it around the jars neck. Make a knot with the yarn to secure in place.
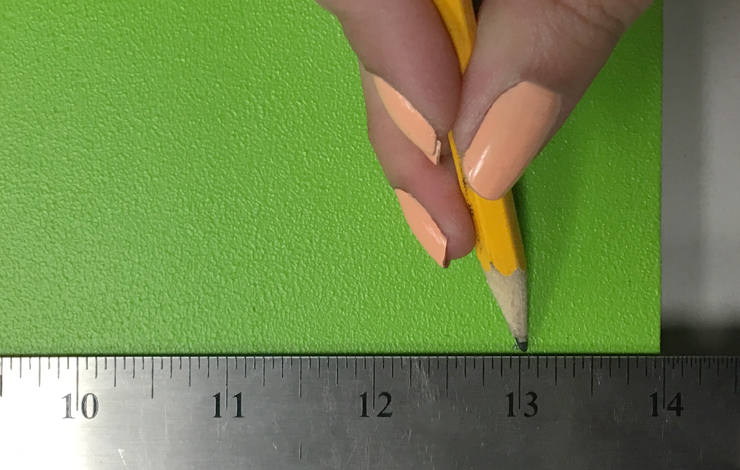
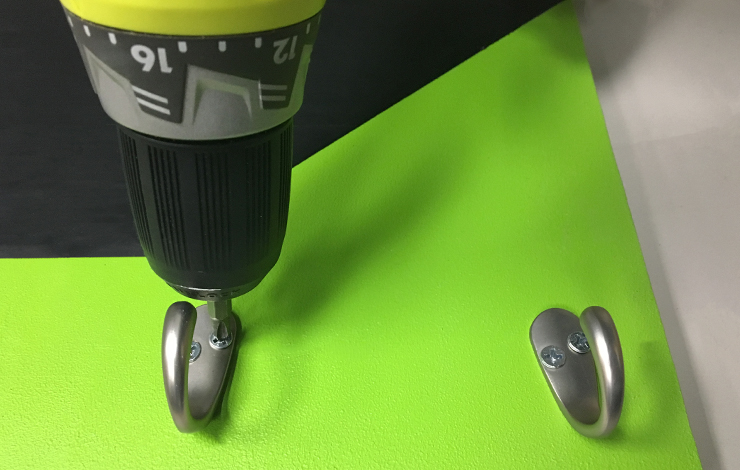
Step 11: Attach the hooks
Use a ruler to mark three equally distanced spots for the hooks. Screw the hooks into the wood board.
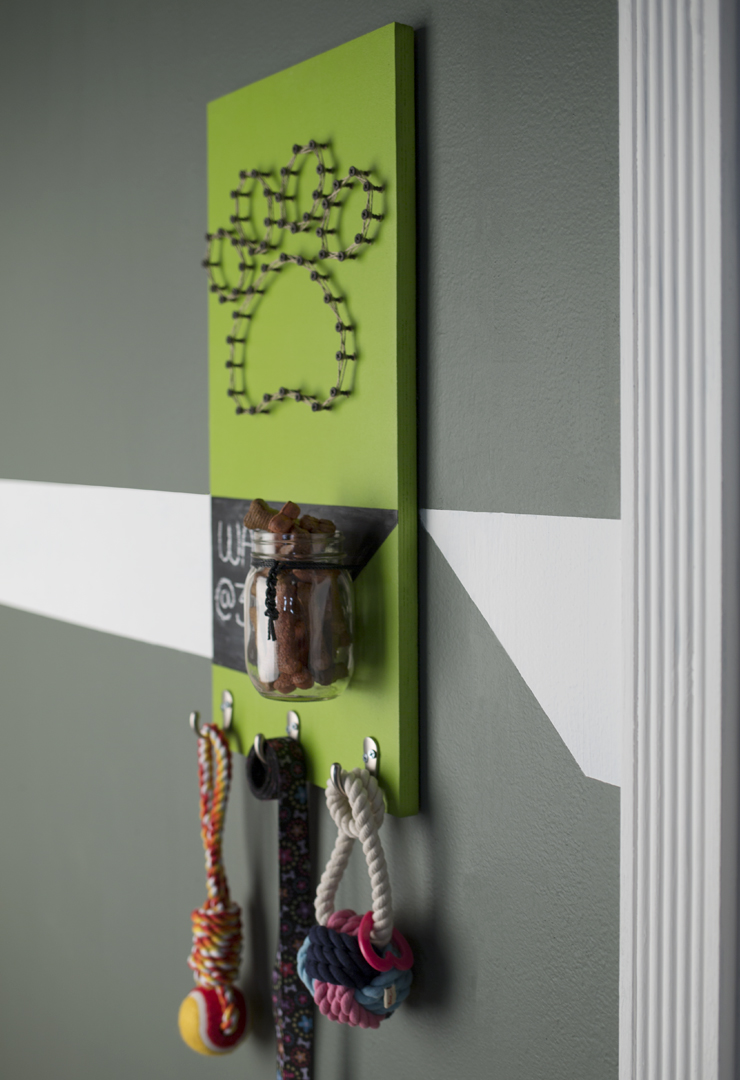
Step 12: Place it on the wall
Place your completed DIY dog leash holder on the wall. Fill Mason jar with treats, write walk times or notes in the chalkboard area and organize your dog’s personal effects in one place.

Featured colors: Walls-In the Woods T17-13, Trim and stripe- ULTRA PURE WHITE, Leash holder- Fresh Apple P360-6
Colorfully yours,
Sha Khezri
For more color and project inspiration visit our Color Studio at behr.com.
DIY Projects
Easy DIY Dog Leash Holder
TIME
BUDGET
COMPLEXITY