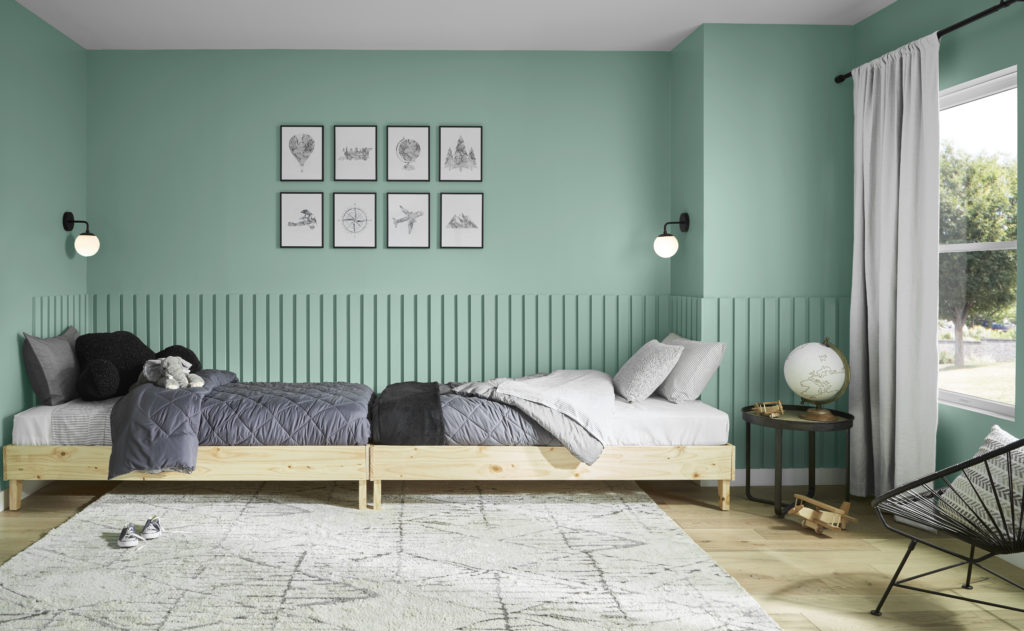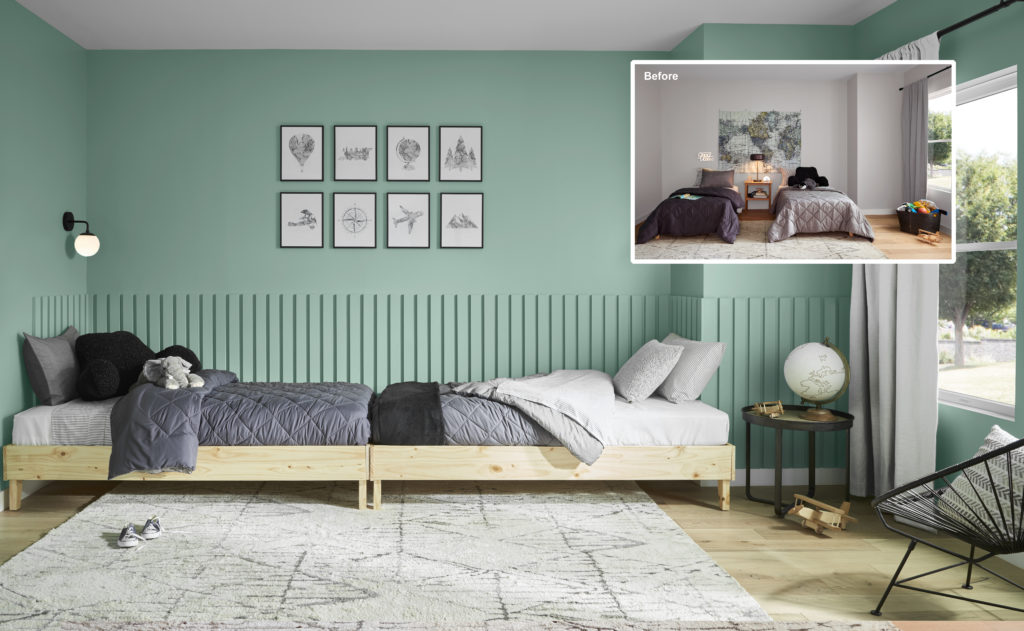
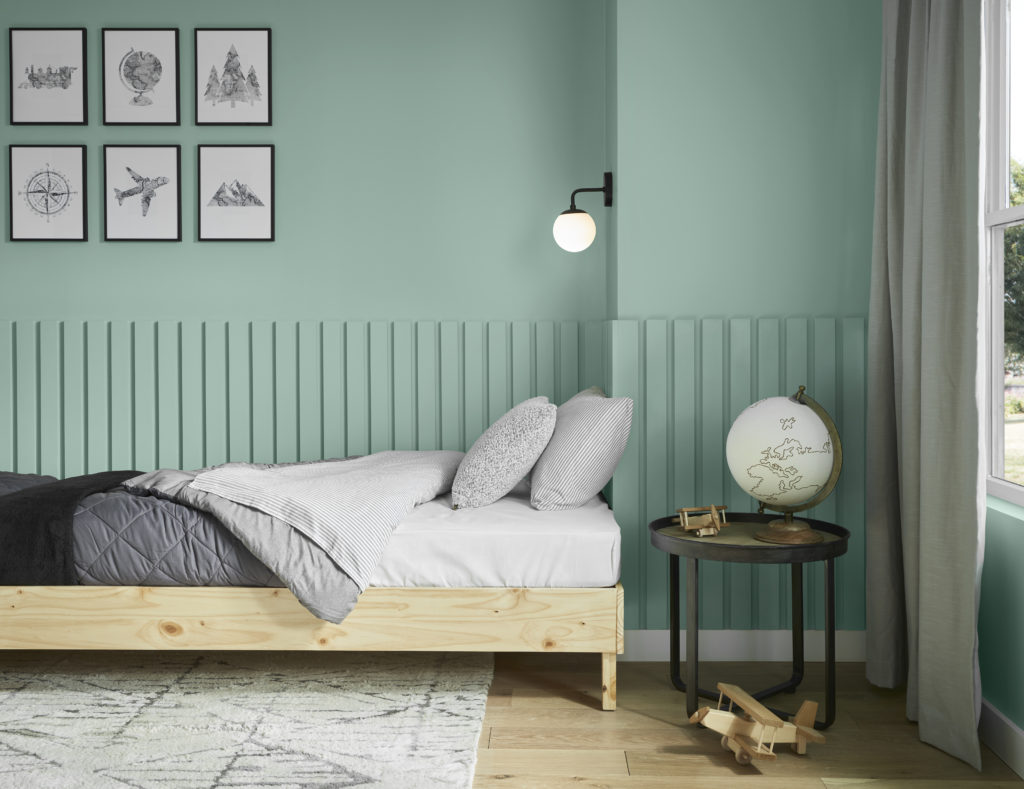
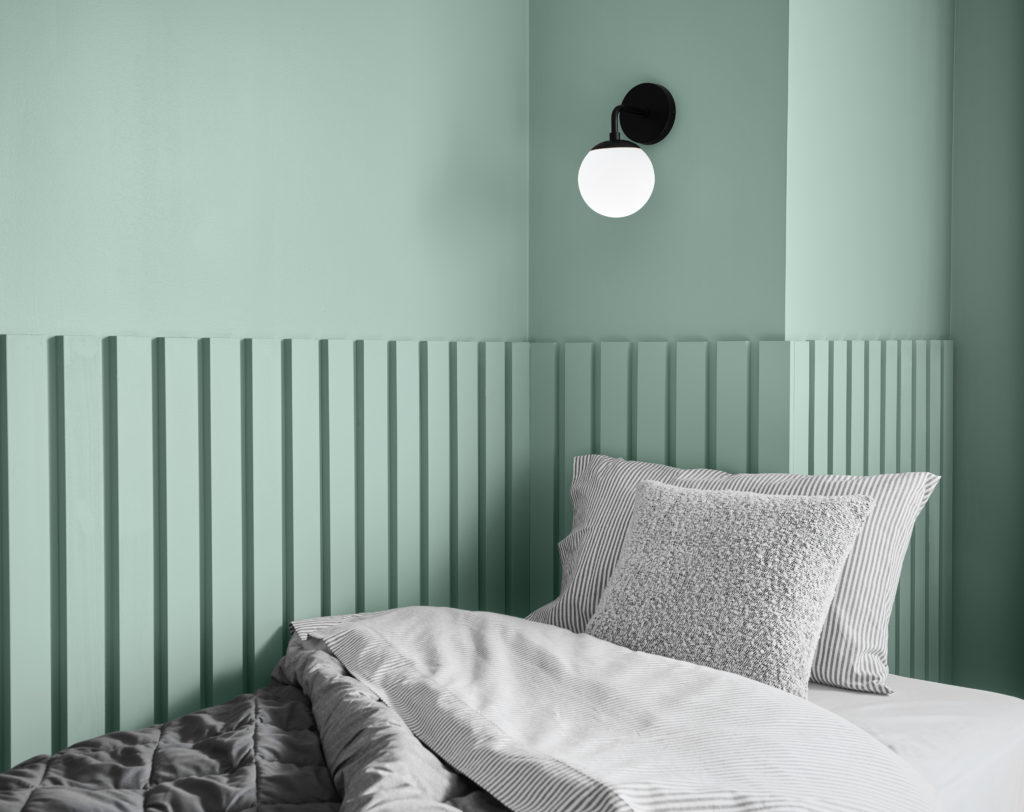
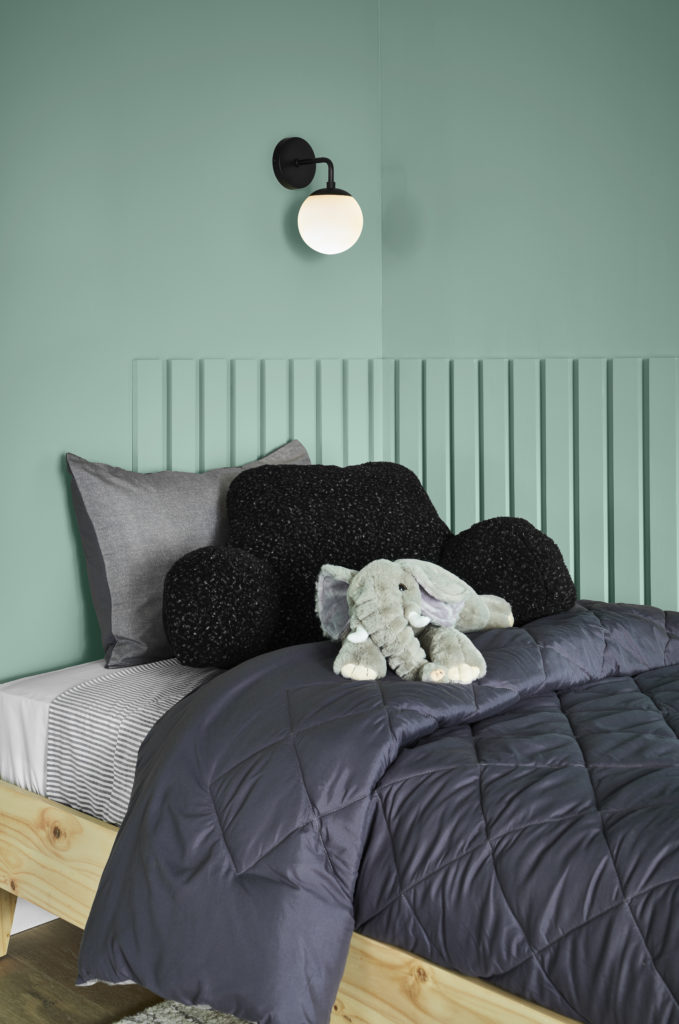
Wood slat walls are an interesting treatment for creating a focal point in a room. They are often found in boutique hotels or retail shops and can easily be used to help define the space in a home. For this project wood slats are painted to coordinate with other decor elements, lending a clean and modern look.
Behr’s Featured Color:
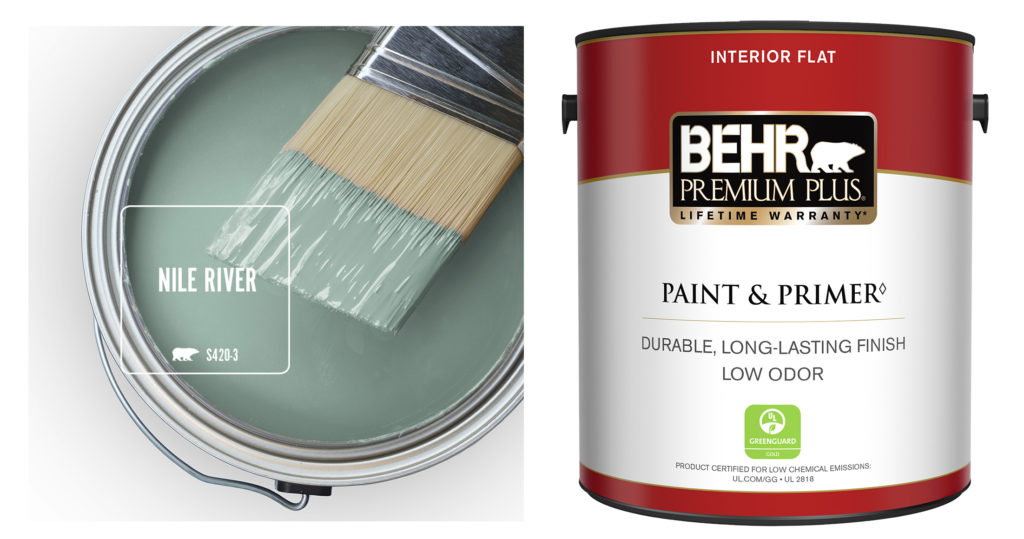
Color: Nile River S420-3
Product: BEHR PREMIUM PLUS® Interior Paint, Flat Sheen
Materials:
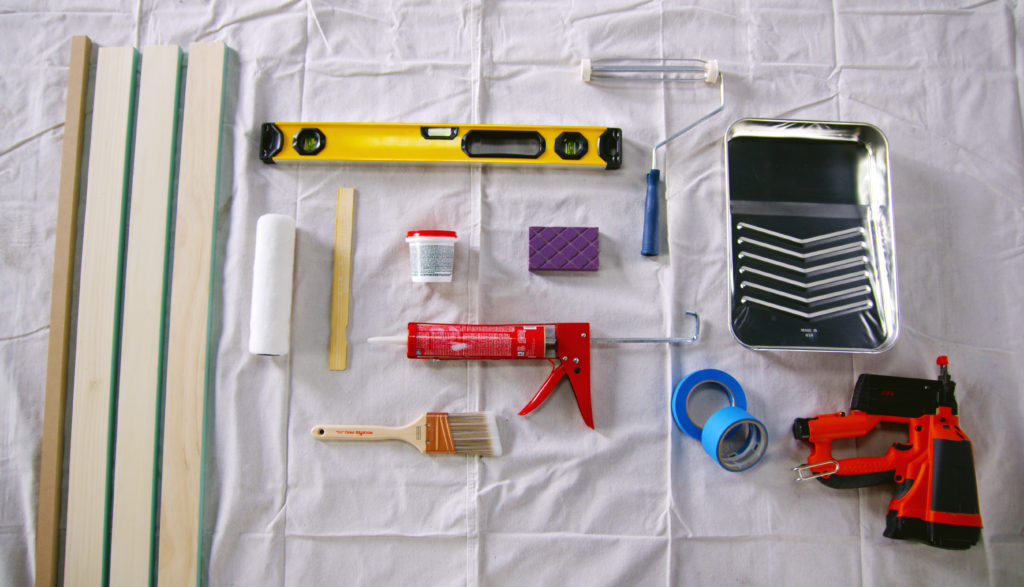
- Paint: BEHR PREMIUM PLUS® Interior Paint, Flat Sheen
- Nylon/Polyester Paint Brush
- Paint Roller with 3/8–1/2″ Nap
- Paint Tray
- Painter’s Tape
- Wood Beams/Slat
- Fine Grit Sandpaper or Sanding Block
- Construction Adhesive
- Nail Gun
- Chalk and Chalk Gun
- Level
- Shop Towels
- Drop Cloth
- Stir Stick
Tip: Always wear appropriate protective gear.
Step 1
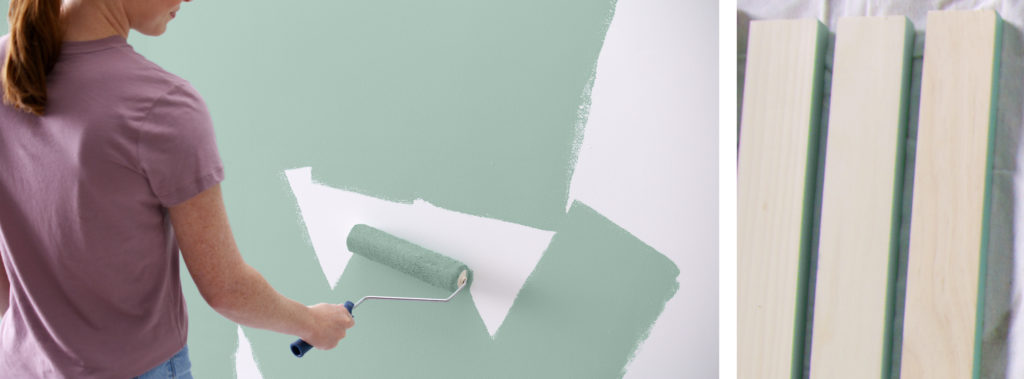
Prep & Paint
Using painter’s tape, tape off baseboards, ceilings and other areas you do not want painted. Paint, remove tape and let dry. Next, paint the side of your wood slats. Let dry completely before starting the next step.
Tip: When painting the sides of your wood slats, don’t worry about the fronts, those will be painted after install.
Step 2
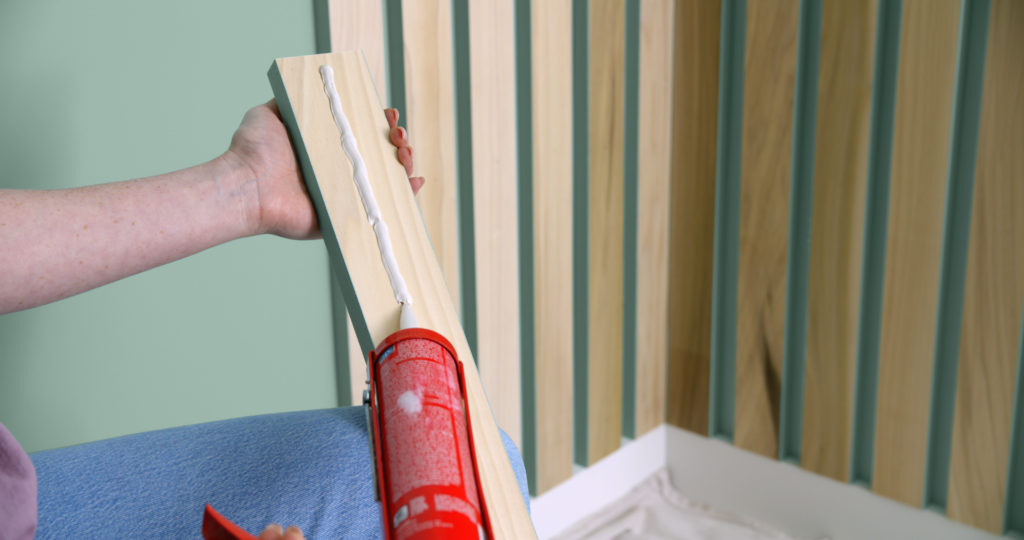
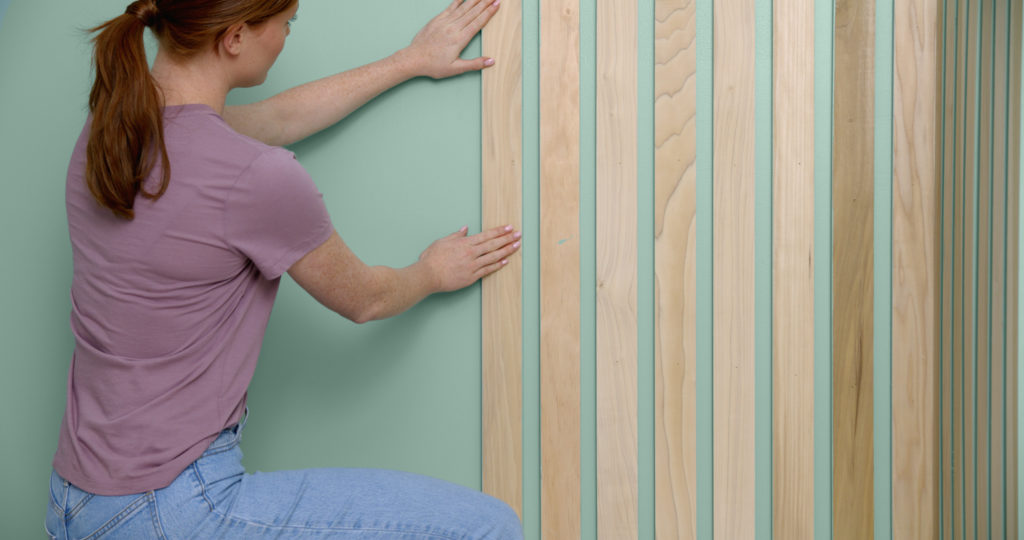
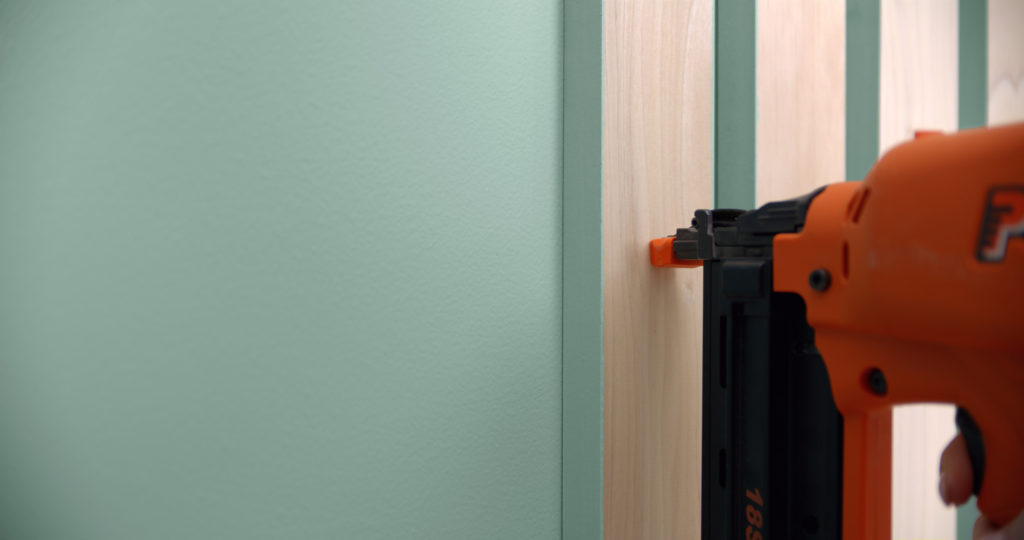
Install Slats
Apply construction adhesive to back of the painted slats and press against the wall to adhere. Use a nail gun and small brads to secure on the wall.
Tip: Use a level to ensure the first slat is straight, then align the remaining slats to the first. Use a tile spacer to ensure even spacing between slats.
Step 3
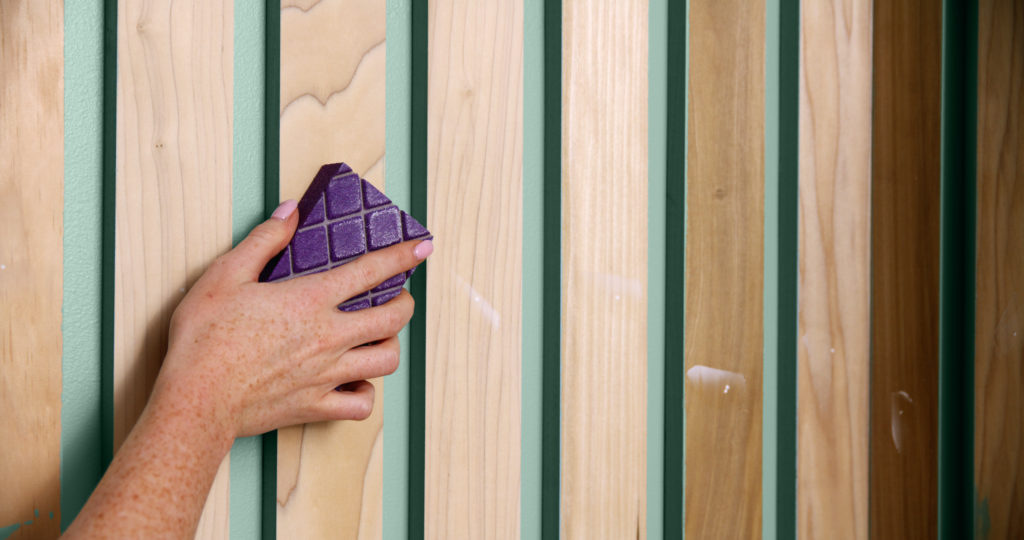
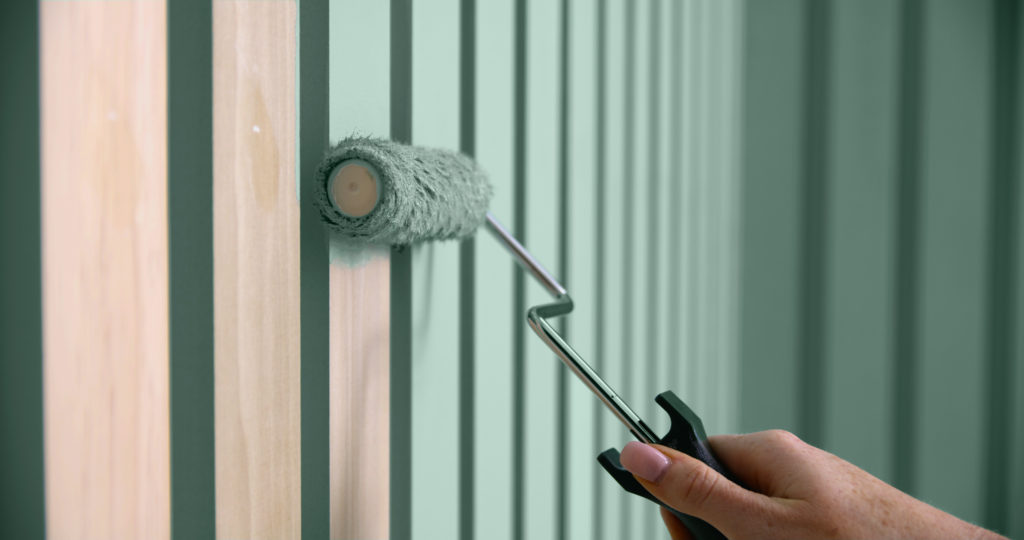
Prepare and Paint Slats
Fill in the holes from the nails with spackle. Once dry, using a medium grit sandpaper or block, smooth down. With a roller or paint brush, apply paint to front of the slats. Let dry.
The Finished Look
Click on the video below to see a step by step of this project.
Wood slats can be used to make-over any room in your home. For additional and inspiration and fresh ideas for your home check out Behr’s Desinger Stories.
Colorfully yours,
Larayne